All lenses used for photography (with a few exotic and very expensive exceptions) are designed and optimized for the visible range. This concerns sharpness, focus and the coating to protect against lens flares in backlight - probably best known is the phenomenon of infrared hotspot. Nevertheless, excellent results can be achieved with most lenses even in the IR range. Unfortunately, you can see very few of these flaws in a lens before actually testing it. However, some problems are recurring with many lenses, so let's take a look at how we can work around them.
Loss of sharpness and detail
The optical design of our lenses is calculated for the visible range. Basically, a certain loss of sharpness is measurable with every lens when used for infrared photography. With most lenses, this is so minor that it is hardly necessary to talk about it. Much worse is often the loss of sharpness towards the edge of the image - this occurs especially with wide-angle and ultra-wide-angle lenses. To improve sharpness in general, it is helpful to close the aperture, just like in "normal" photography. However, this again leads to other problems. On the one hand, stopping down can cause a hotspot, on the other hand, the long-wave infrared light is much more likely to be affected by diffraction blur than the visible range. In general, the aperture should only be closed as far as absolutely necessary when taking IR images.
Autofocus in Infrared Photography
Correctly functioning autofocus can be more critical than image sharpness. With modern mirrorless cameras, there are usually no problems or surprises here. But with digital SLR cameras, you have to pay attention to a few things.
Focusing in the infrared range requires a "somewhat closer approach" than in the visible spectrum. On old manual lenses, there was often an extra red IR mark on the focus ring for this purpose. In the AF age, focusing is no longer the task of the photographer but of the camera - and this should also be the case in digital infrared photography. With a professional infrared conversion, the autofocus of the SLR camera is adjusted once, so that the AF of the camera will focus all lenses correctly for the IR range from now on. A complete infrared conversion is the only way to use the autofocus on a DSLR and thus to focus quickly and reliably.

A quirk of older lenses is often the occurrence of backfocus when using a DSLR. The difference between visible and IR light, which is compensated on the camera by the focus adjustment, is not constant for all lenses. It depends on the optical construction of the respective lens (mainly on the quality of the aspherical correction) and possibly on the set focal length (for zoom lenses). With most modern autofocus lenses, there should be no problems with autofocus. The older a lens is, the more likely it is to be poorly aspherically corrected or not aspherically corrected at all. However, there is no rule here, unfortunately again only trying helps.
Unfortunately, I cannot promise perfect focus for every lens when using a DSLR. To get consistently perfect results even with "problem lenses", it makes most sense to use a (DSLR) camera with contrast autofocus via the sensor. The focus difference is no problem with contrast AF via the sensor, since it already sees the IR light and focuses accurately. With mirrorless system cameras, the focus position is basically unproblematic; these cameras work permanently in "LiveView mode" due to their design.
Infrared Hotspot and countermeasures
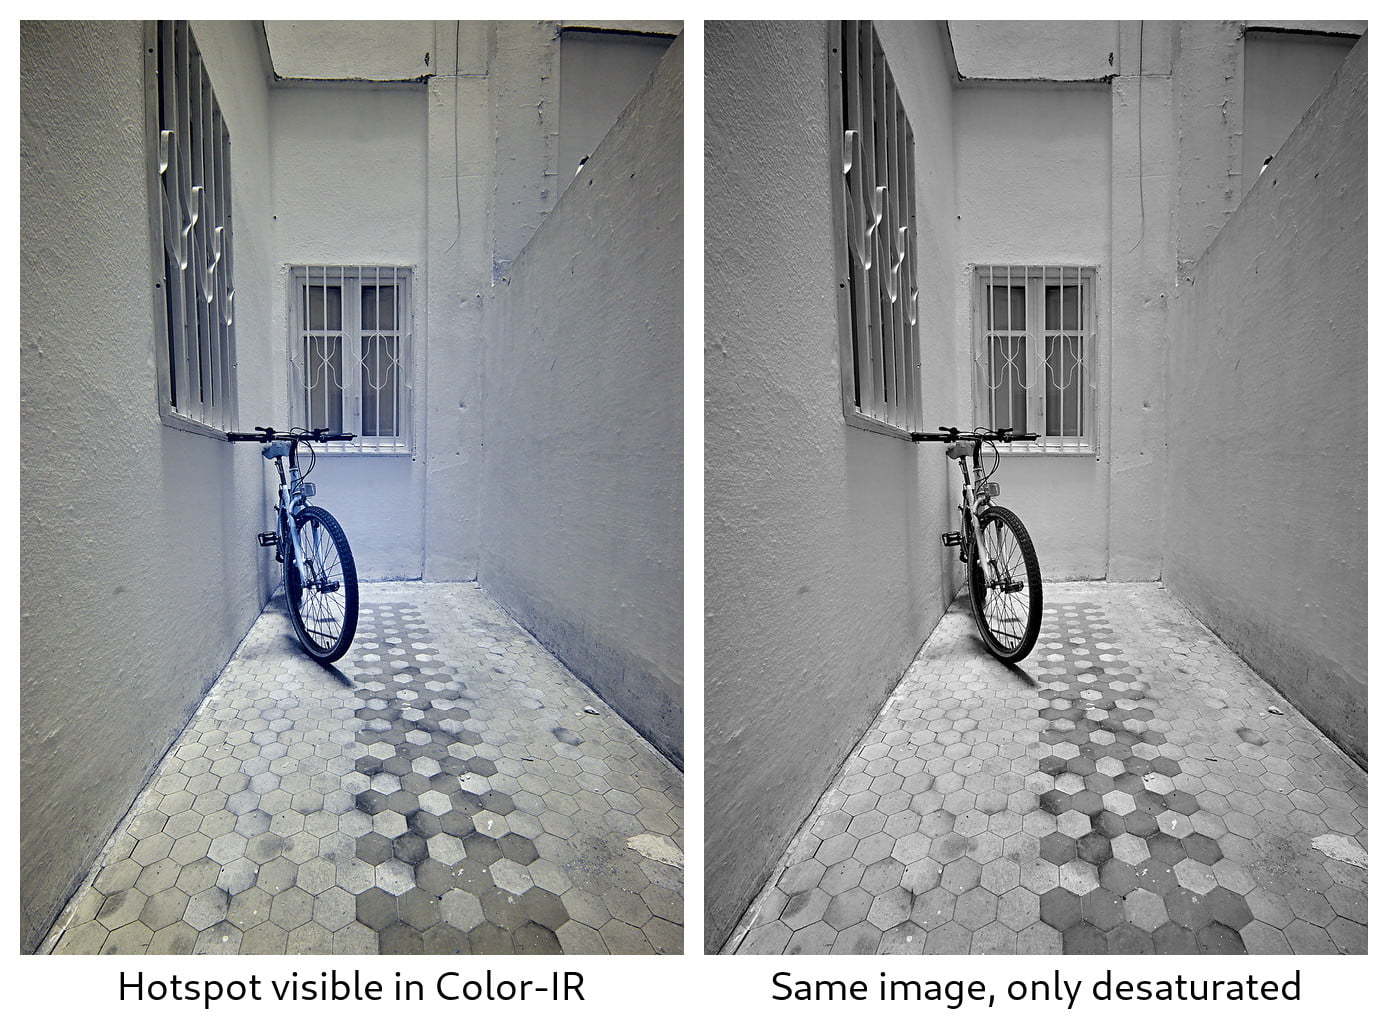
A very unpleasant image flaw is the hotspot. A hotspot is a circular area in the center of the image that is brighter and therefore stands out clearly. Often the blue channel of the image is more affected by this, which is why a hotspot appears as a color blob to make it even worse.
The hotspot is caused by the insufficient coating of the lenses in the IR range, which makes it difficult to work around. If a lens is affected, it may help to experiment with different apertures. The intensity of the hotspot increases when stopping down, another reason not to stop down the lenses too far. In addition, backlight situations can amplify the hotspot - the use of a lens hood should therefore be mandatory at least for the affected lenses.

Once a hotspot is in the image, you can try to retouch it out while editing your image. Even if this seems possible, it is often a hard and time-consuming process. A very fast and effective technique is the conversion to a black and white image. The hotspot occurs mainly with color IRs, in a monochrome image it shows up only very weakly or not at all.
Lens flares and backlight
In backlight, the global image contrast of an IR image drops very quickly. Shadow areas become dull and muddy, even hotspots can be promoted. Besides the simple rule of not taking pictures in backlit situations, the first means of choice is to shade the front lens with care. This can be done with a hand or by putting on a sun shade.

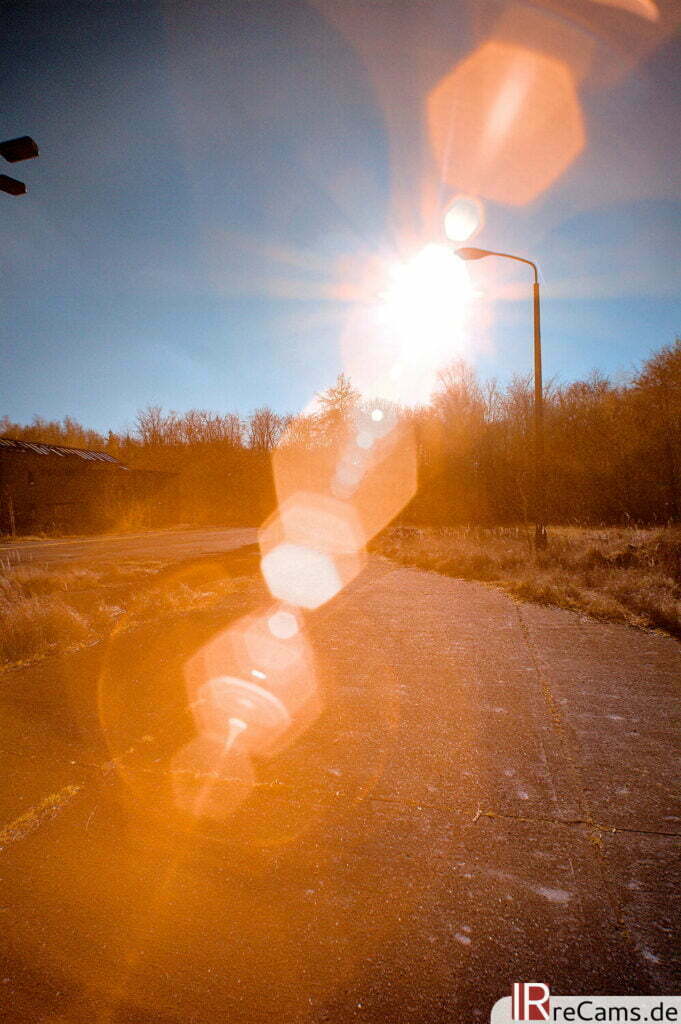
Finally, due to the ineffective coating of most lenses in the IR range, lens flares occur very quickly in backlight situations. This phenomenon can be avoided or at least reduced by avoiding backlight situations, by using a sun shade and possibly by stopping down. Another possibility is to creatively include the lens flares in the image composition! There are extra tools in many image processing programs that artificially create such an effect. We have integrated it right away.
Image problem prediction
Whether a lens produces image errors, and if so, which ones, can unfortunately not be seen beforehand. Either you try it out yourself (remember the 14-day right of exchange when buying a lens, used lenses can usually be resold without loss of value), or research the experiences of other photographers before buying the lens. On the Internet you can also find a few databases that have summarized many user experiences - this gives you at least a clue as to which lenses might be suitable before you buy them.

