
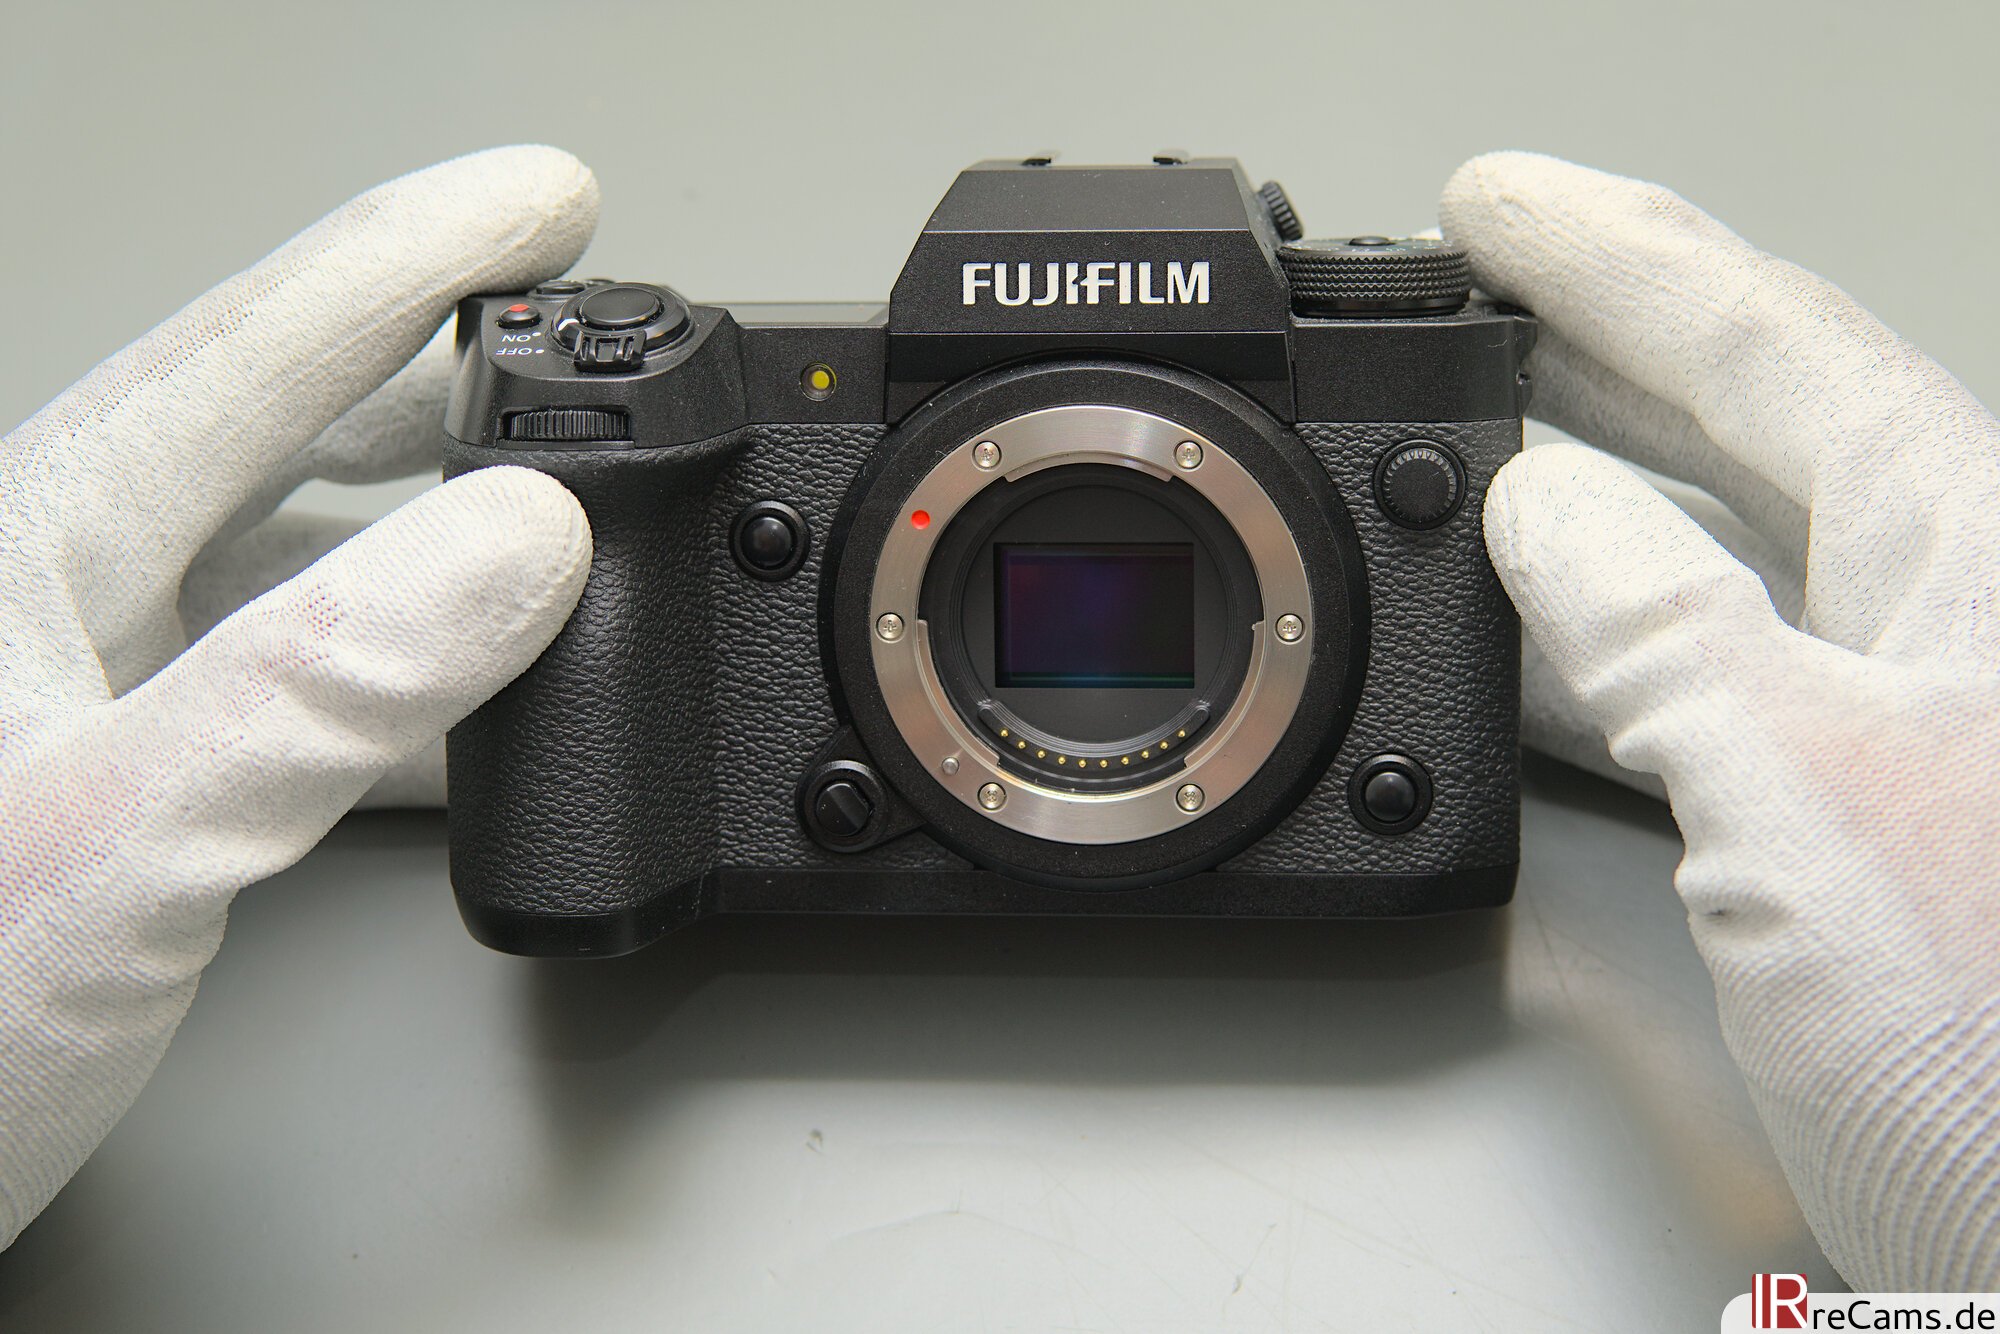
In the fall of 2022, Fujifilm introduced the X-H2, the first camera with the new X-Trans CMOS 5 HR sensor. This sensor has an effective resolution of 40 megapixels, making it the leader in the APS-C segment. Combined with the new X-Processor 5, which enables advanced subject detection and video capture up to 8K RAW, this flagship camera is aimed at professionals and enthusiasts. After a deep look under the hood, the design of this camera can be summarized as follows: Heat Management and Dissipation. But how does it perform in Infrared Photography?
Important:The camera has been modified by routined professionals, please do not attempt to do this at home. This article is not a guide and there will be no assistance from our side to convert your camera. If you do decide to open your camera, IRreCams is not responsible or liable for any damage or problems resulting from your actions.
Disassembly and Teardown of the X-H2
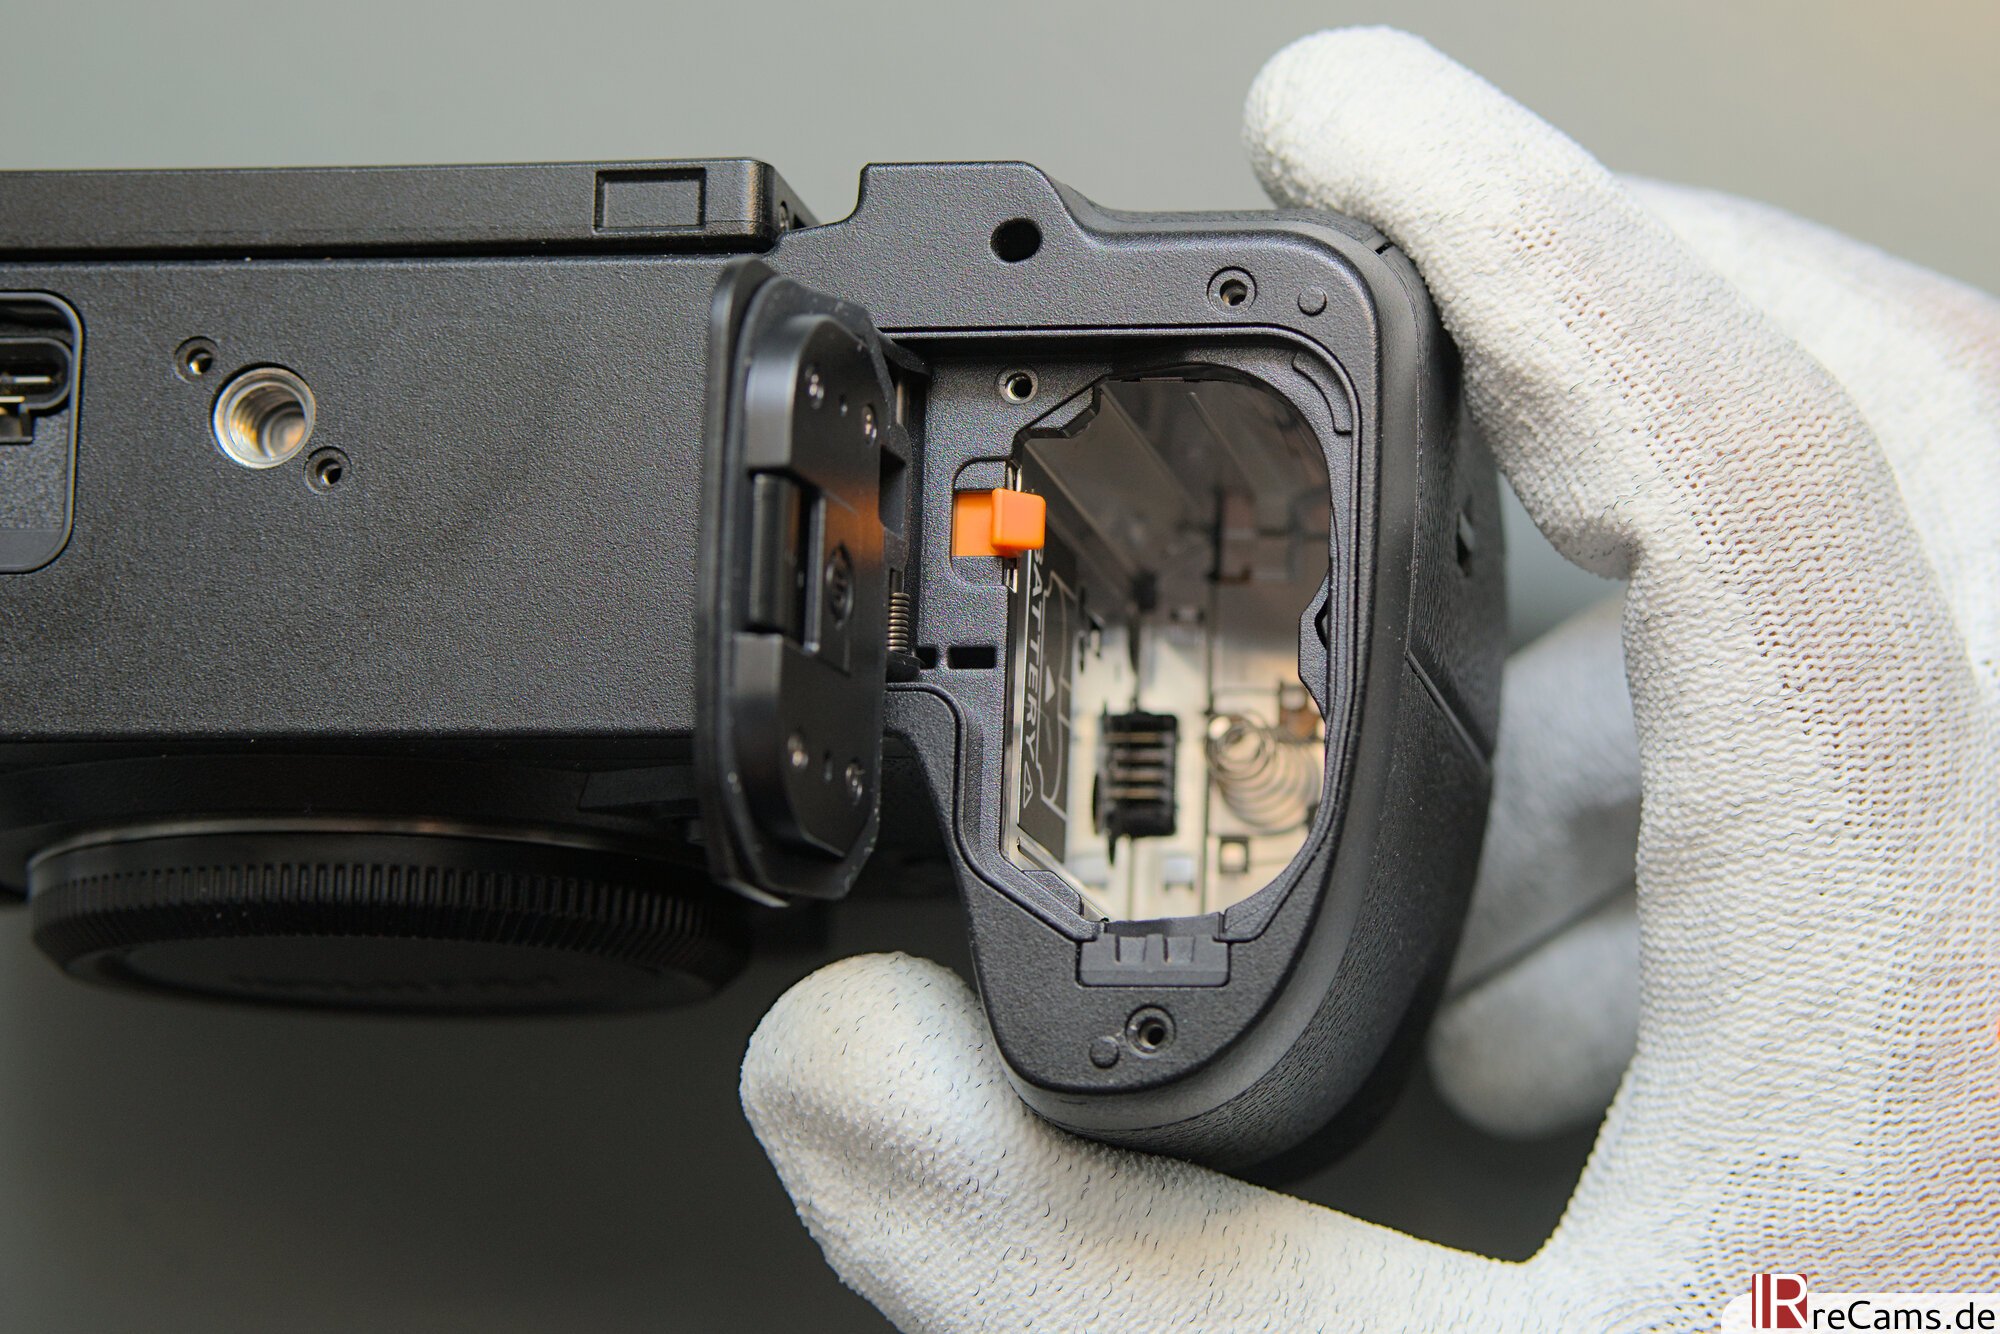
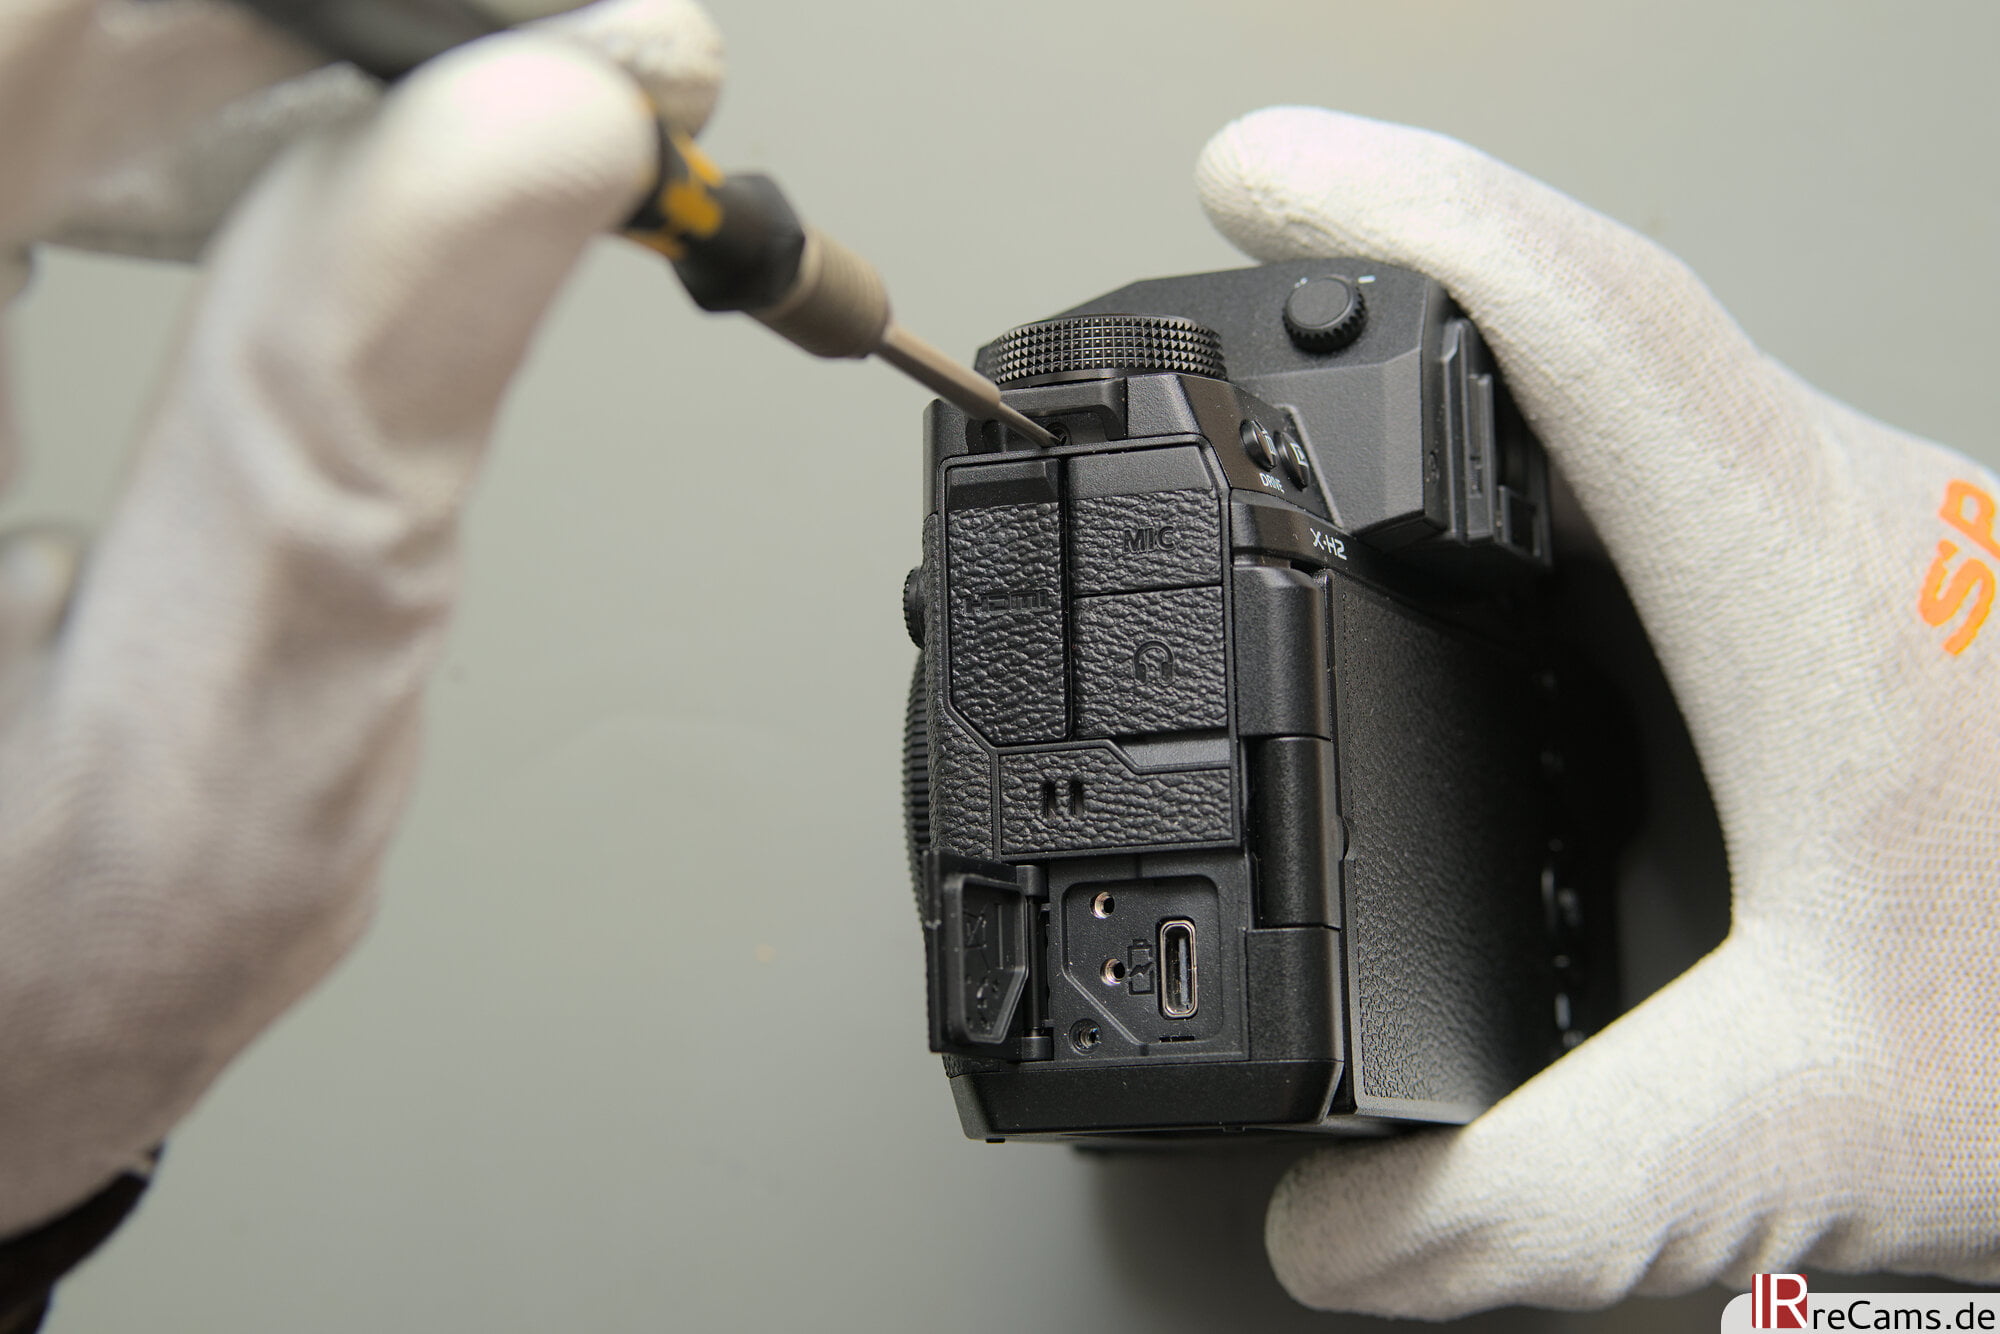
Externally, relatively few screws can be seen on the casing. As with other Fuji cameras, the usual ones are quickly found. Let's start at the bottom - there are no surprises here and everything is open and accessible.
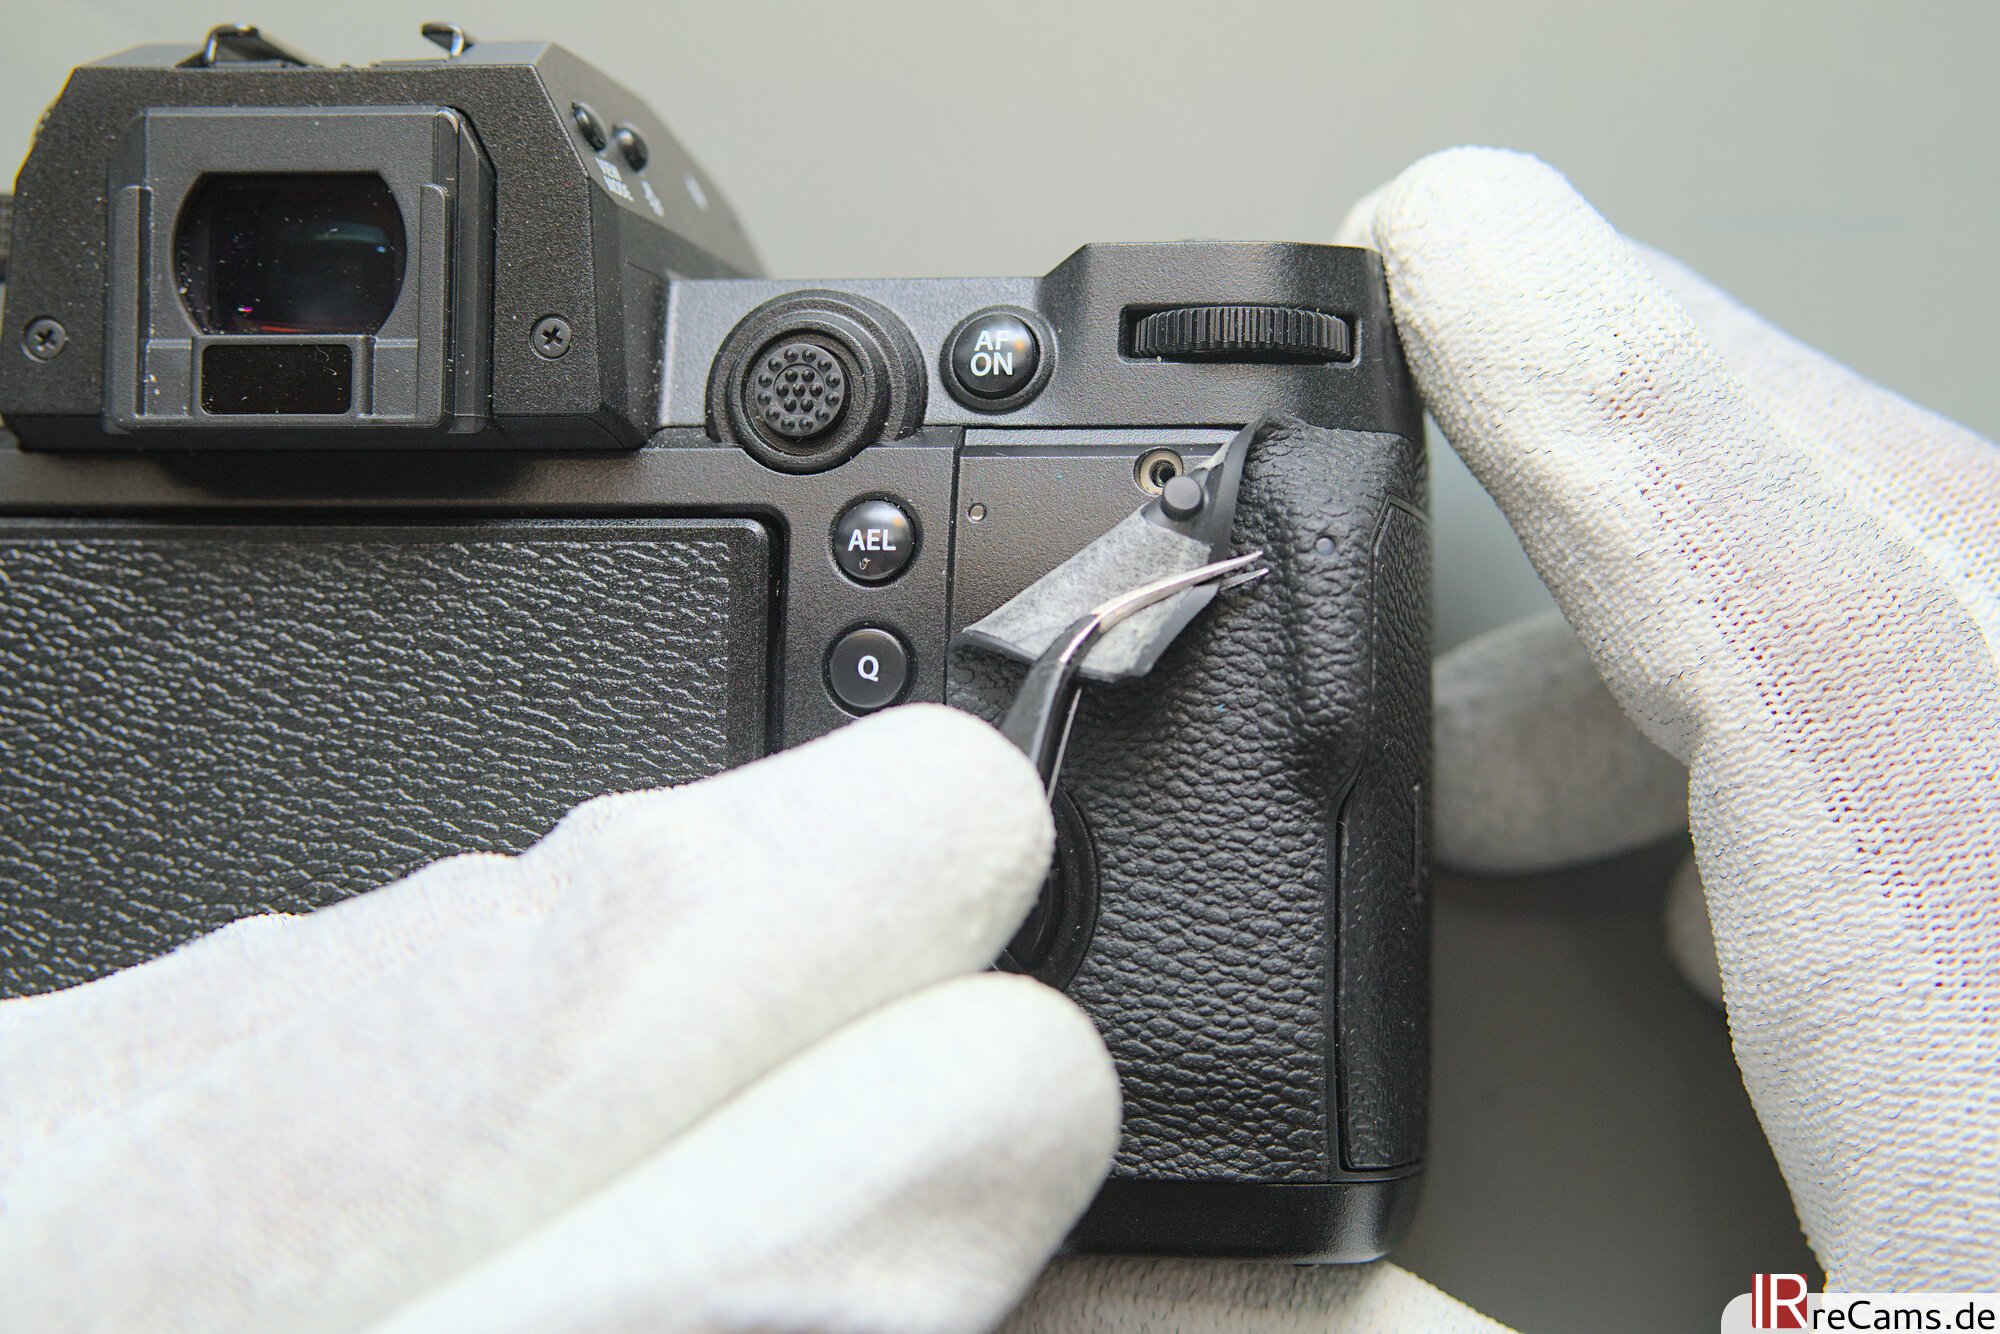
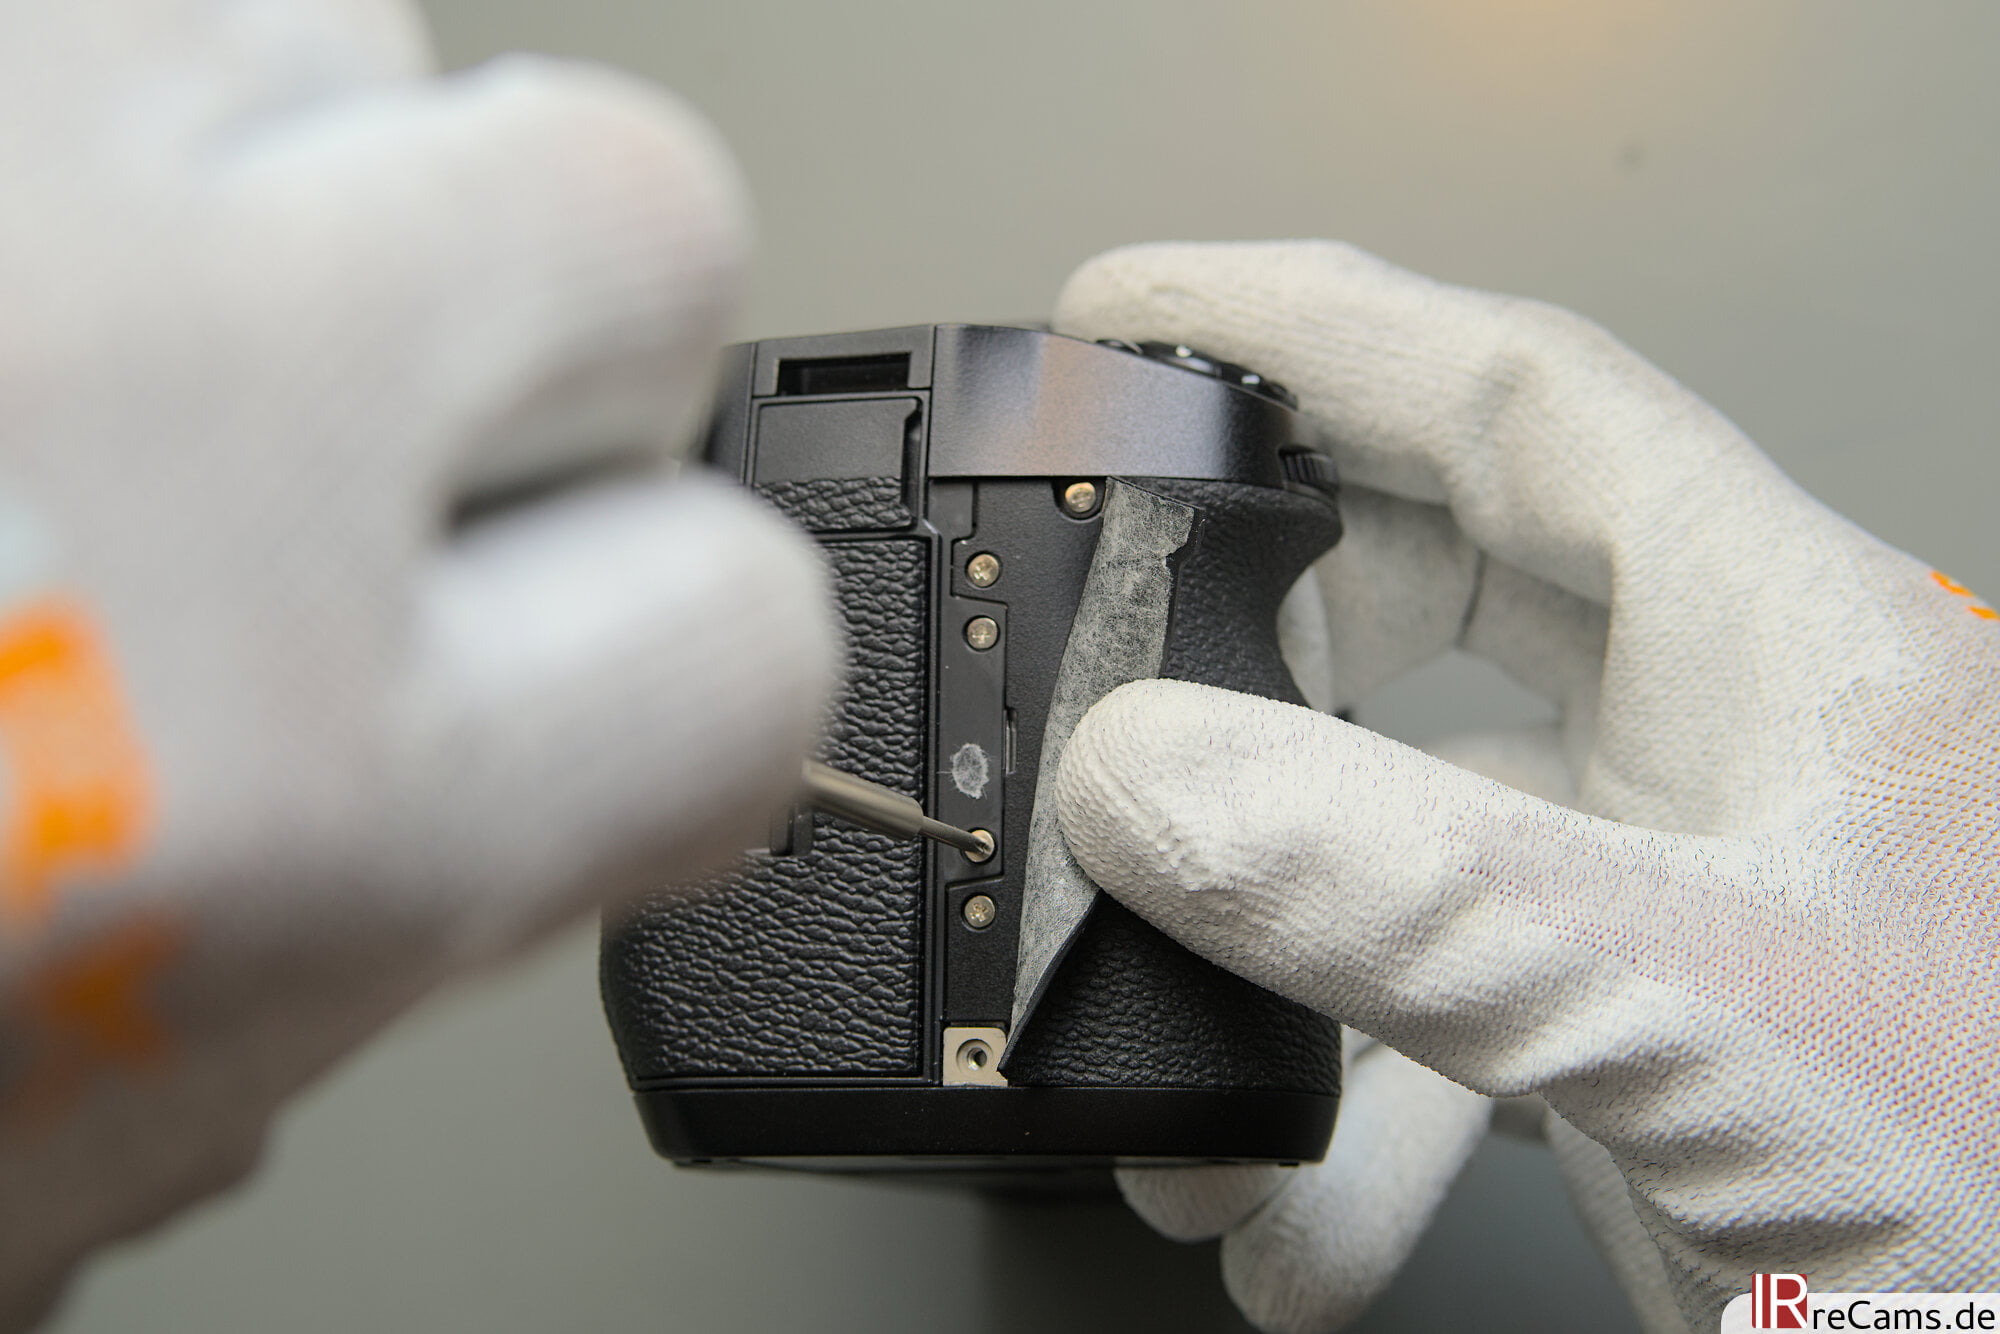
A few screws are accessible around the casing, but many are also hidden under the rubber coating.

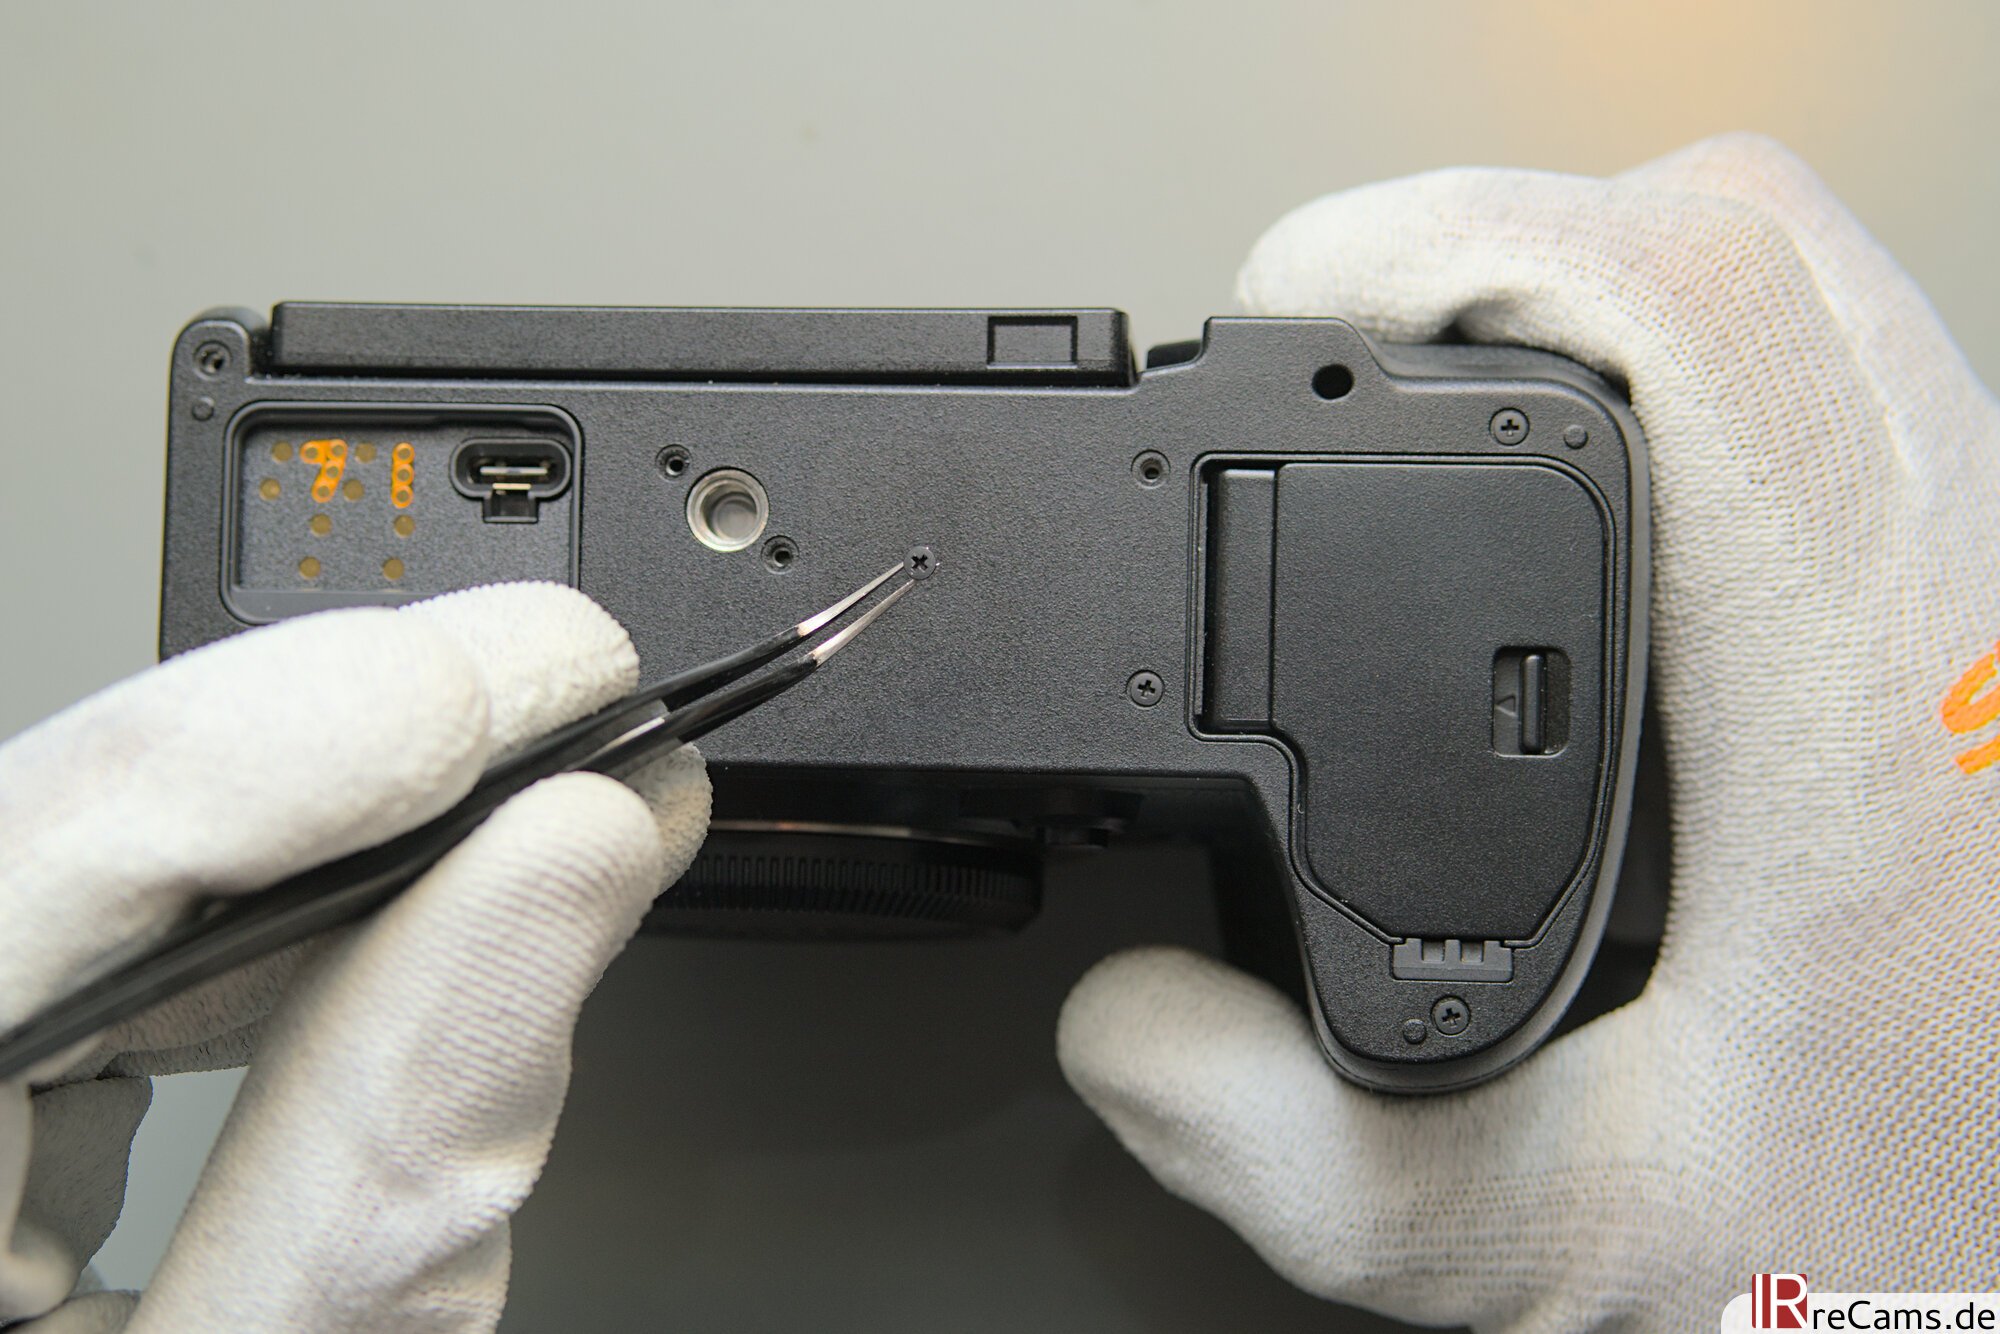
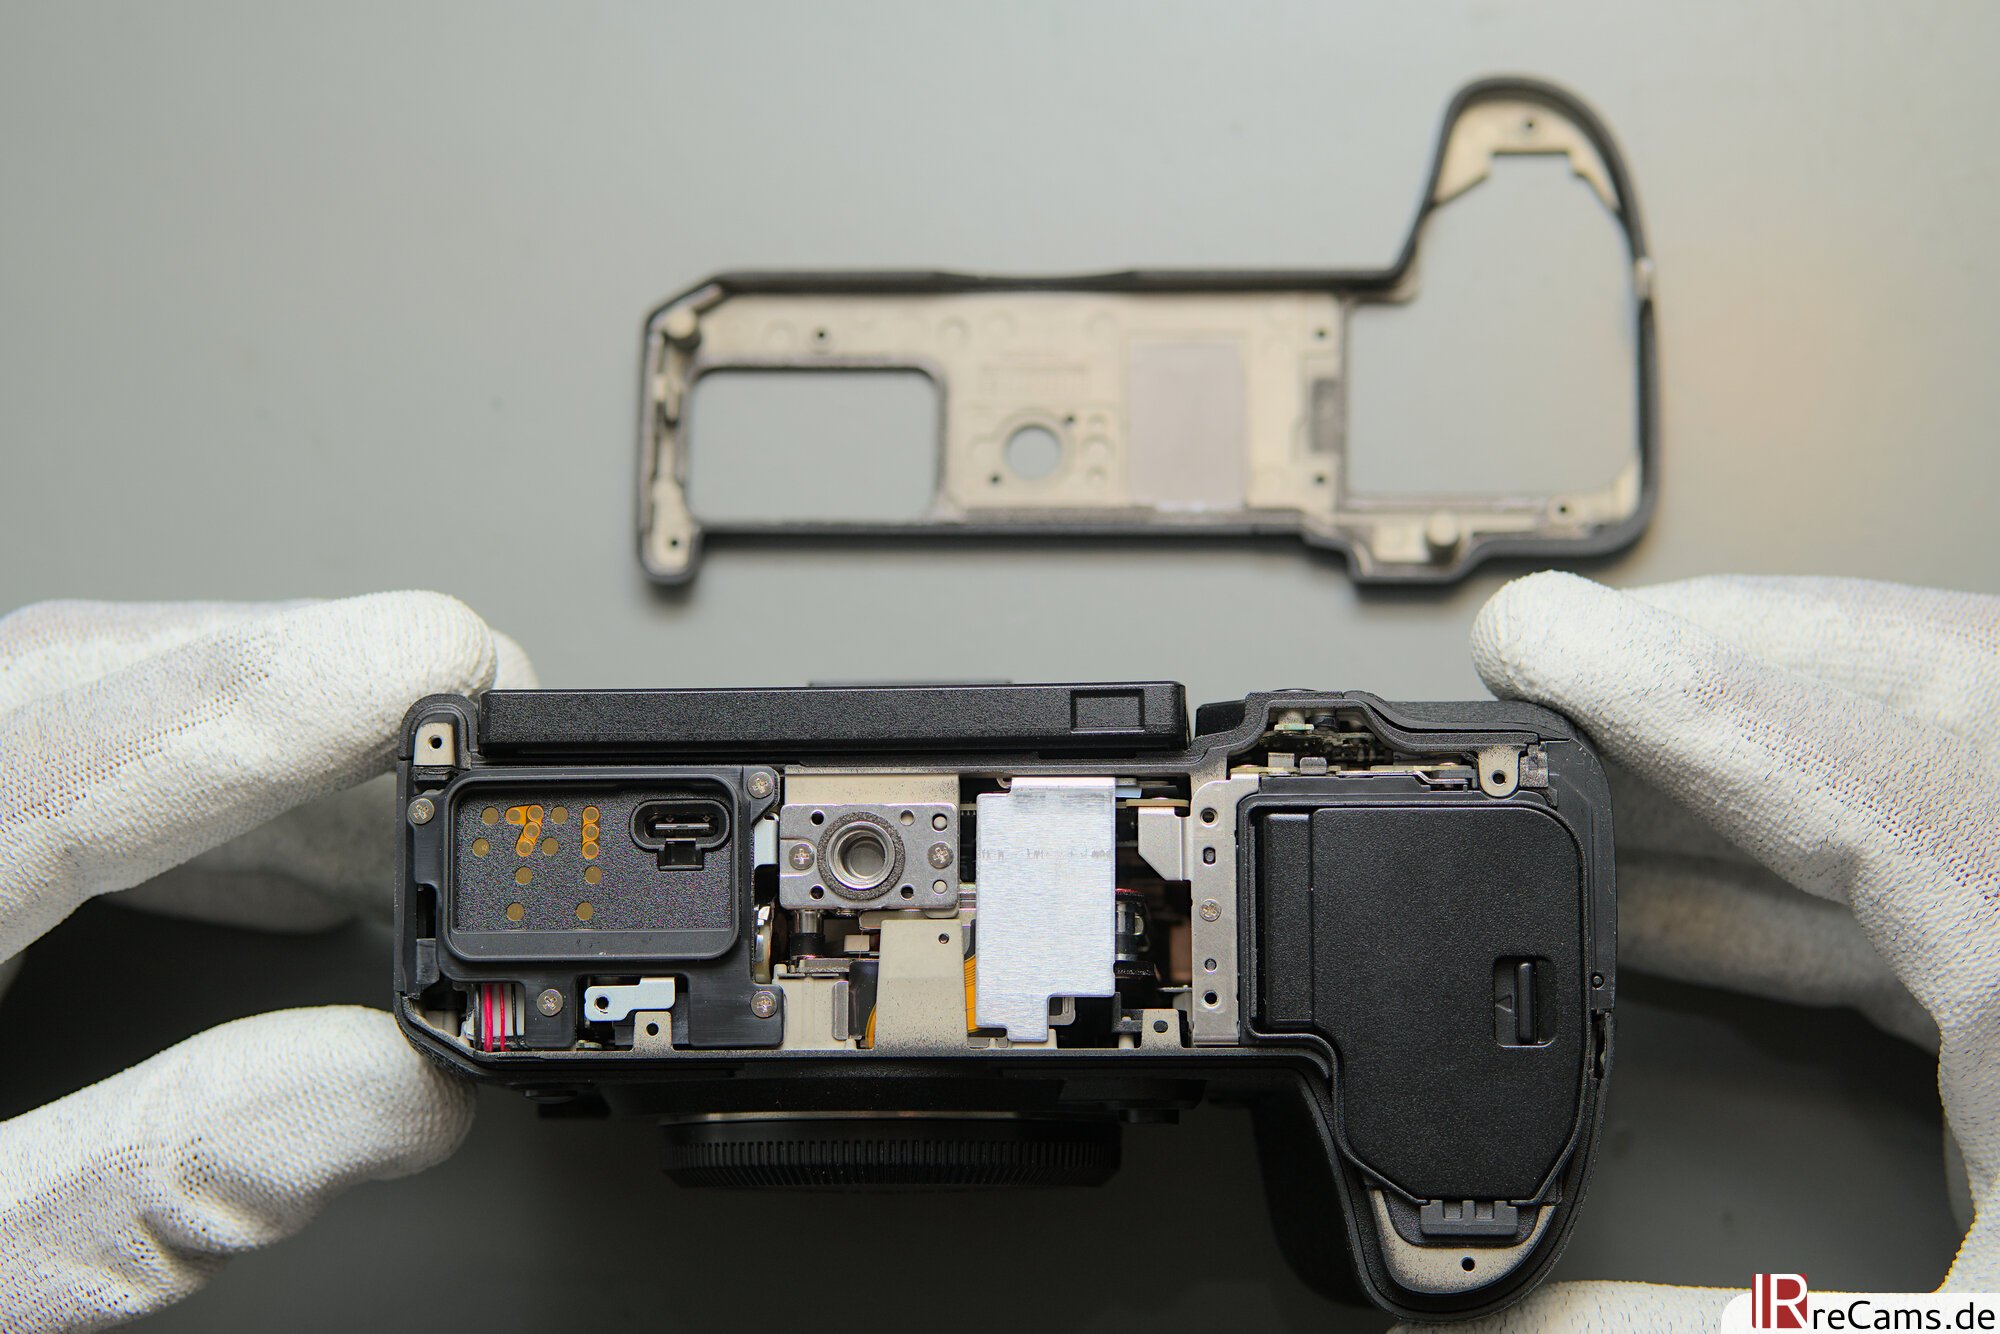
After the screws are removed, the bottom can be removed and reveals the first view of the inner parts. The first thing that stands out is a large aluminum surface on the right of the tripod thread. This surface is connected to the bottom via a heat conduction pad to dissipate heat from the inside.
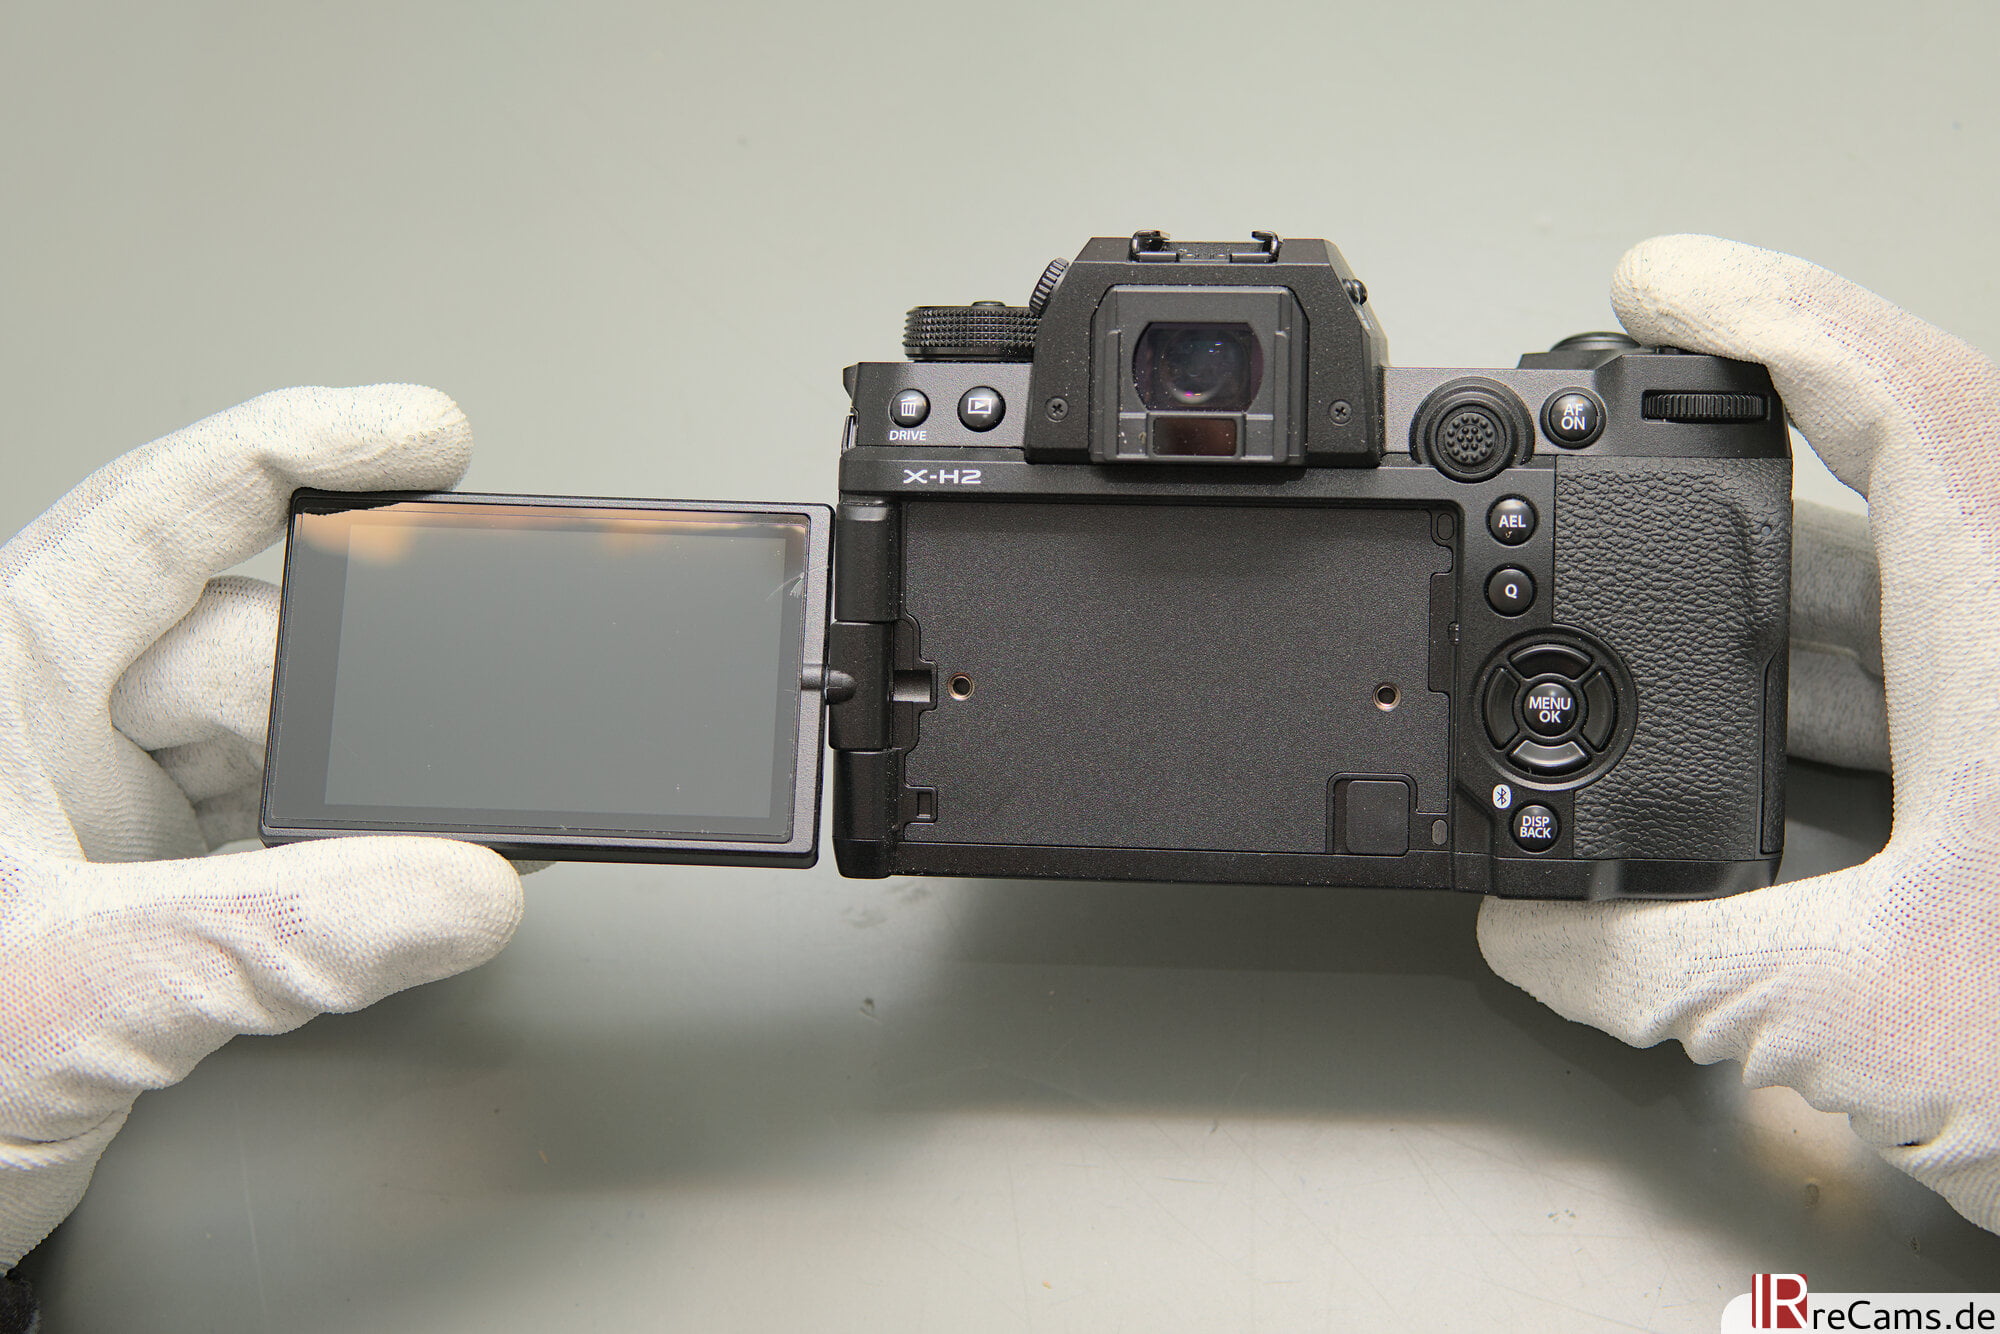
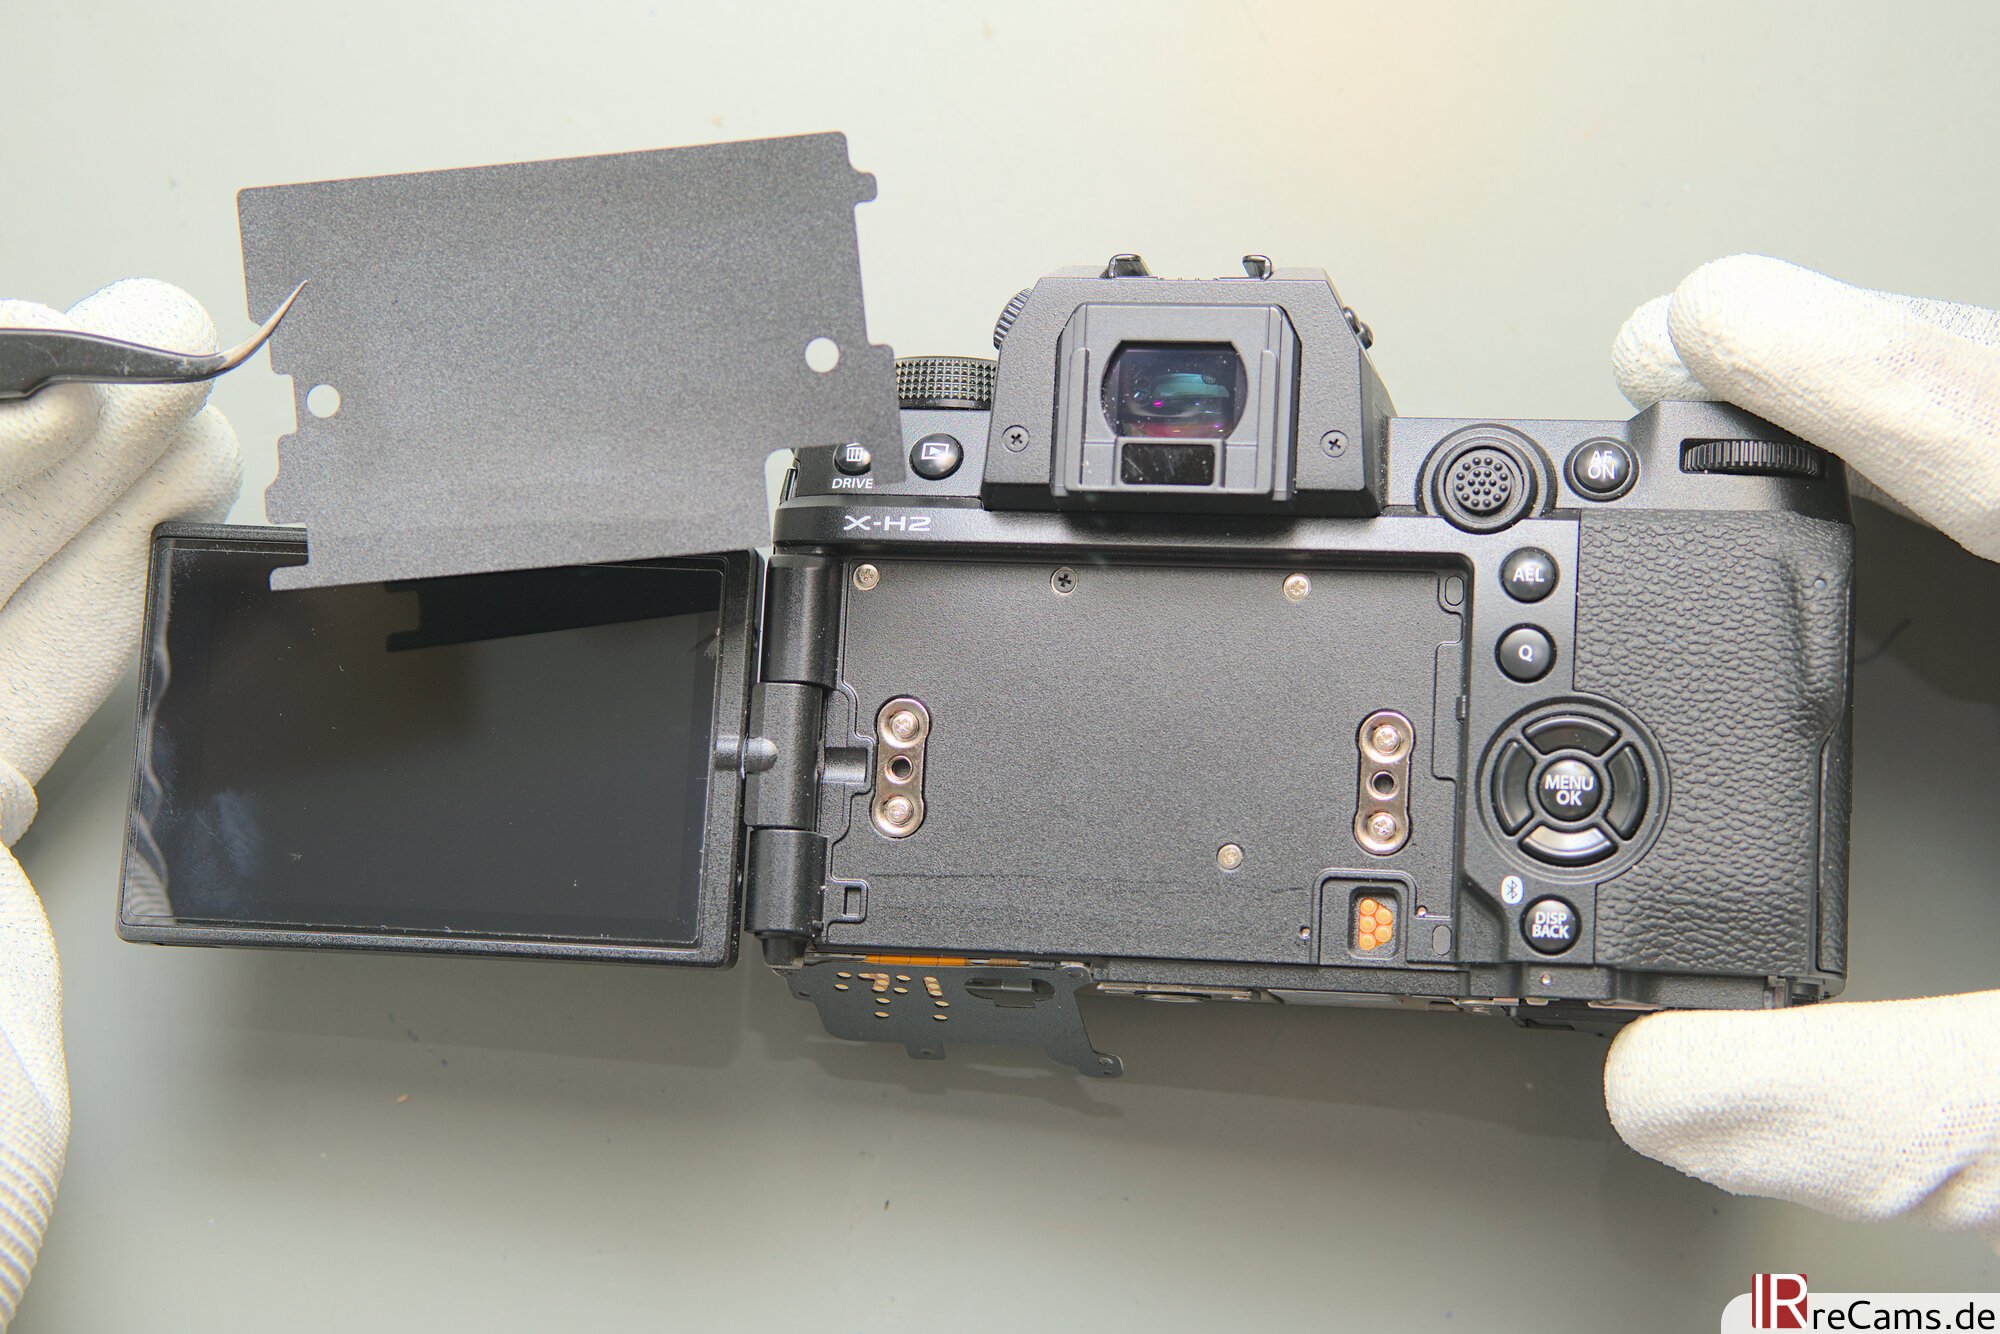
There is not much to see behind the display apart from 2 threaded holes and an electrical interface. These connections are for the optional fan, "FAN-001", which can actively cool the back of the camera. A few more screws can be found under a thick film on the back (a design decision that is somehow very reminiscent of the X-A1 era). Once the last screws have been removed, the rear section including the hinged display can be removed to reveal the mainboard.
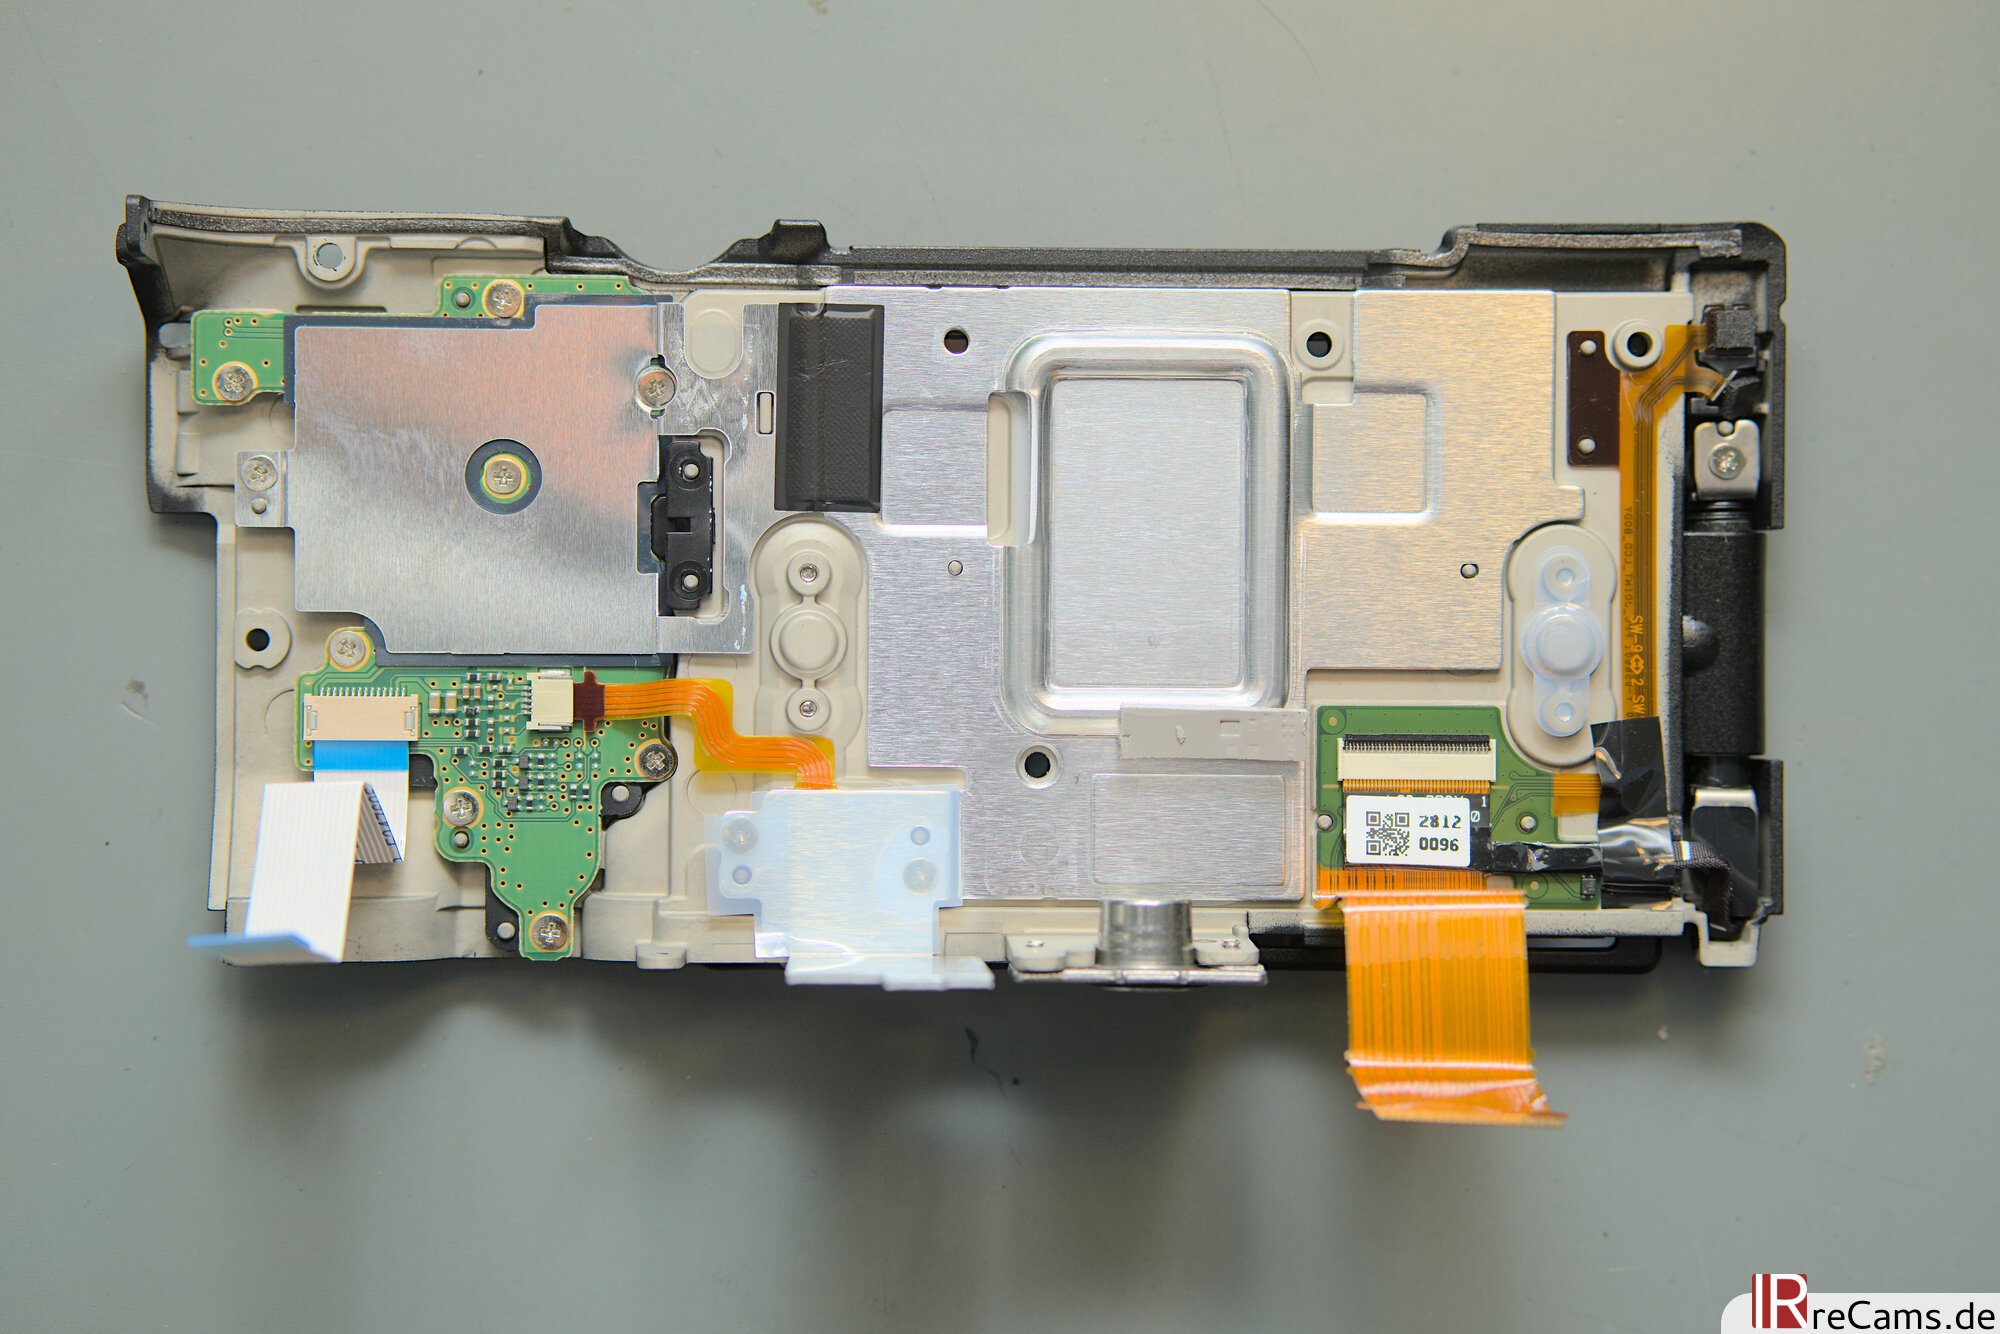
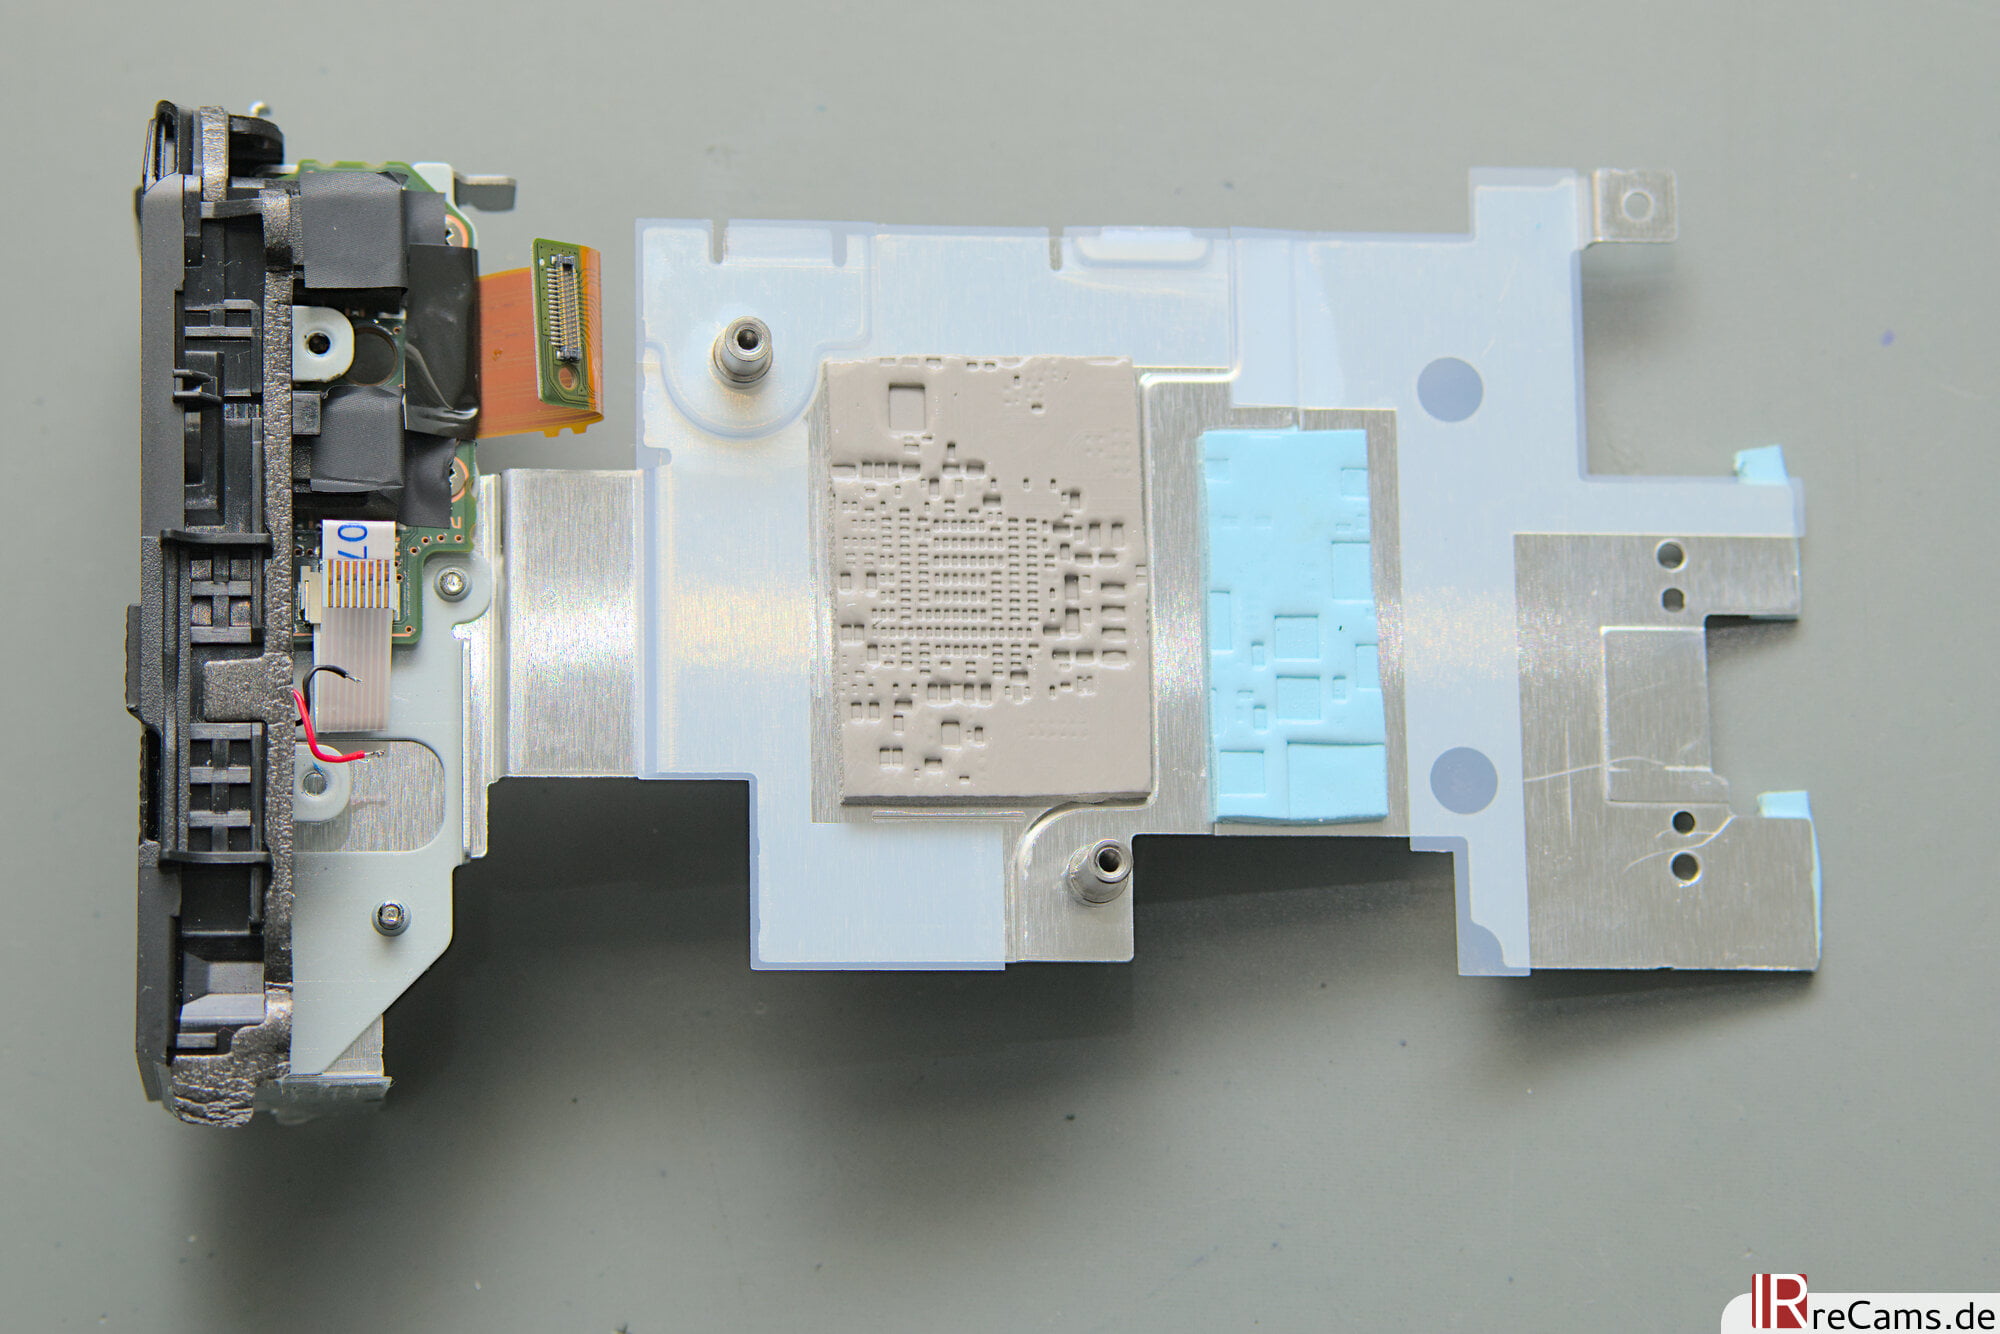
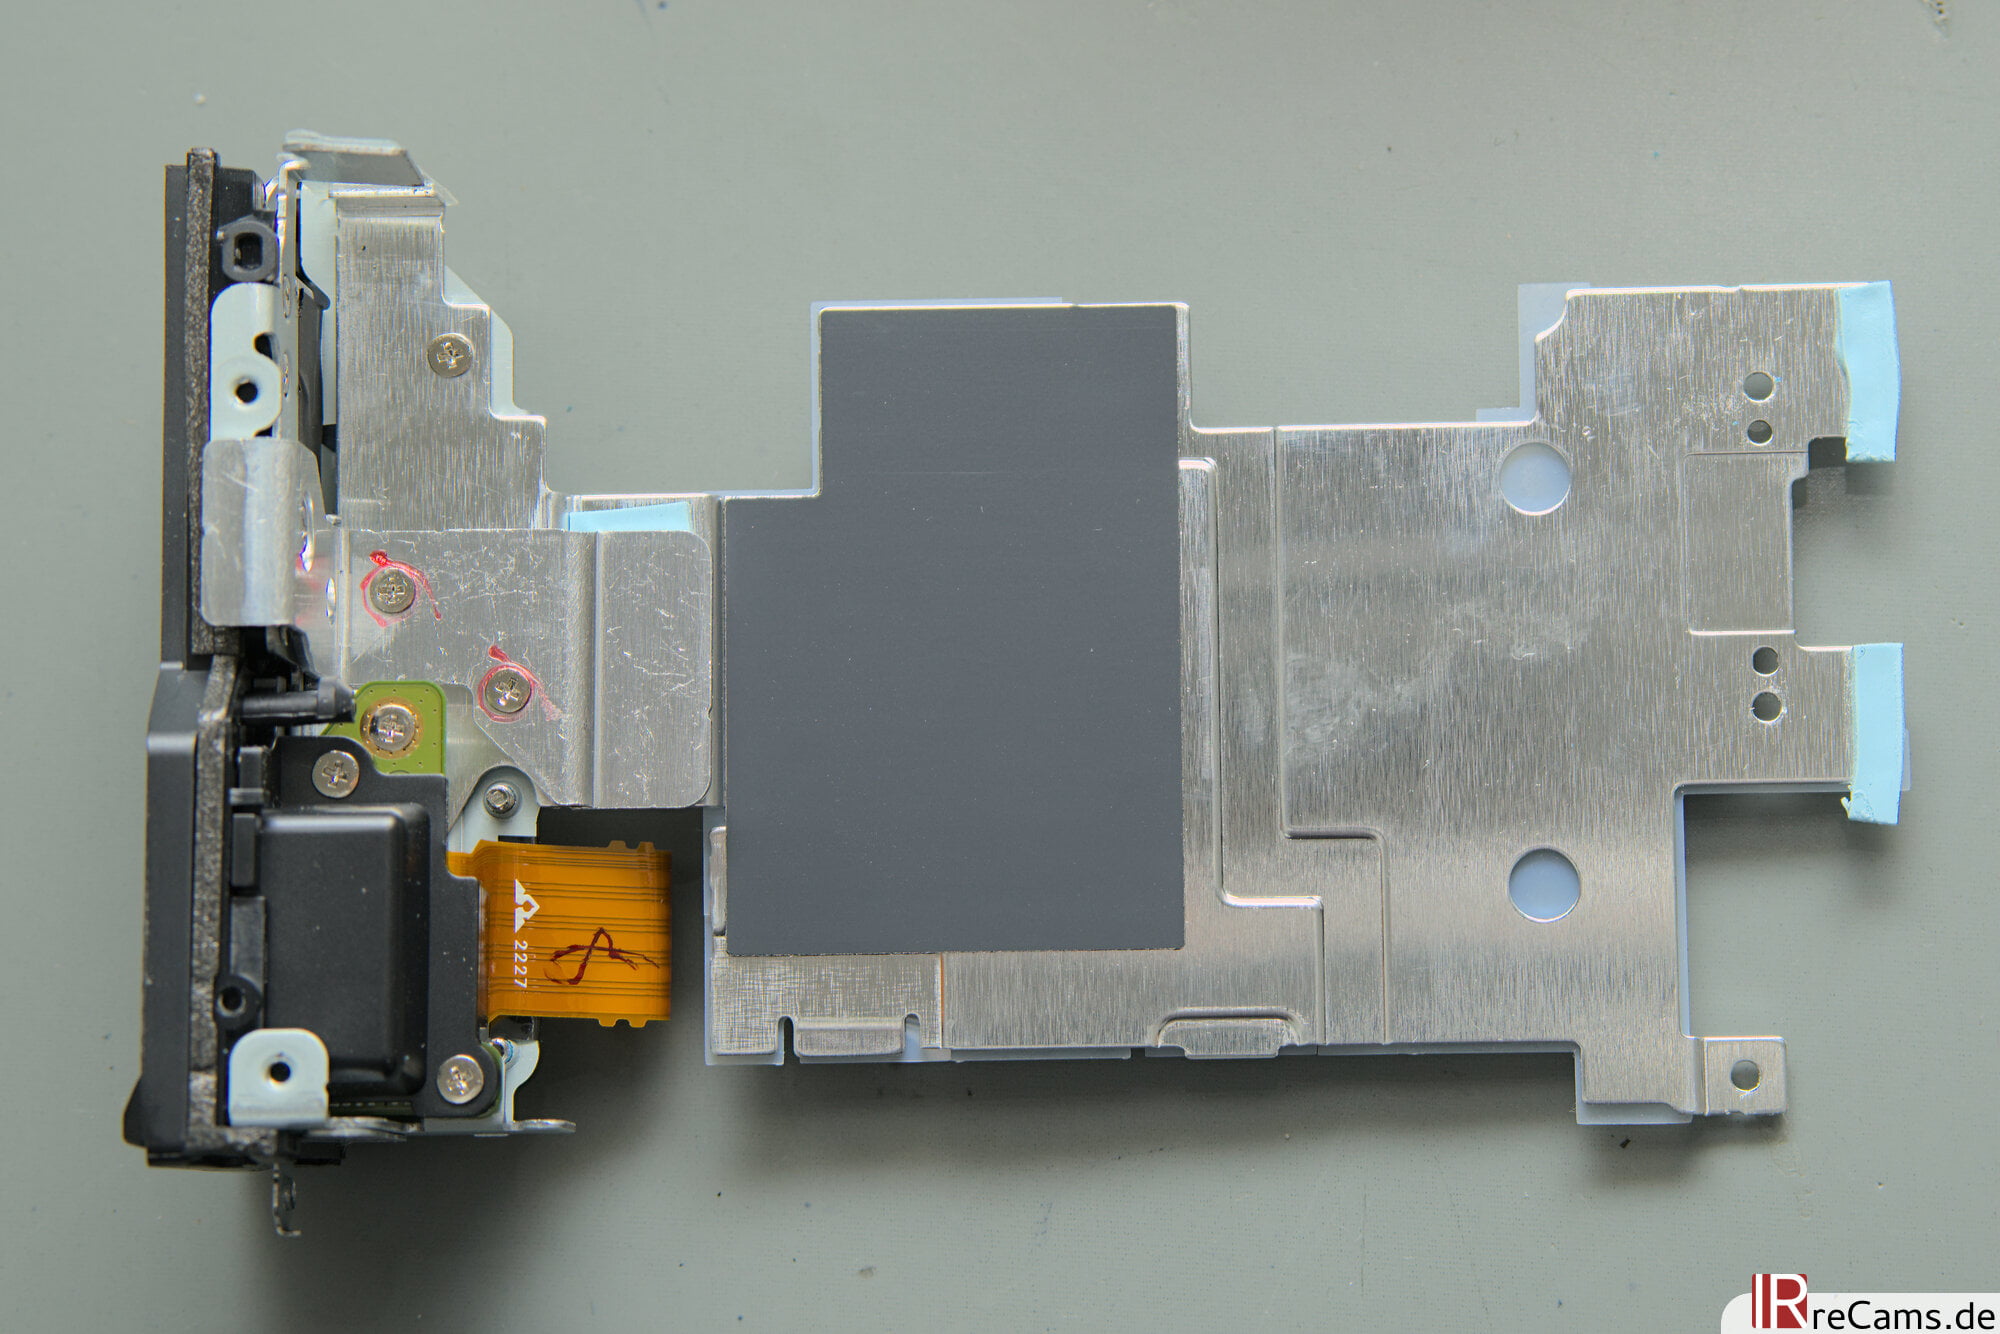
On the inside of the rear panel is a large aluminum plate, which is responsible for heat dissipation. The waste heat from various components of the mainboard, especially the waste heat from the processor, is fed directly into this plate and distributed via heat conduction pads. This heat can then be dissipated to the environment via the rear behind the display (keyword "FAN-001") and the base.
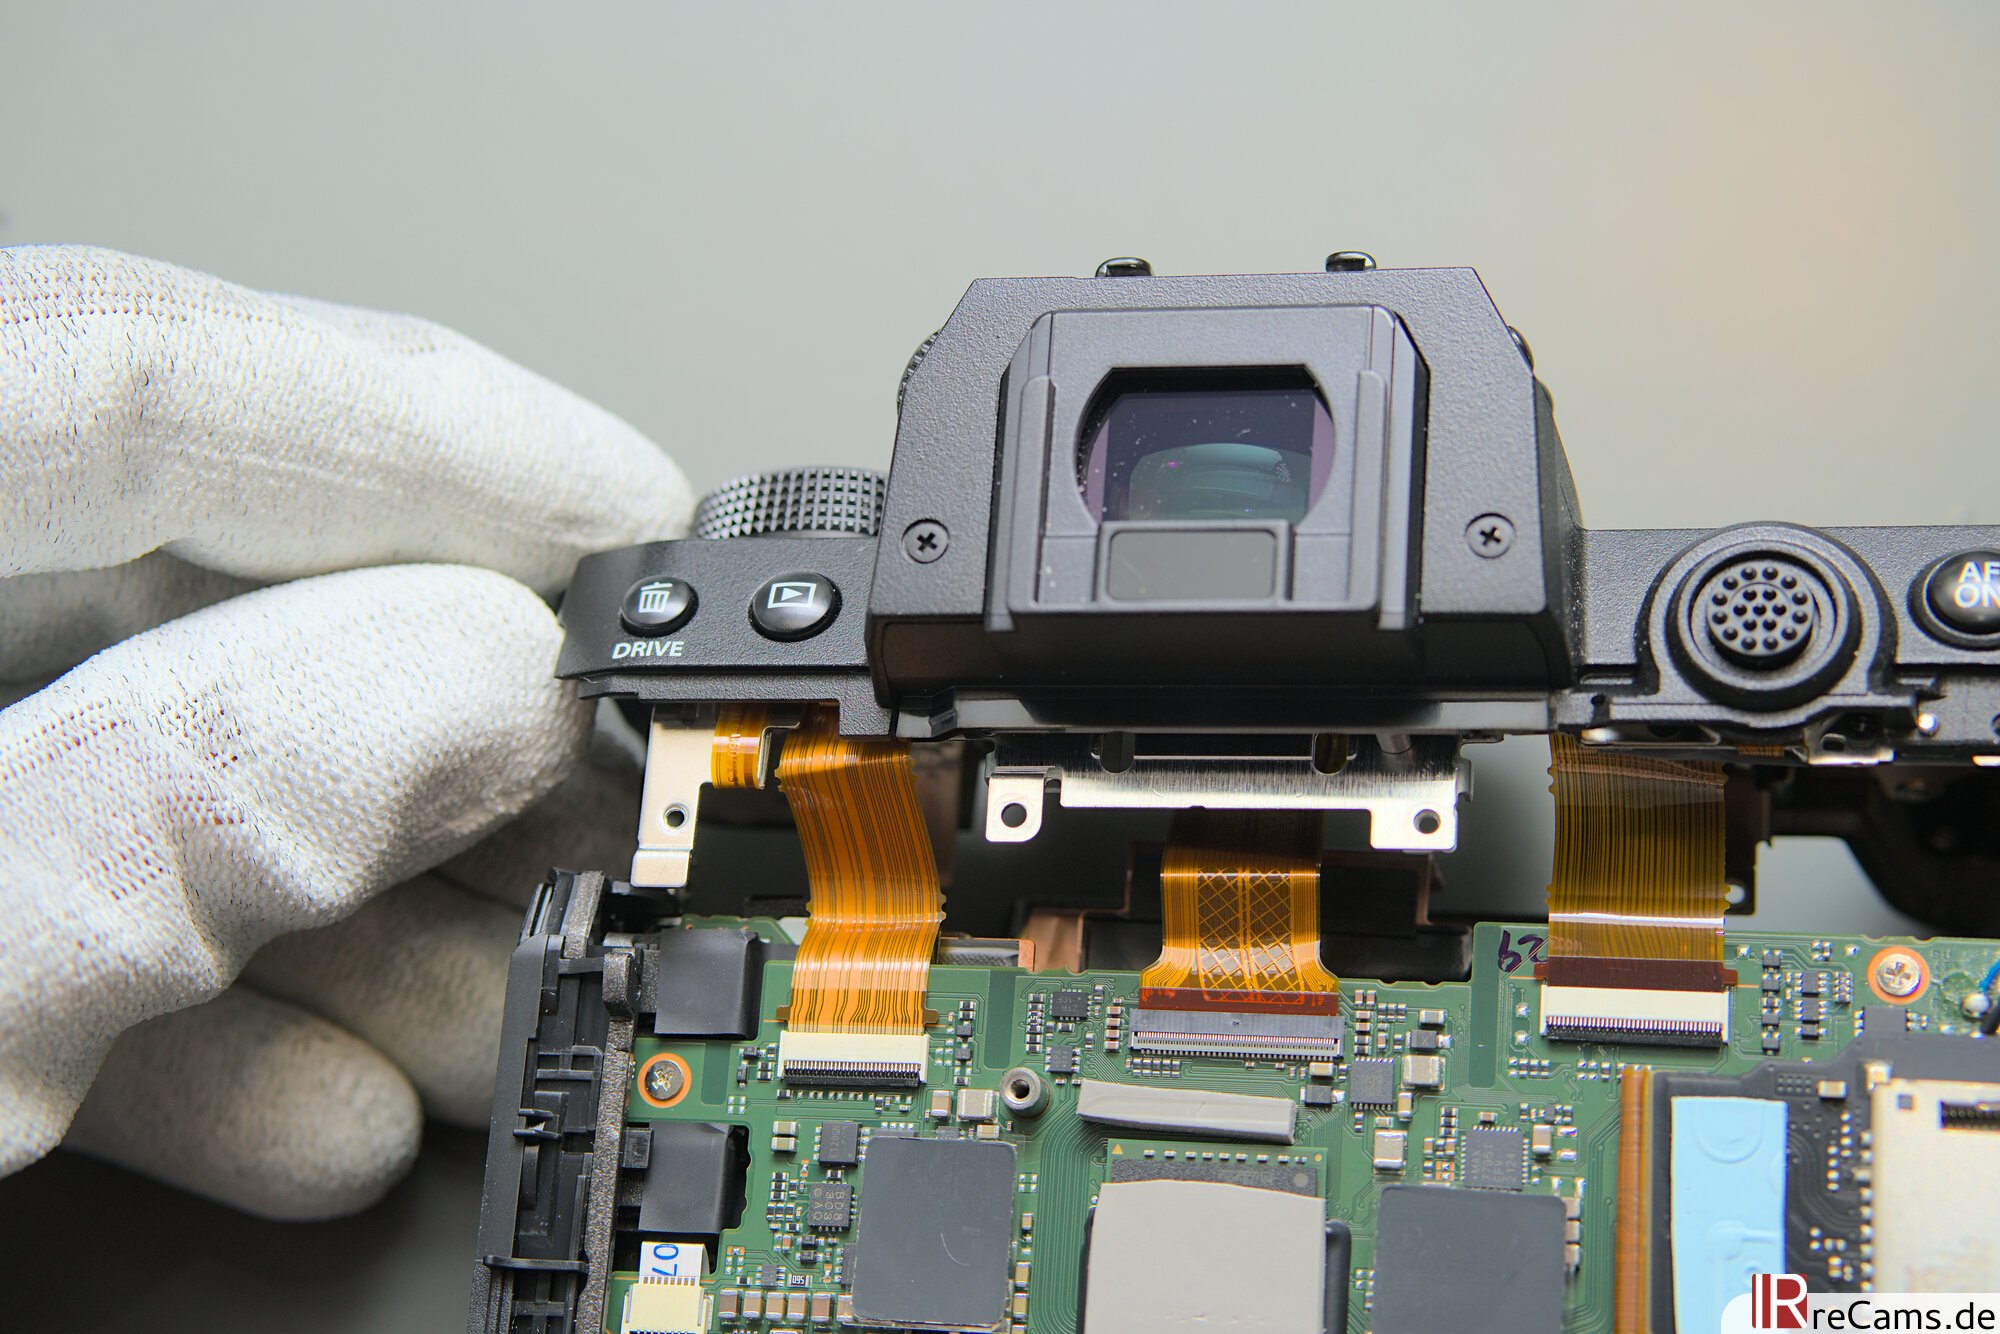
Next, the upper part including the viewfinder has to make way. All screens and buttons of the upper camera case are connected to the mainboard via 3 cables. A small copper contact surface and heat pad is also noticeable here. Later, it becomes clear where the heat comes from: The heat is conducted directly from the sensor into the upper case in front of the viewfinder.
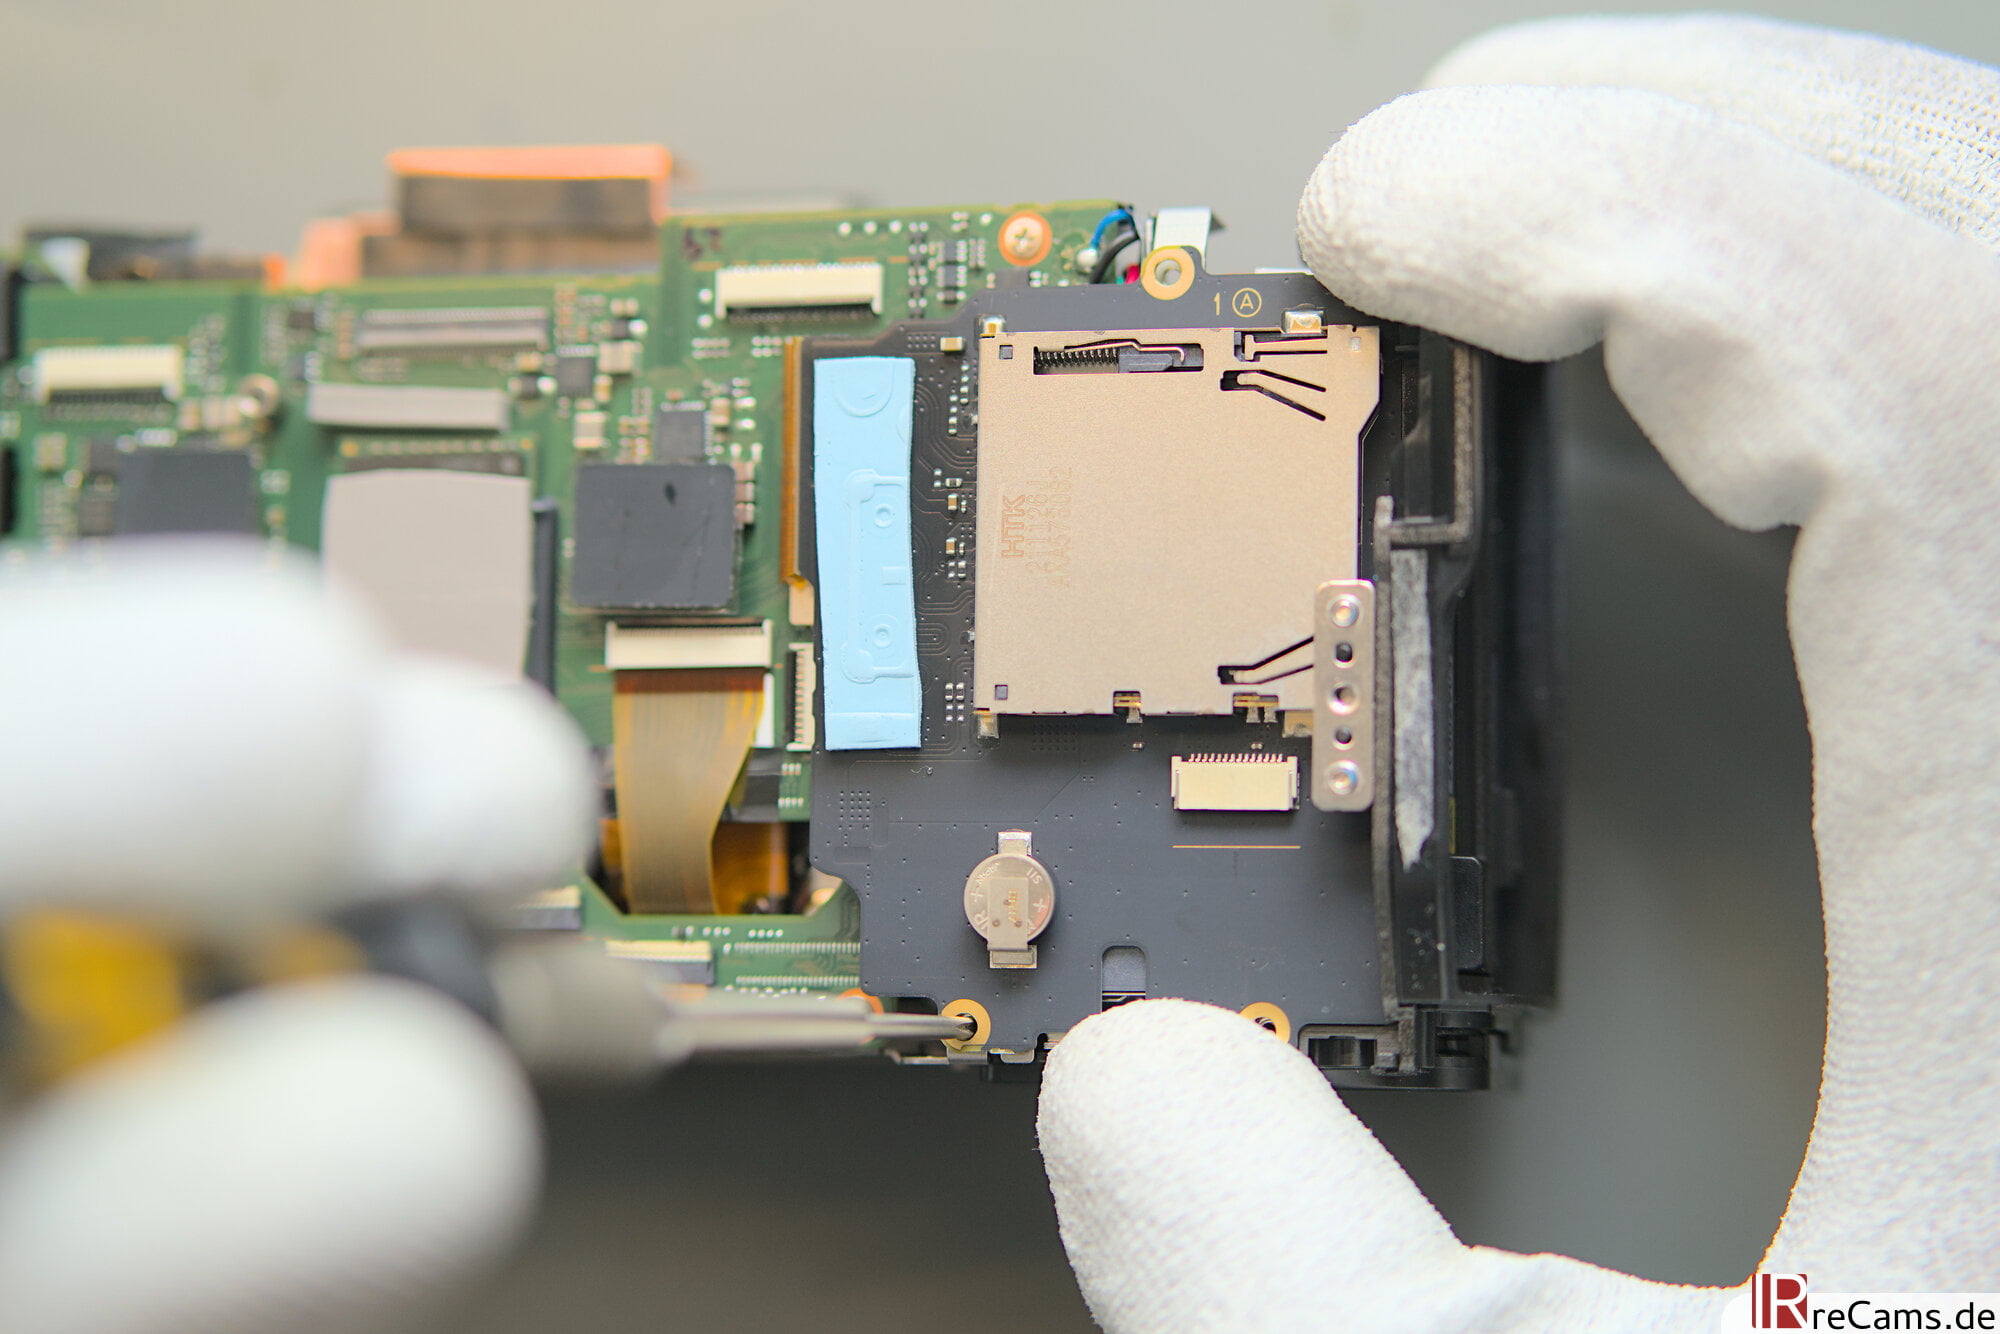
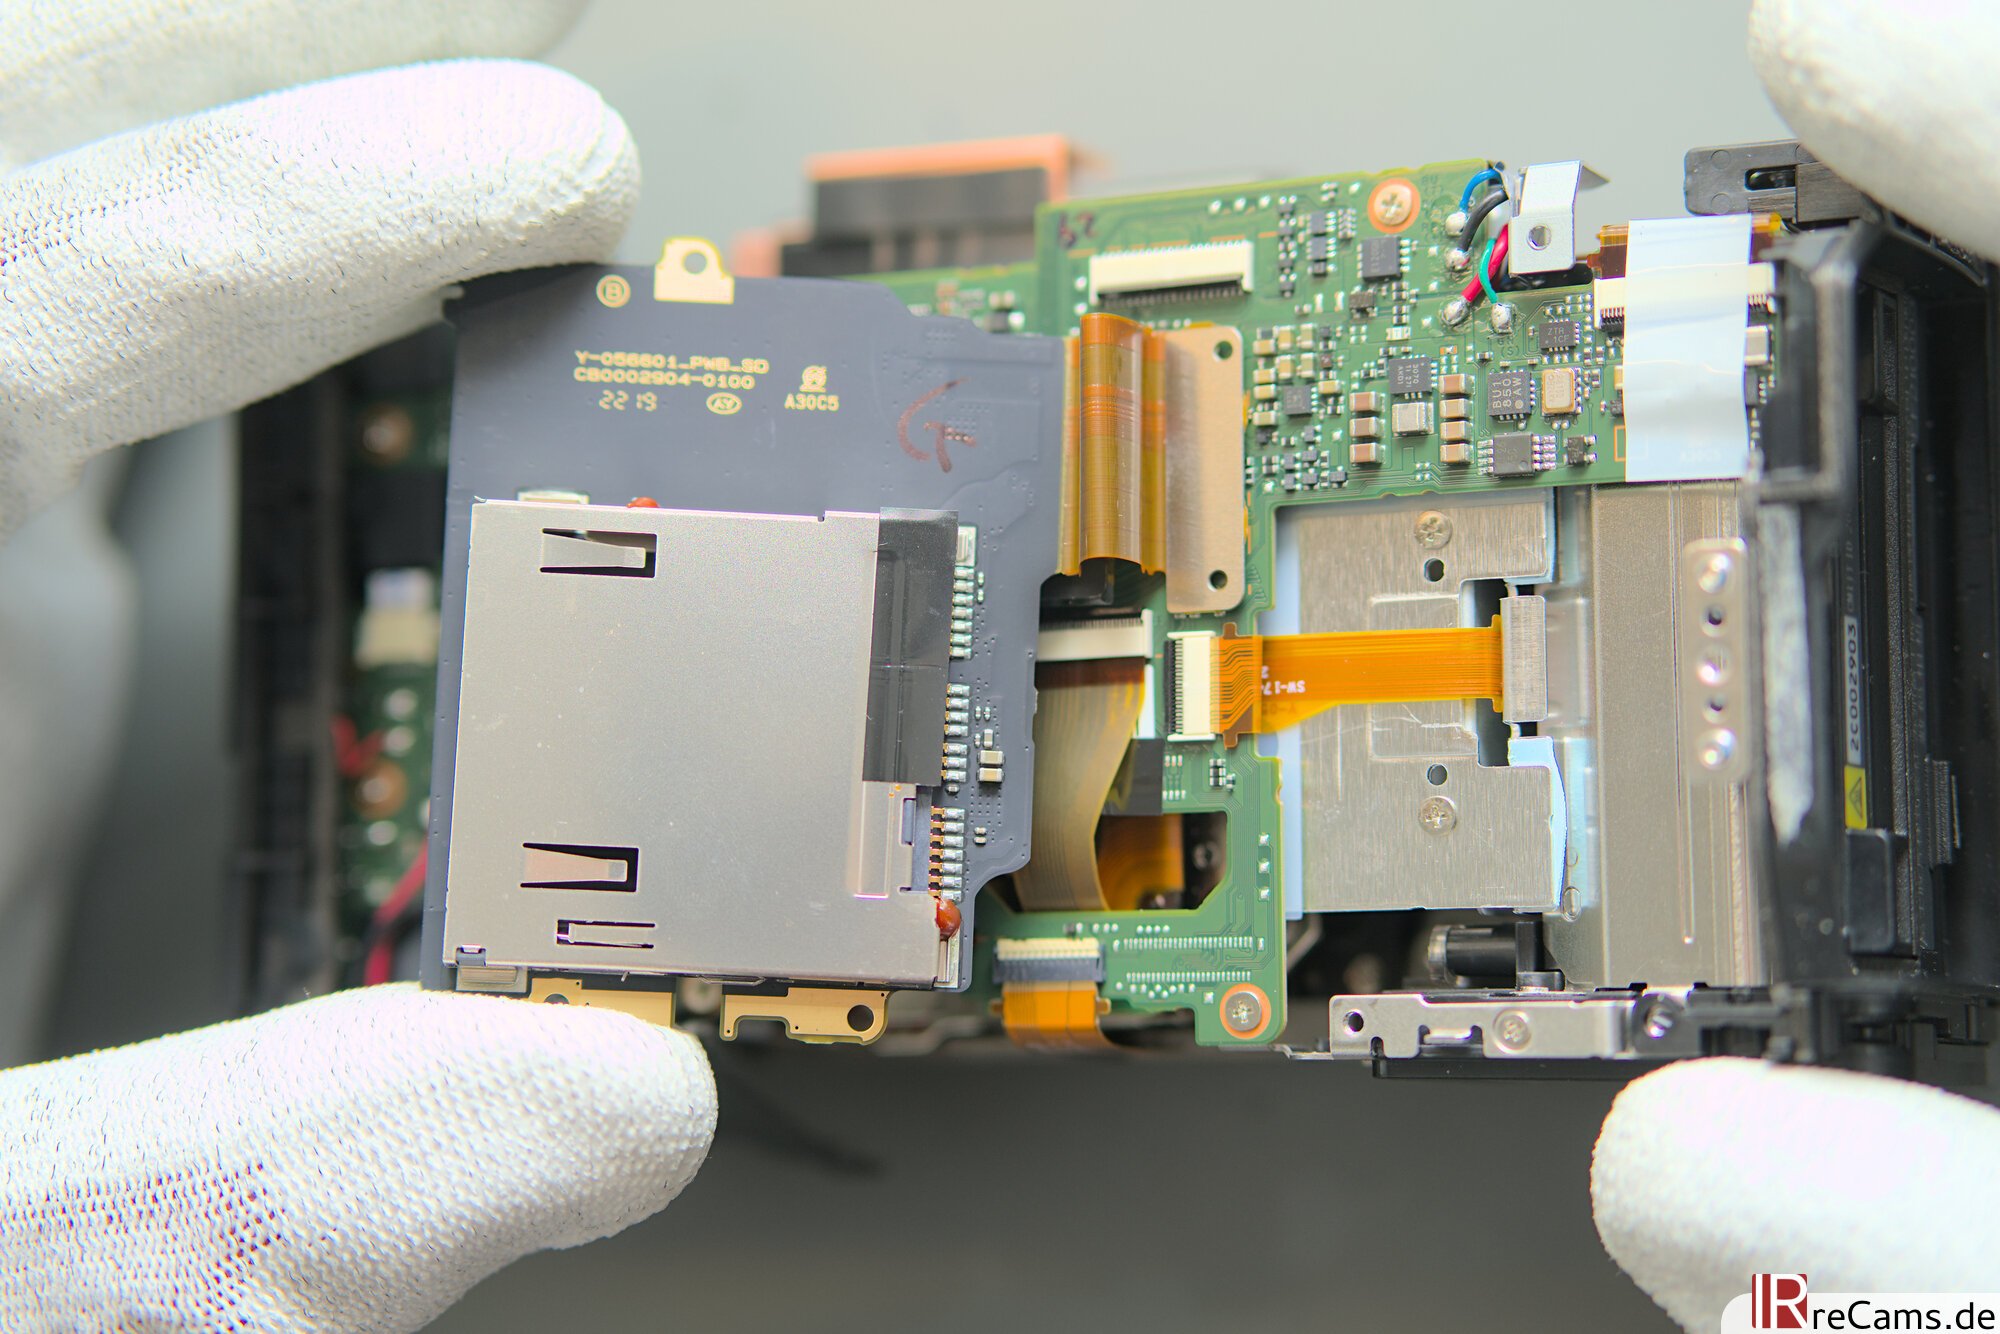
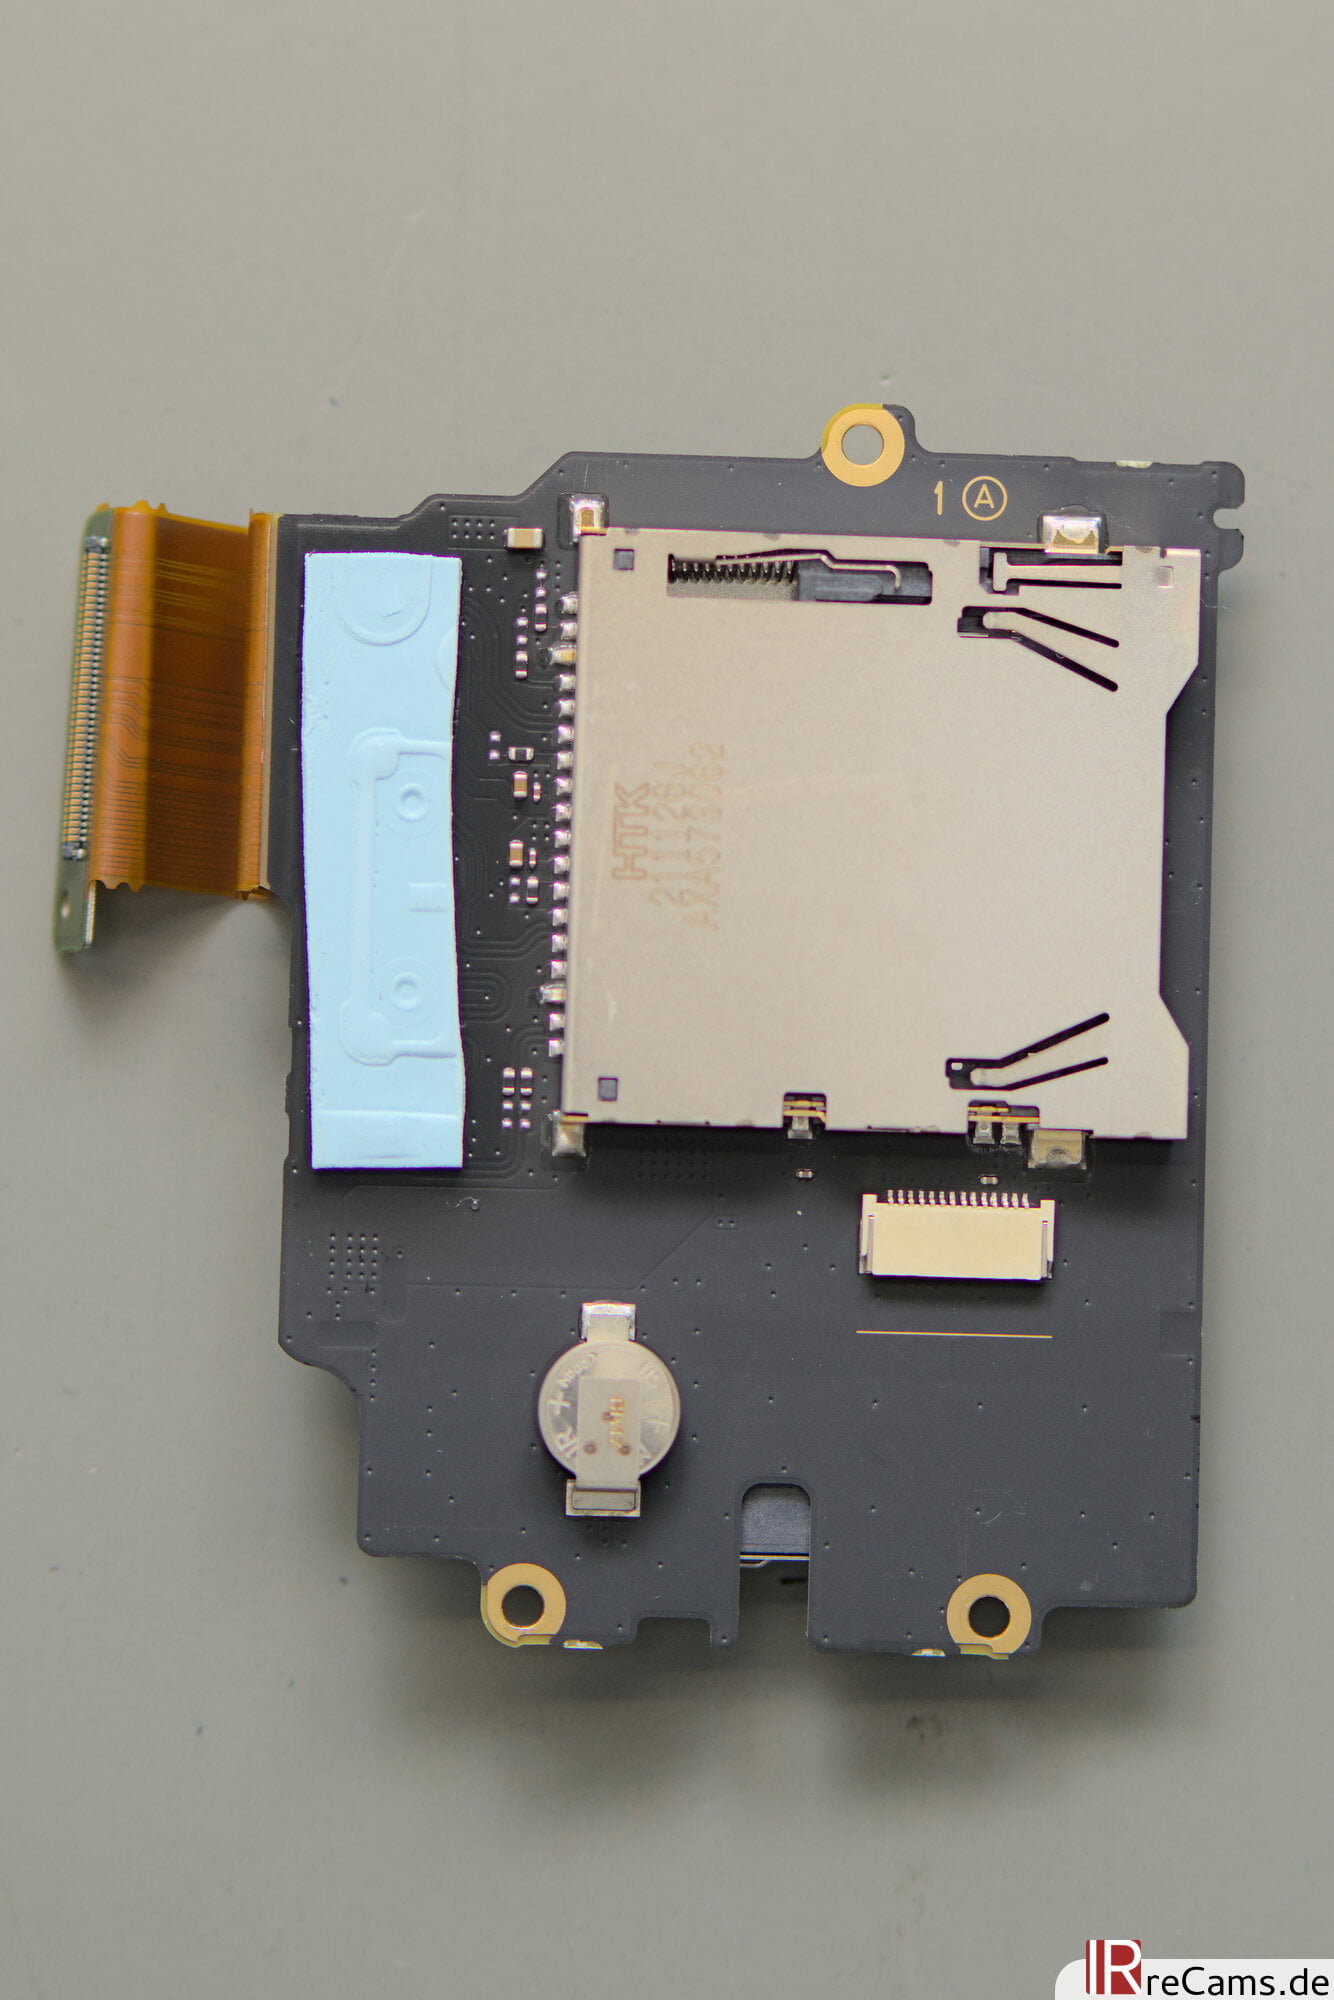
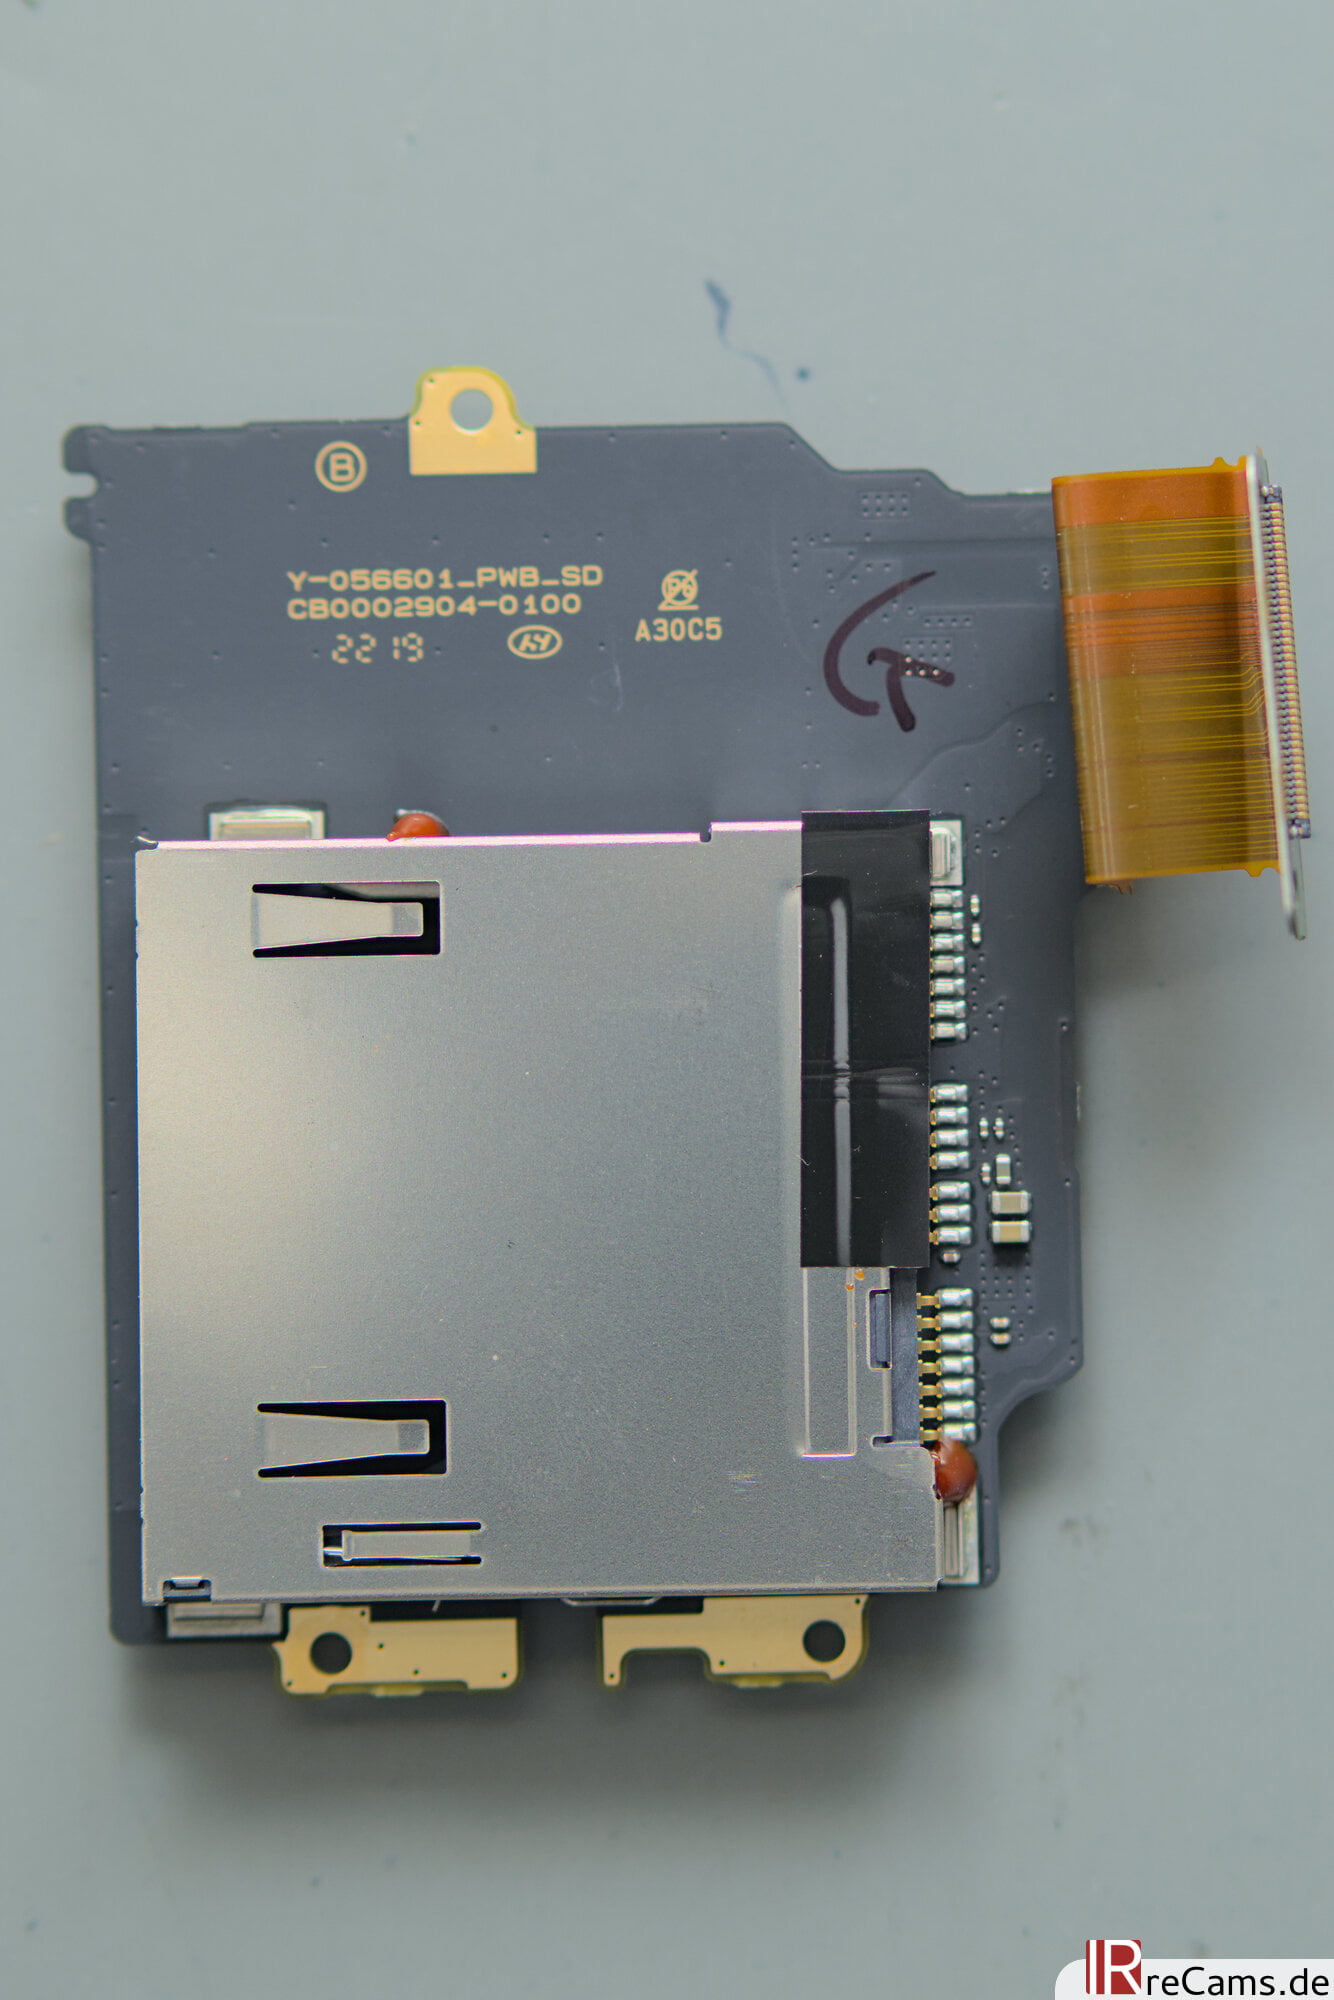
The two card slots (SD and CFexpress) have their own small circuit board, which has to be removed first, with only 3 screws it is done quickly. This design element was carried over from the X-T4, except that there are 2 SD card slots in the X-T4.
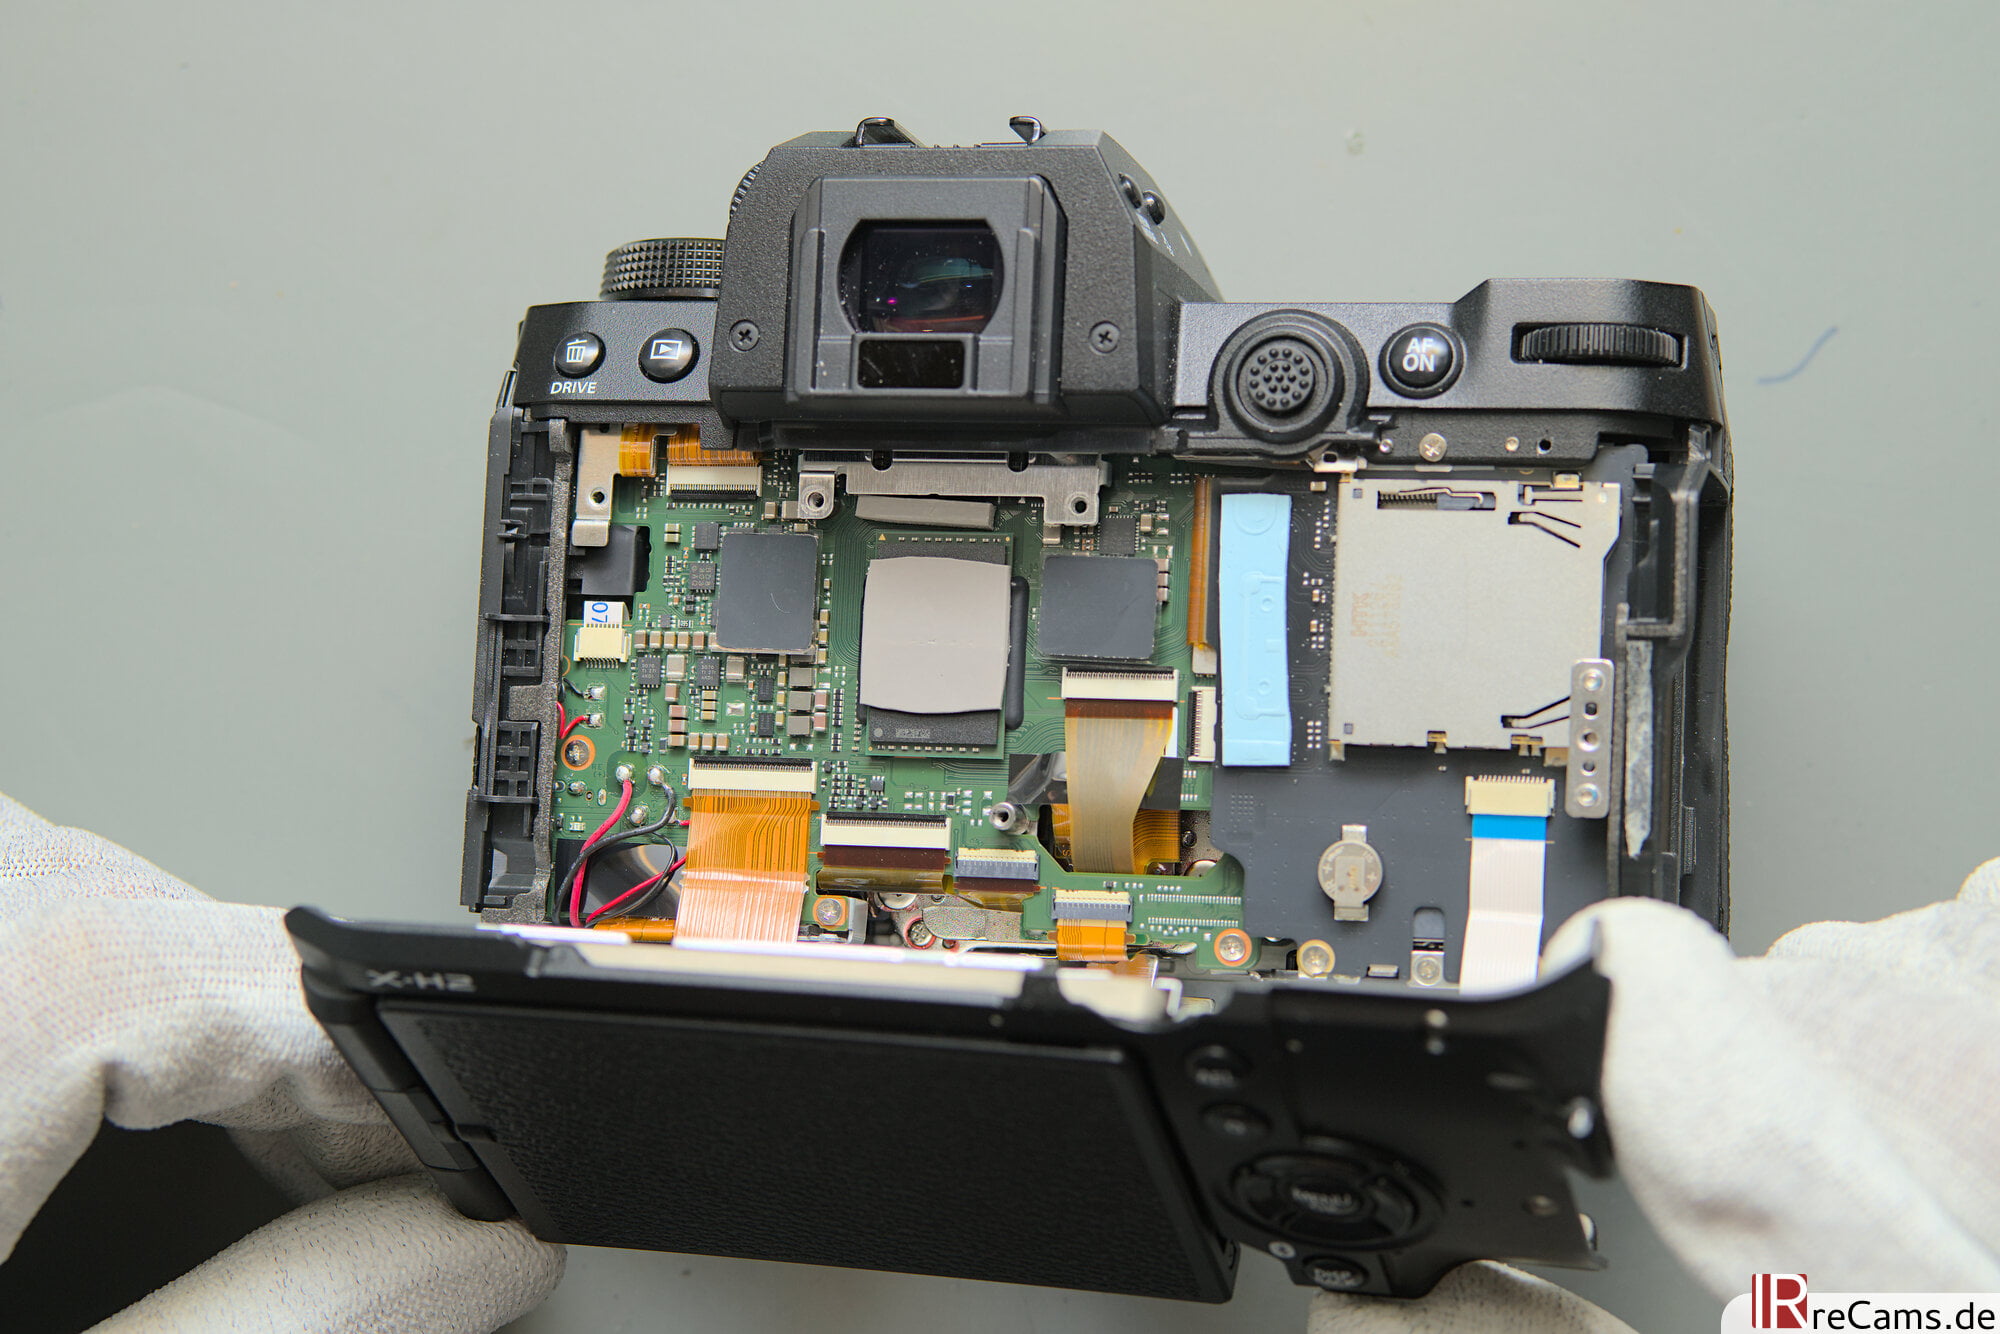
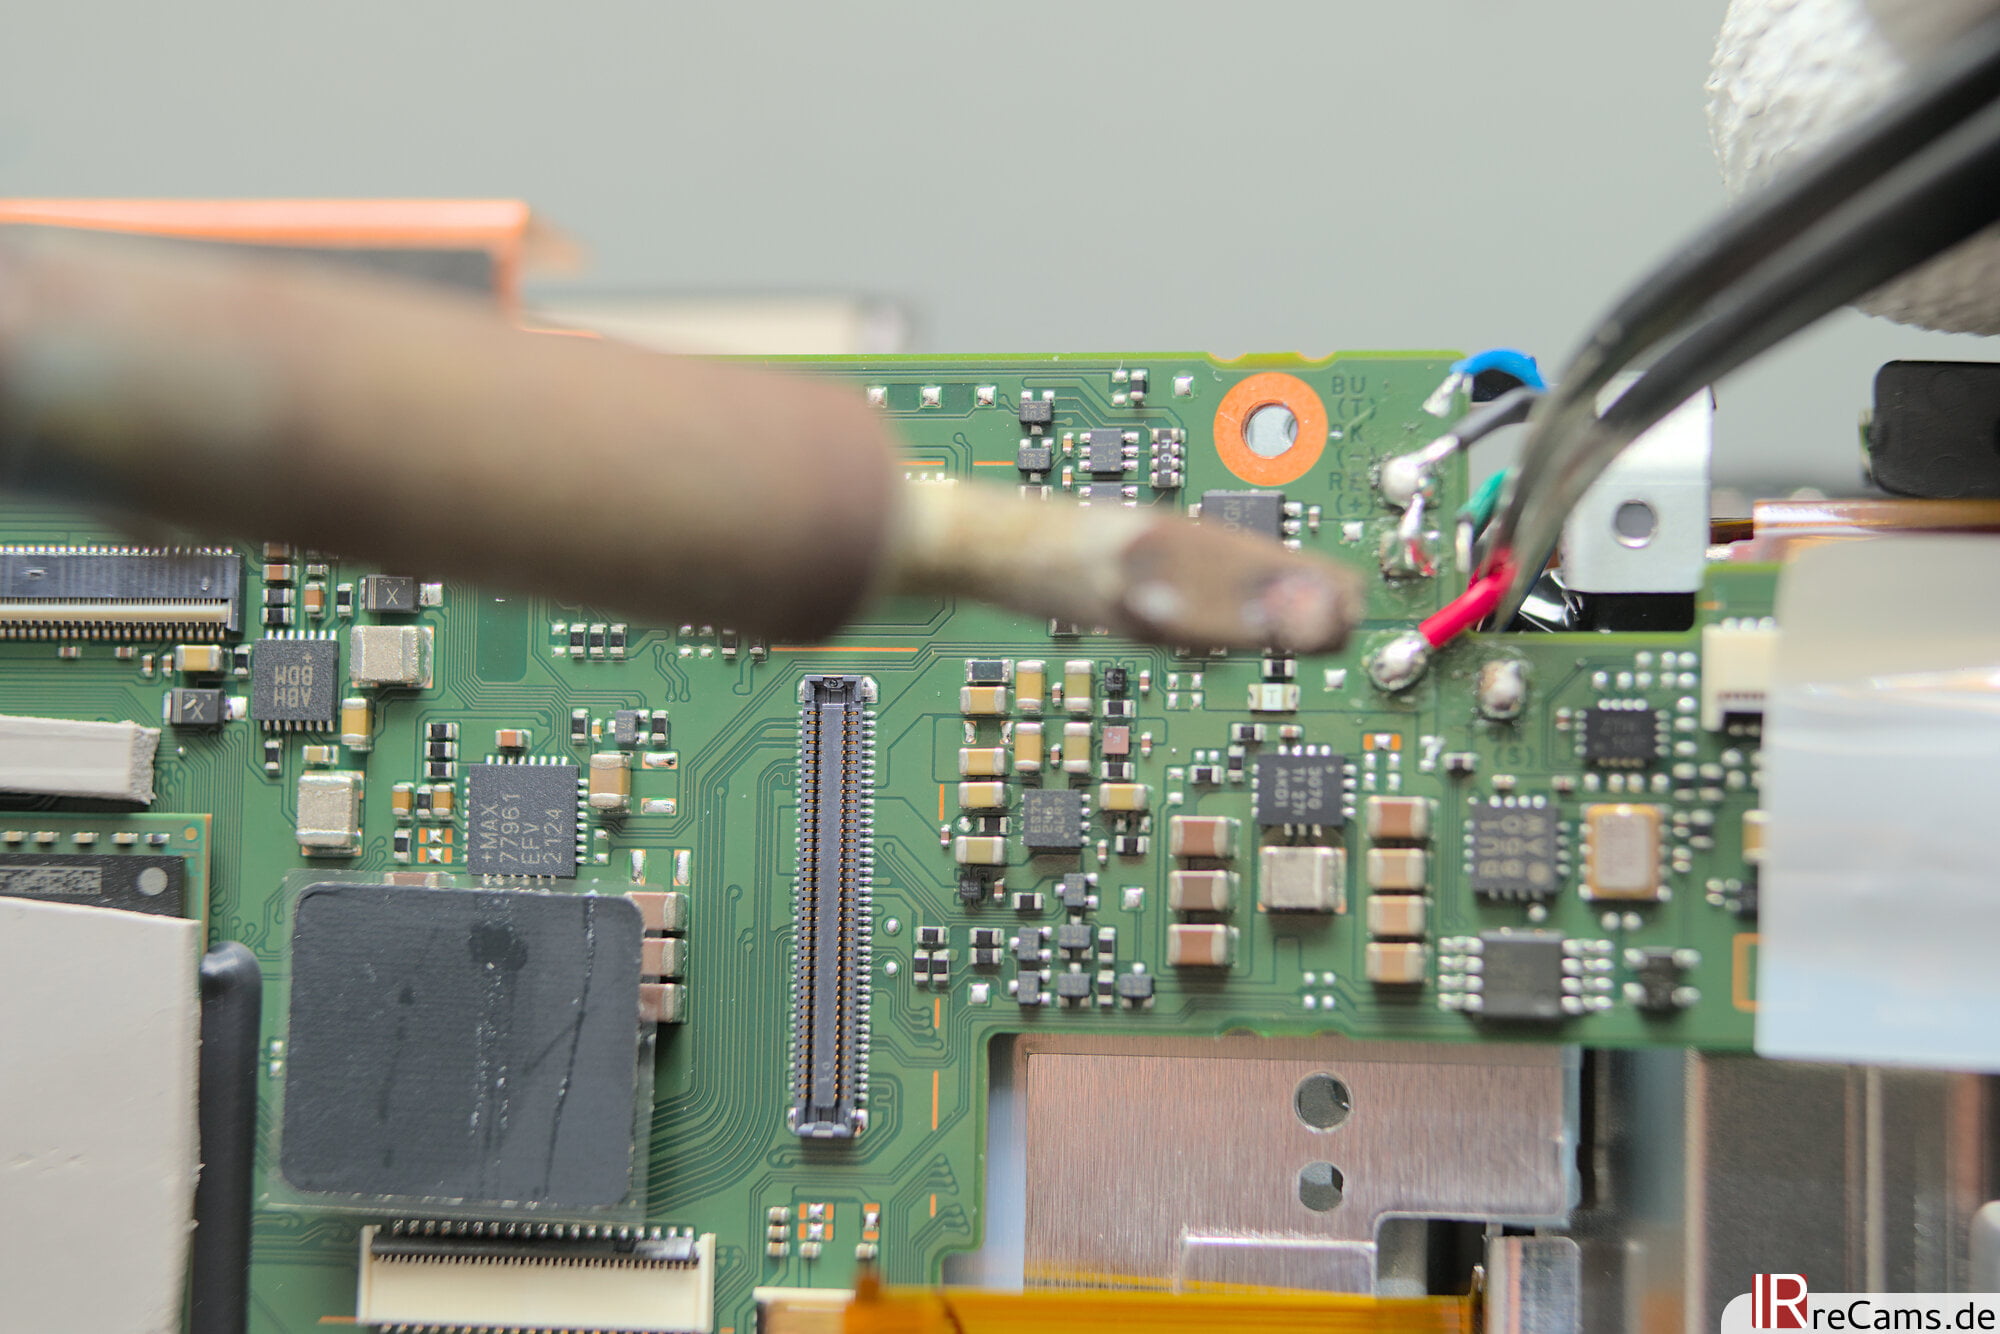
Next, the mainboard has to leave the camera. Besides some cables on the top and a handful of screws, there are also a few cables to unsolder. Similar to the X-T4, there are other cables on the underside that have to be carefully detached.
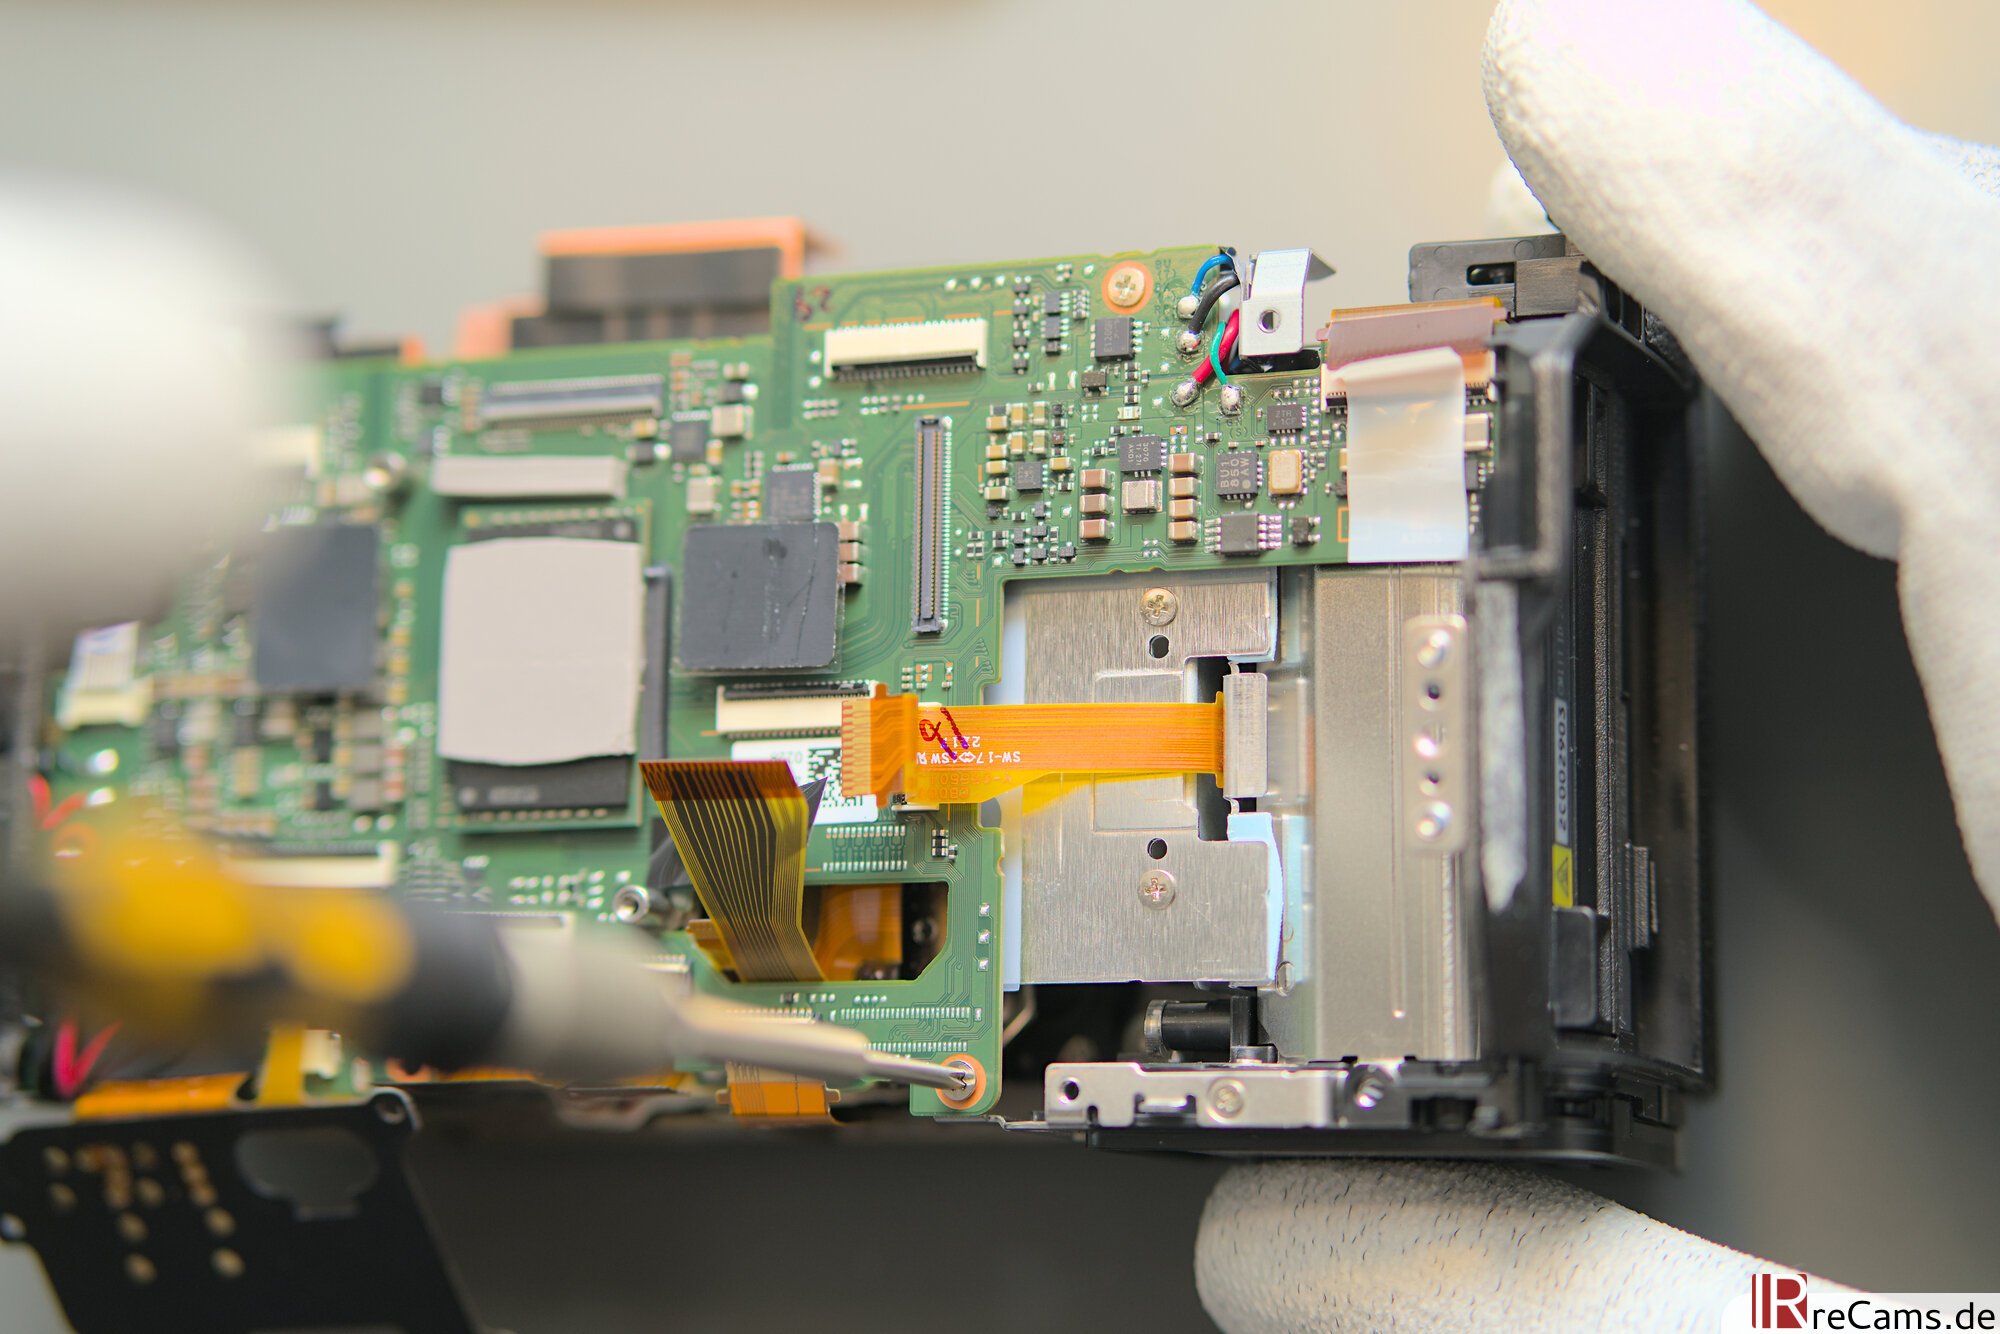
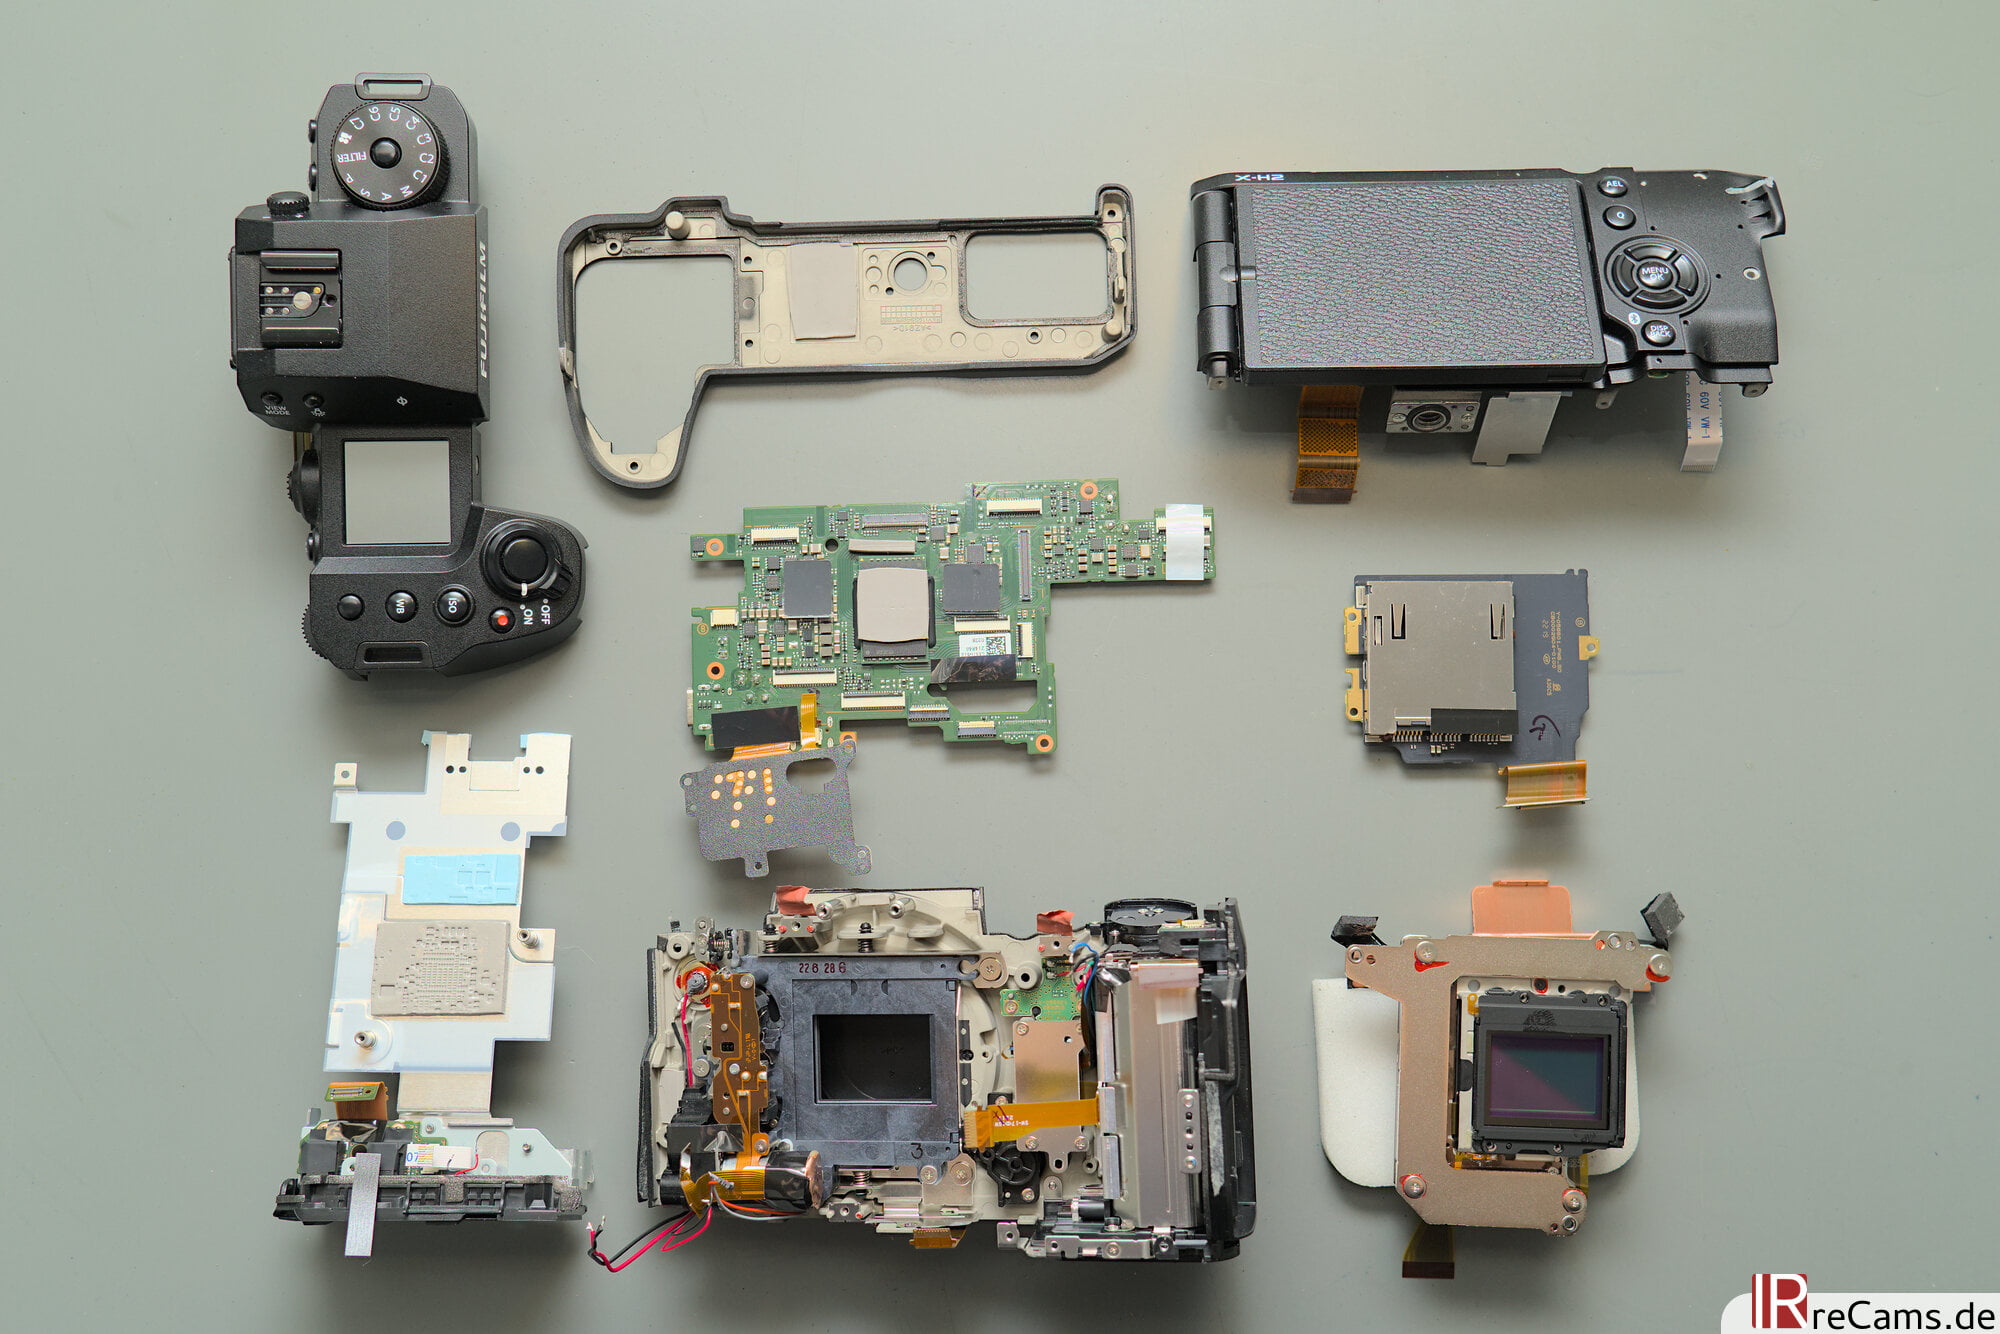
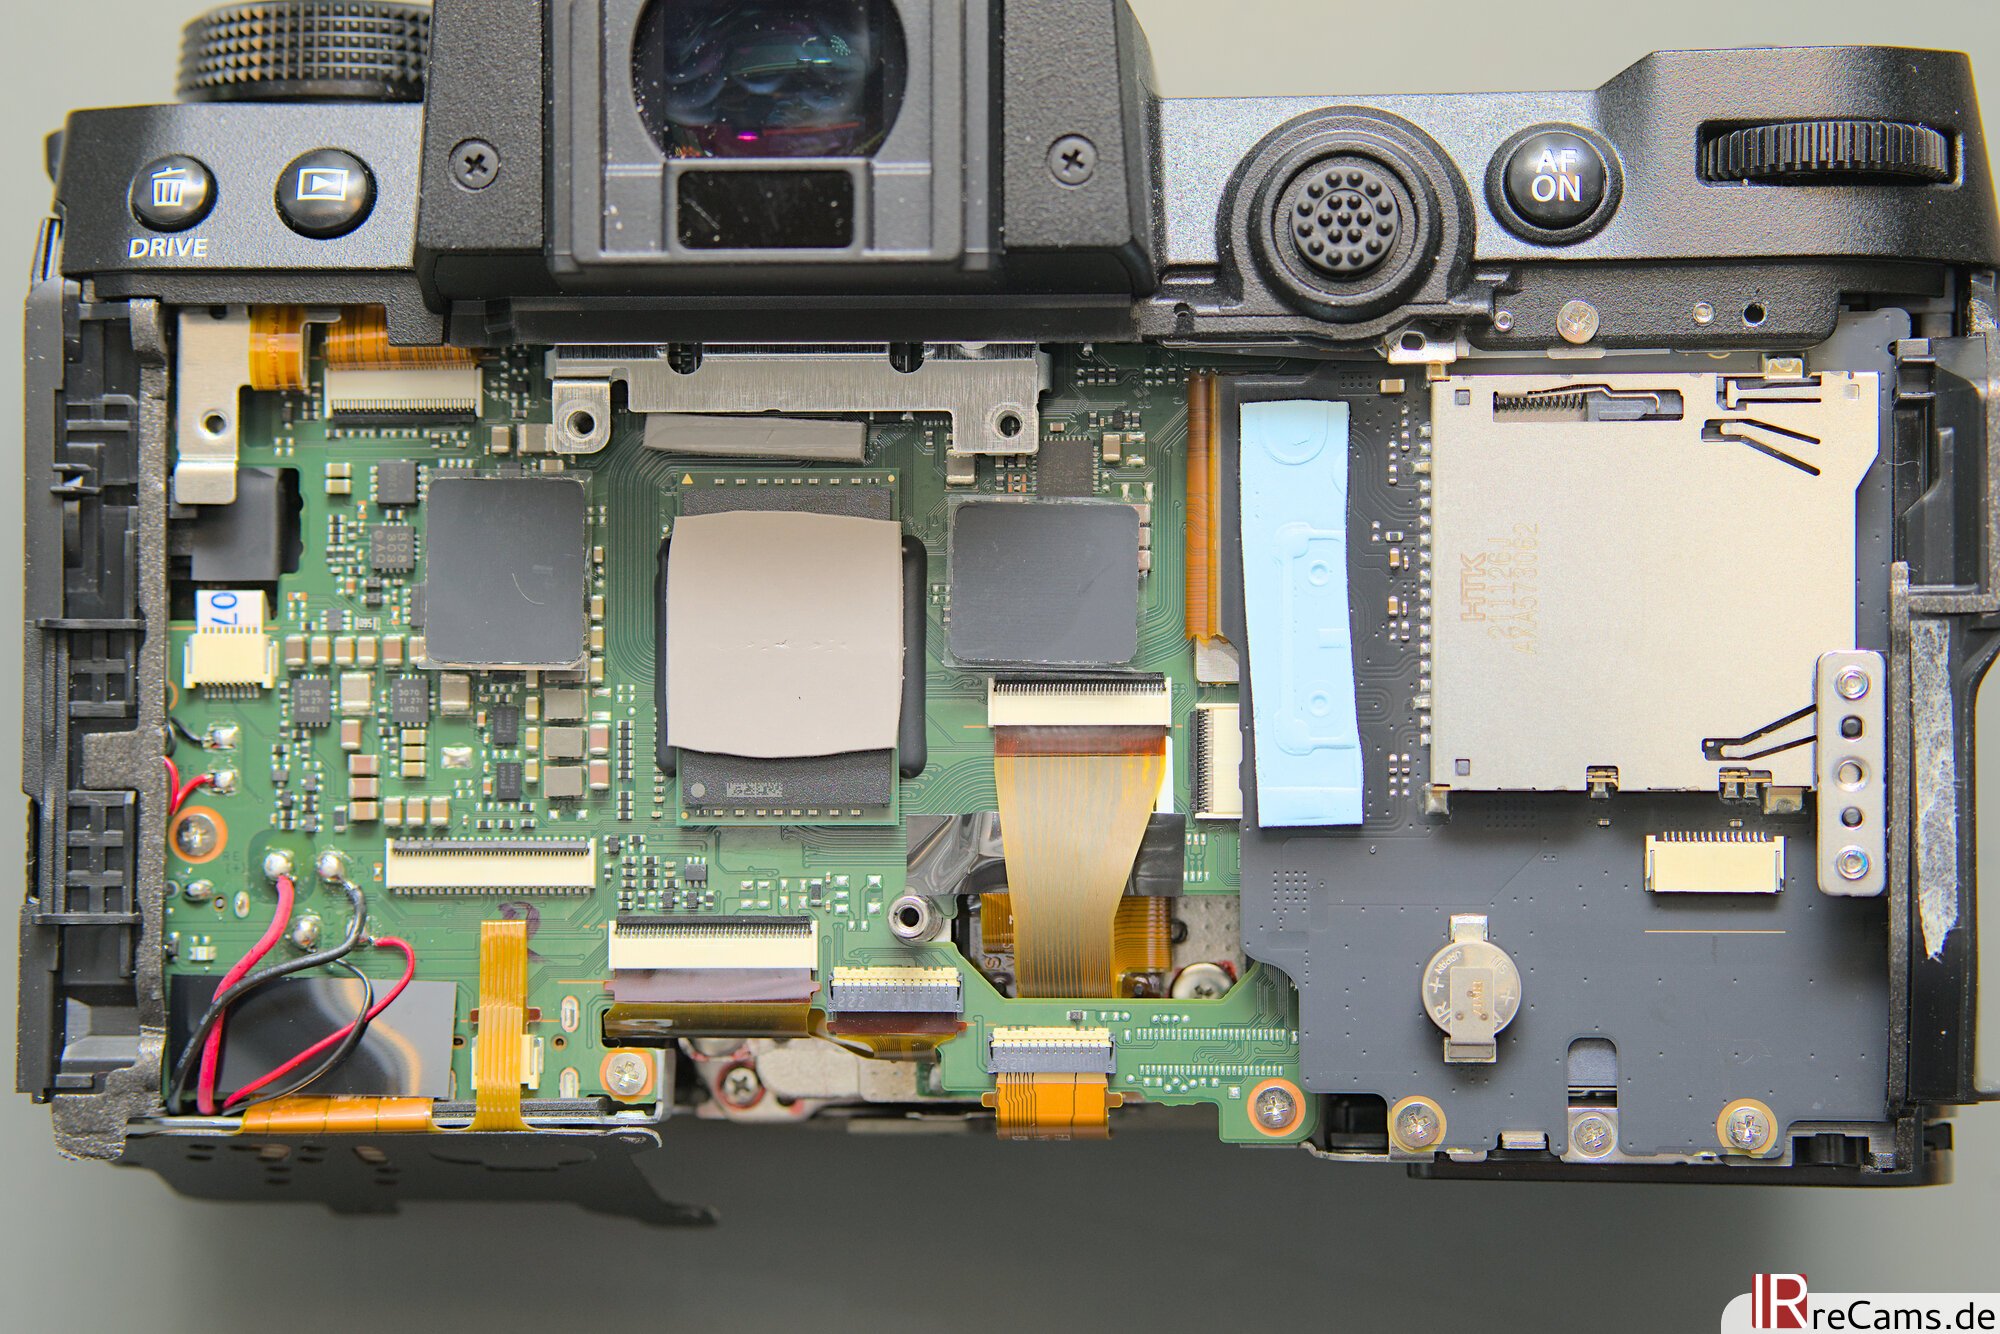
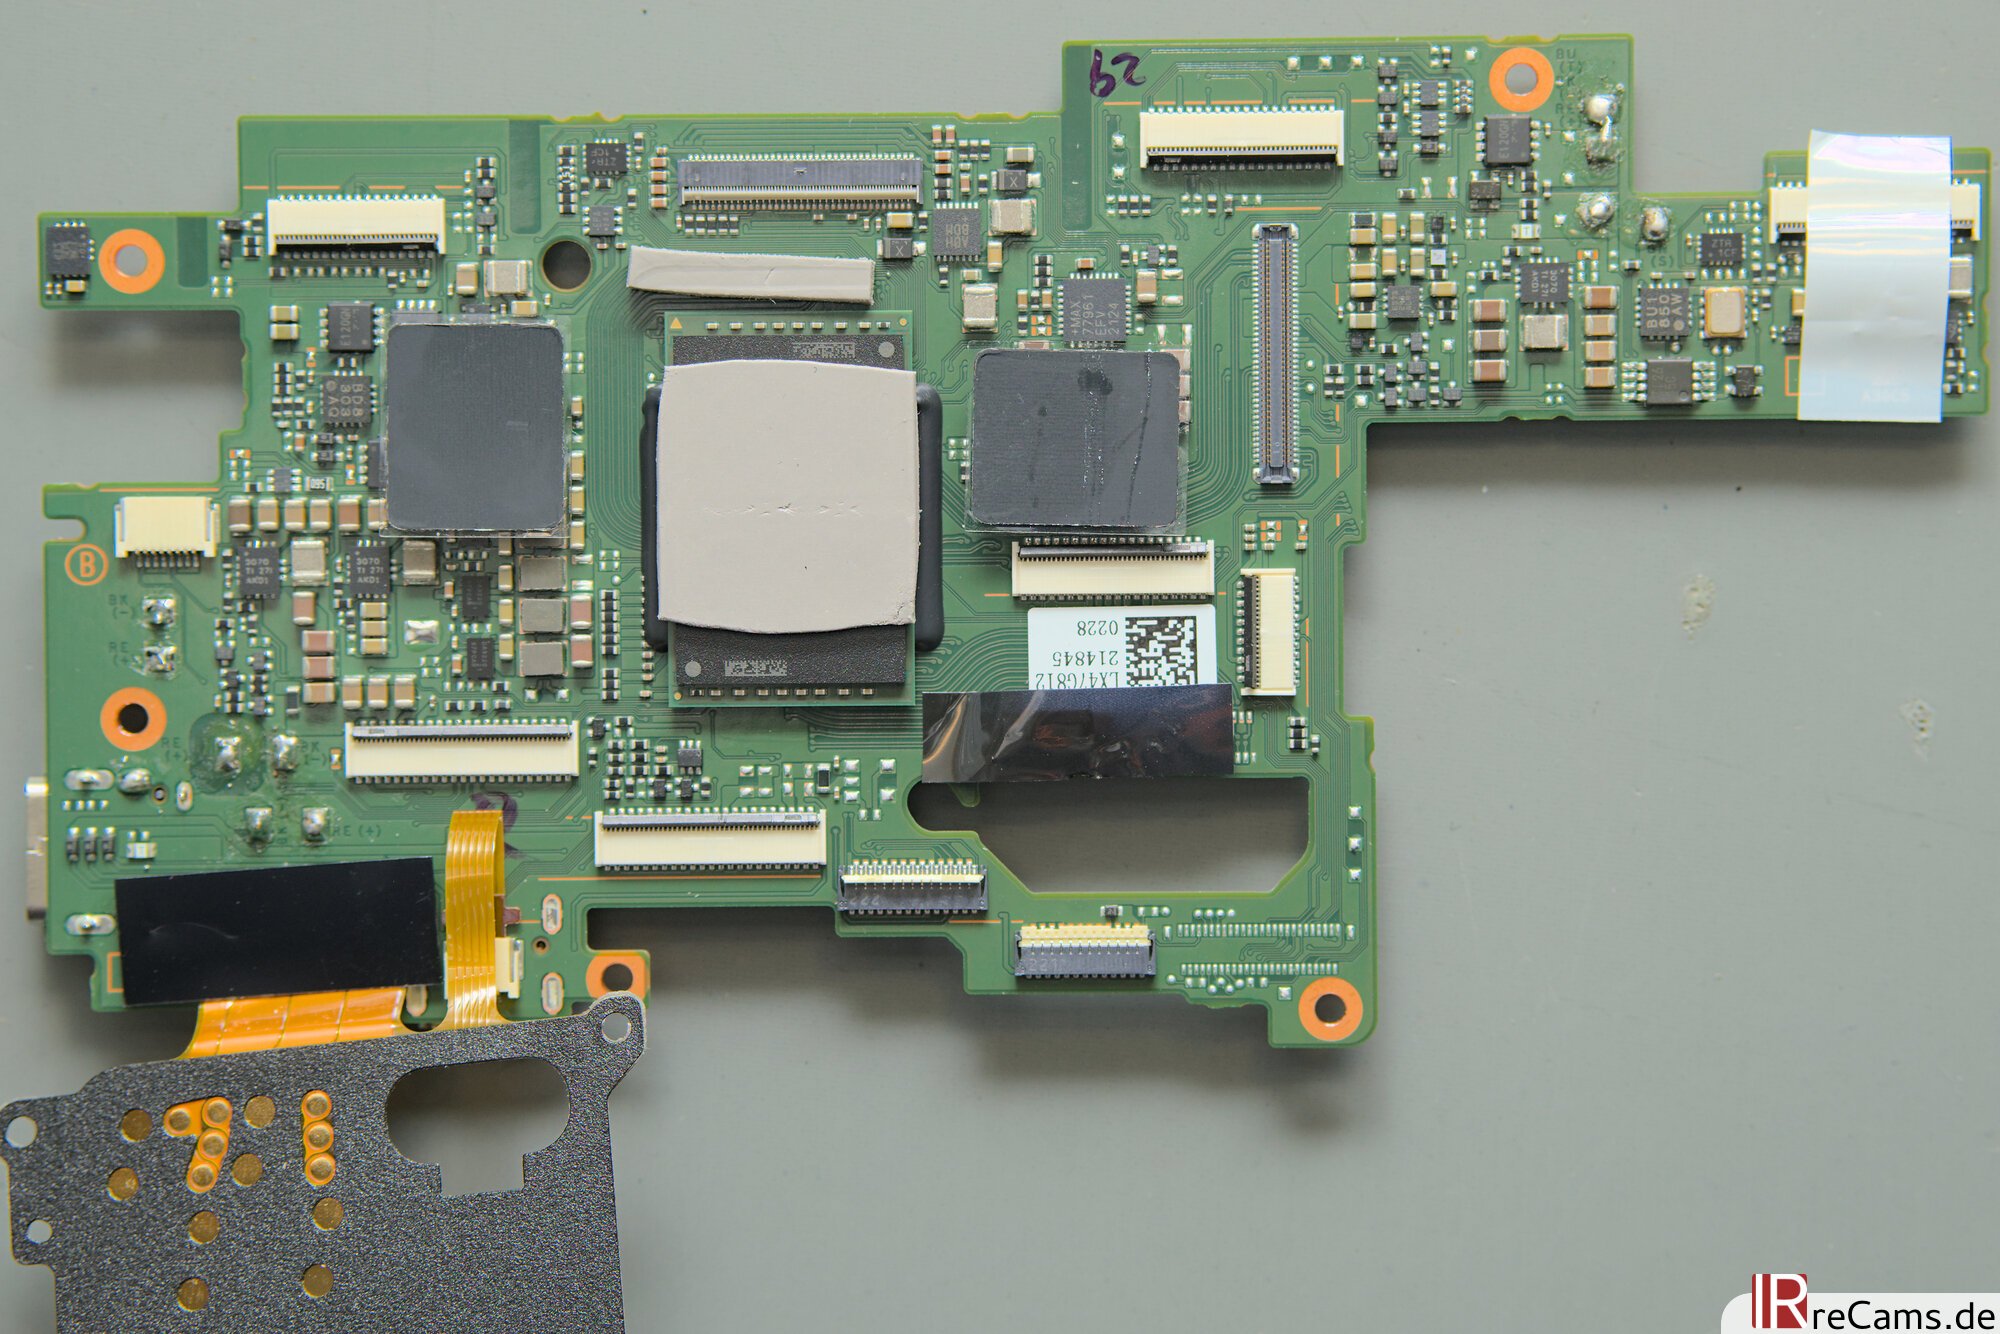
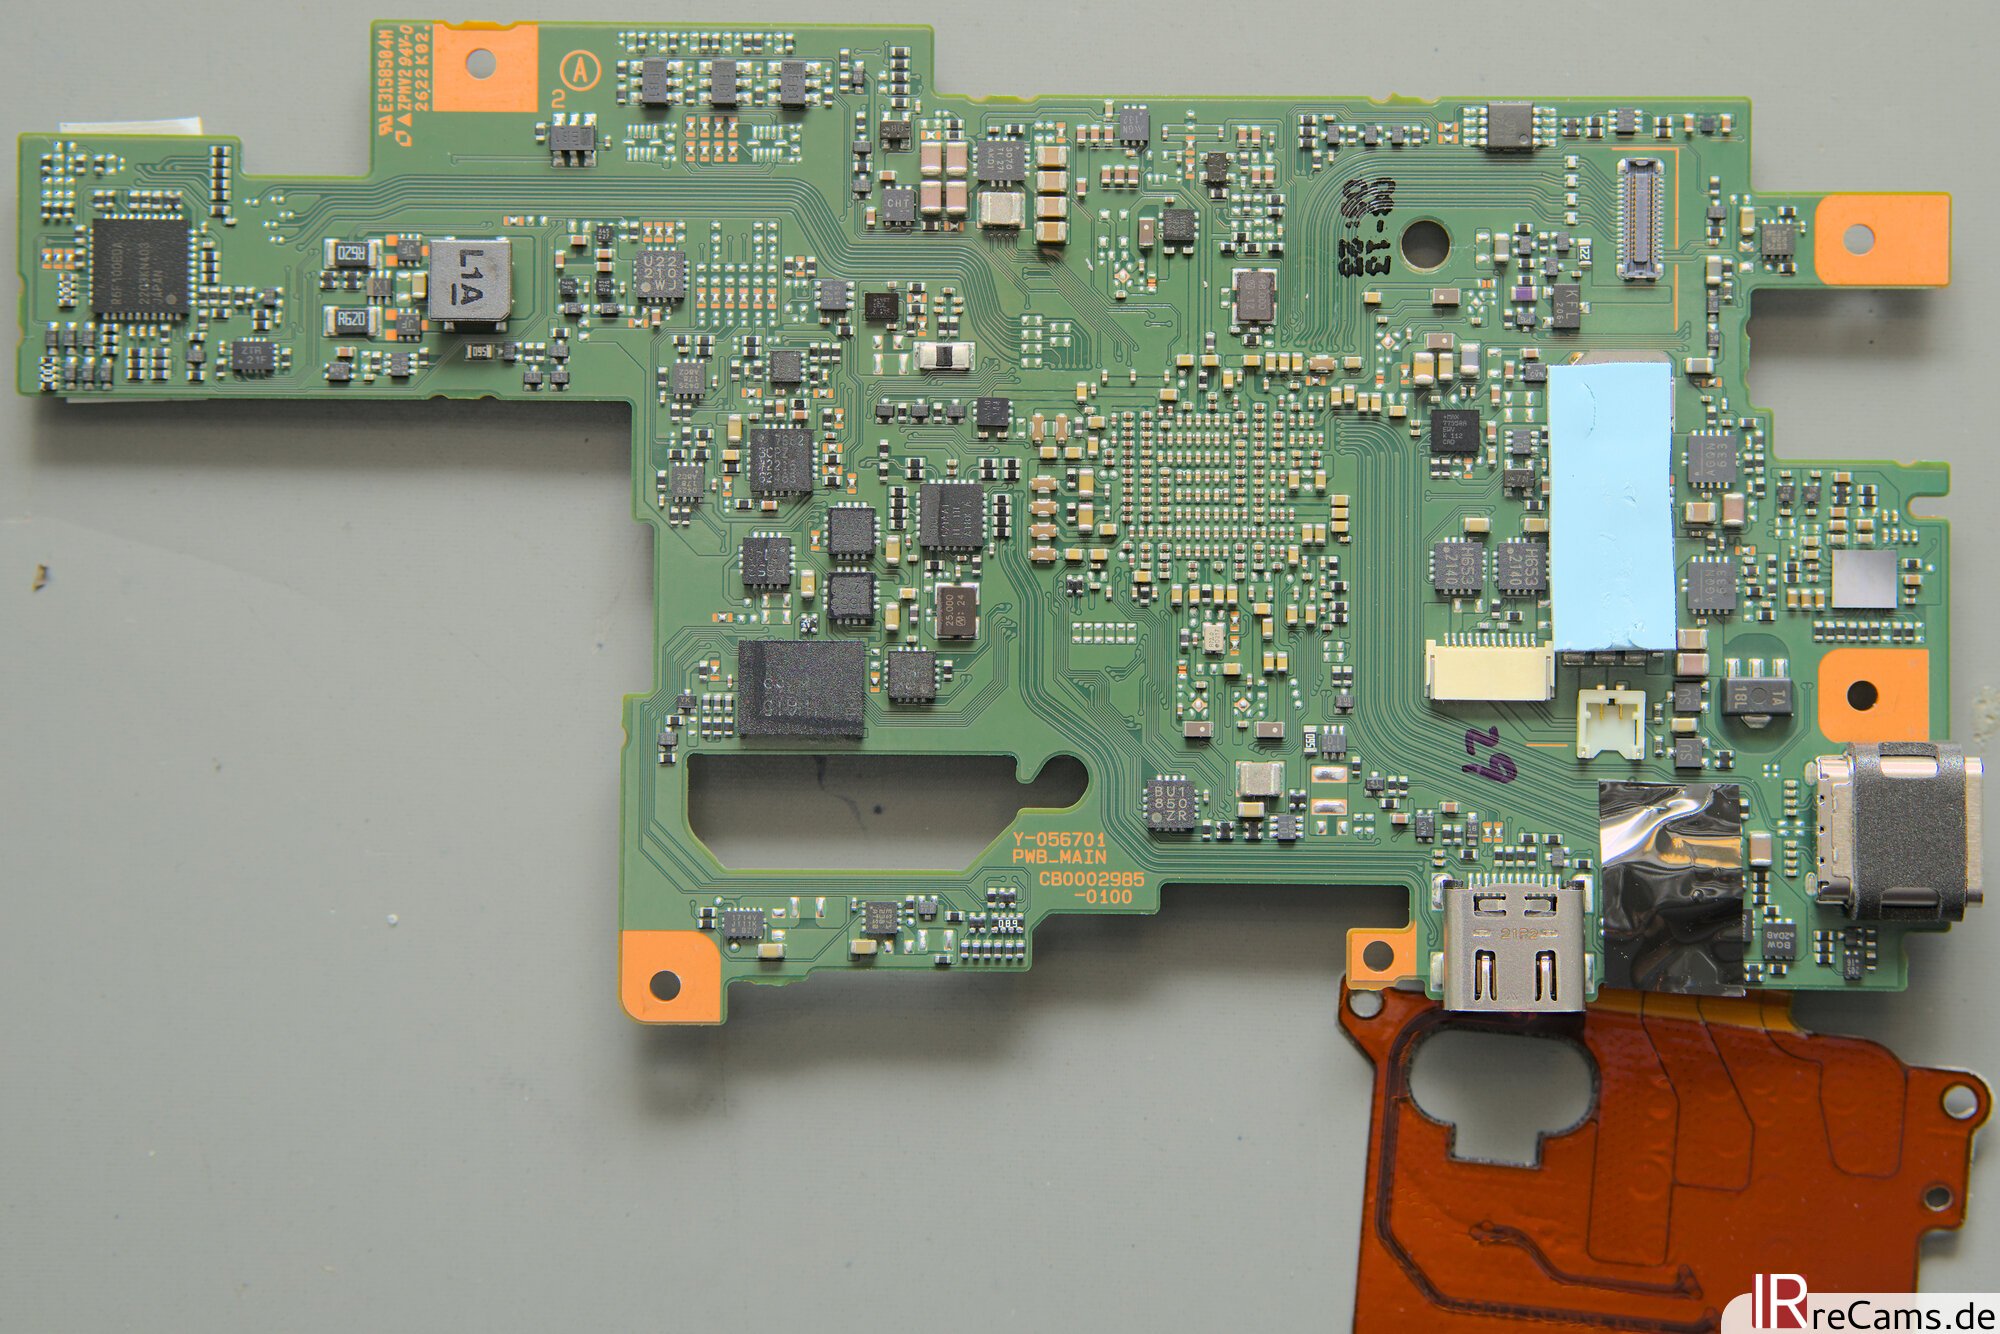
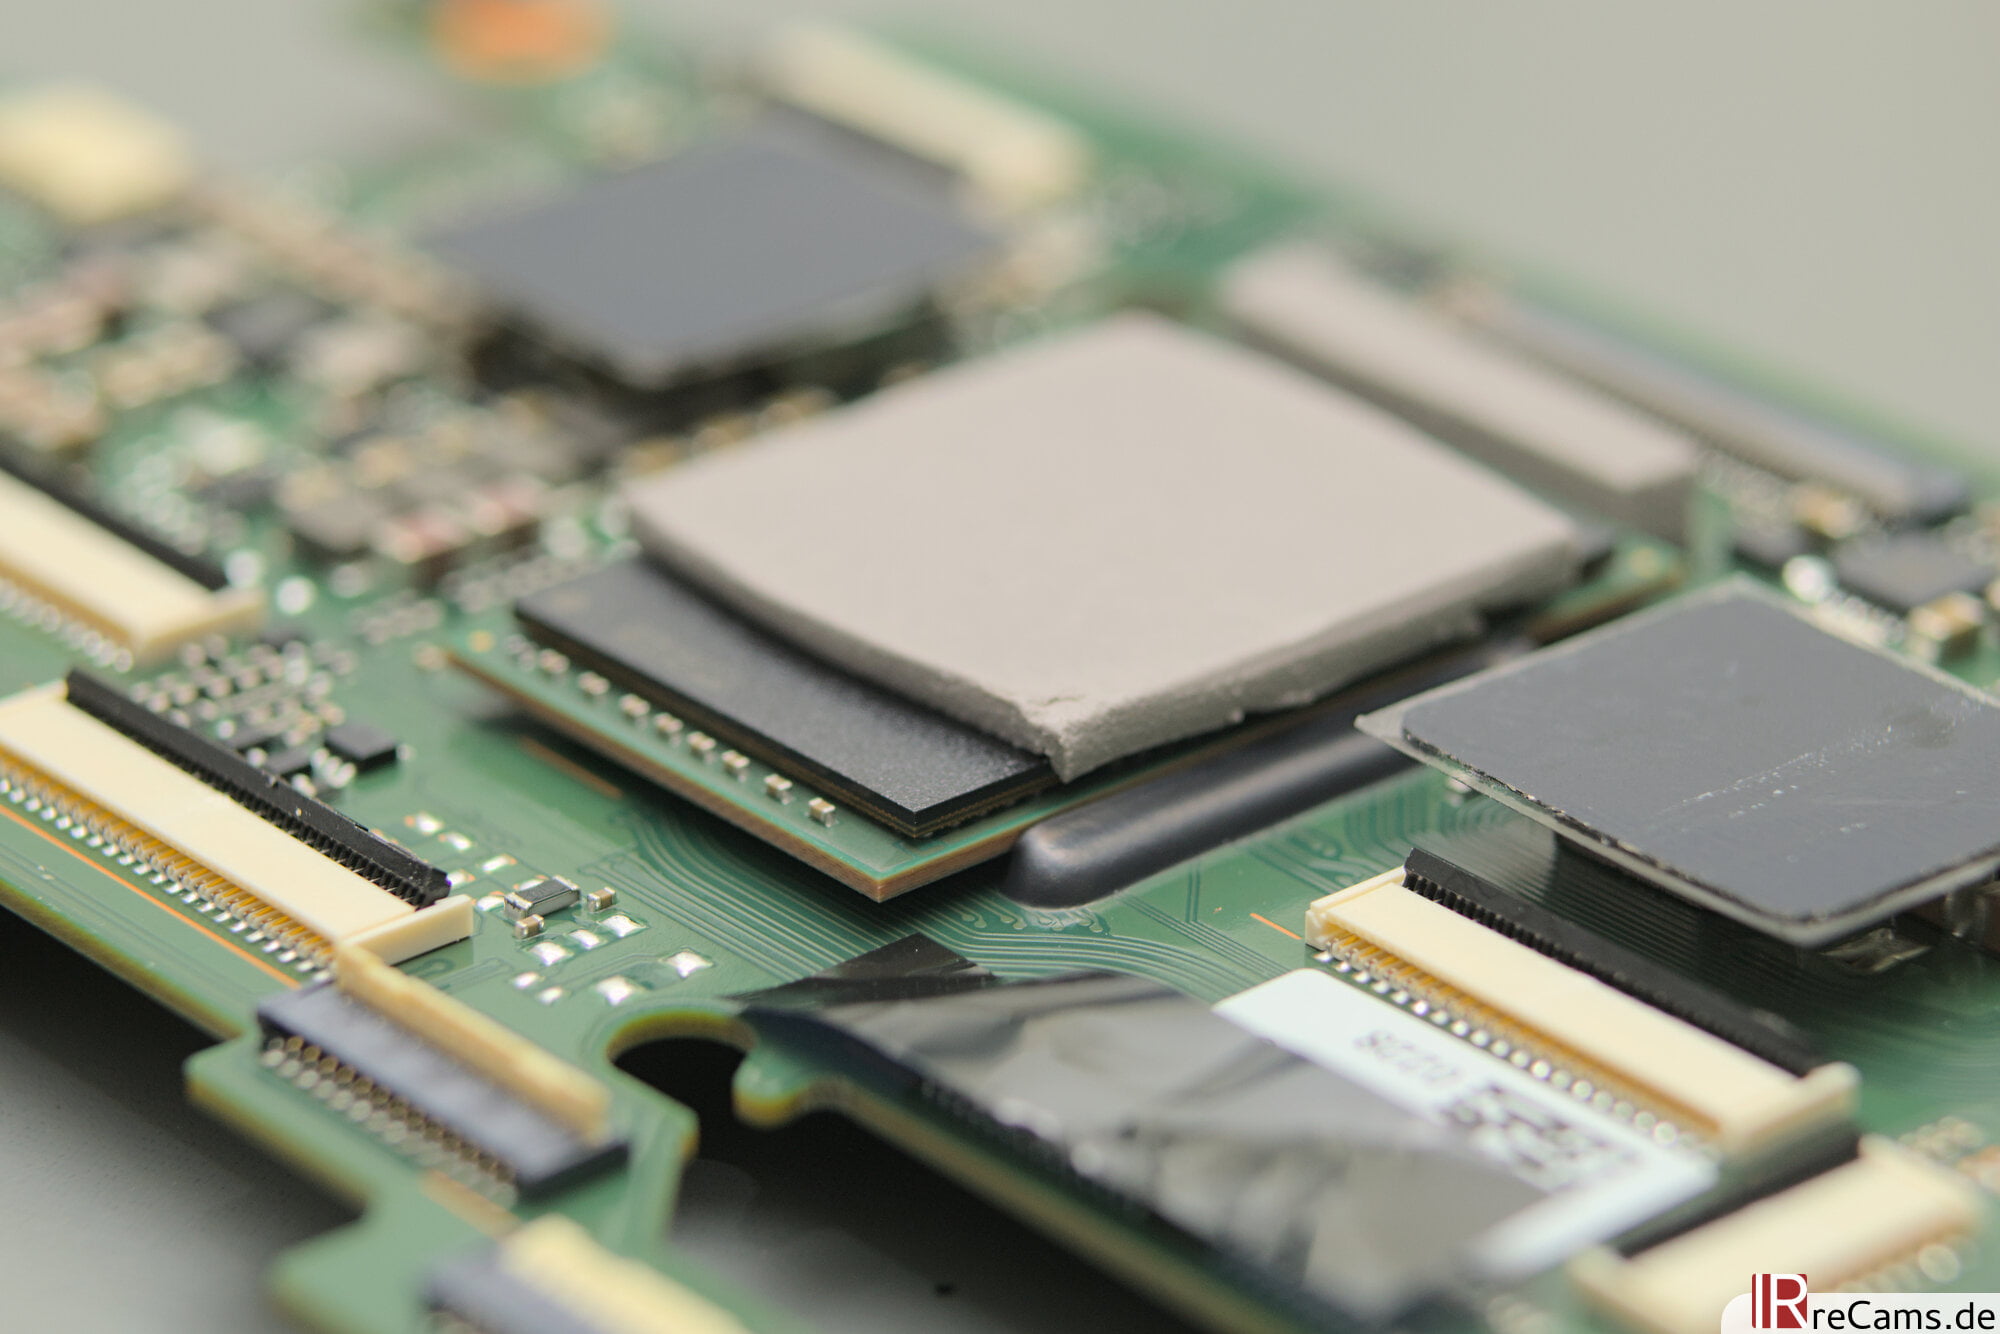
A closer look at the removed mainboard of the X-H2 reveals countless SMD components, both on the top and the bottom. With the amount of features packed into such a small camera, this is hardly surprising. The new X-Processor 5 is placed in the middle of the board, and it's slightly higher than the rest of the board. It seems to be installed on a small socket, almost floating above the other components. Whether this was designed because of the heat development, or has entirely different reasons, can only be speculated. In any case, the processor is covered with a heat conduction pad and thus establishes the already mentioned connection to the camera's back plate.
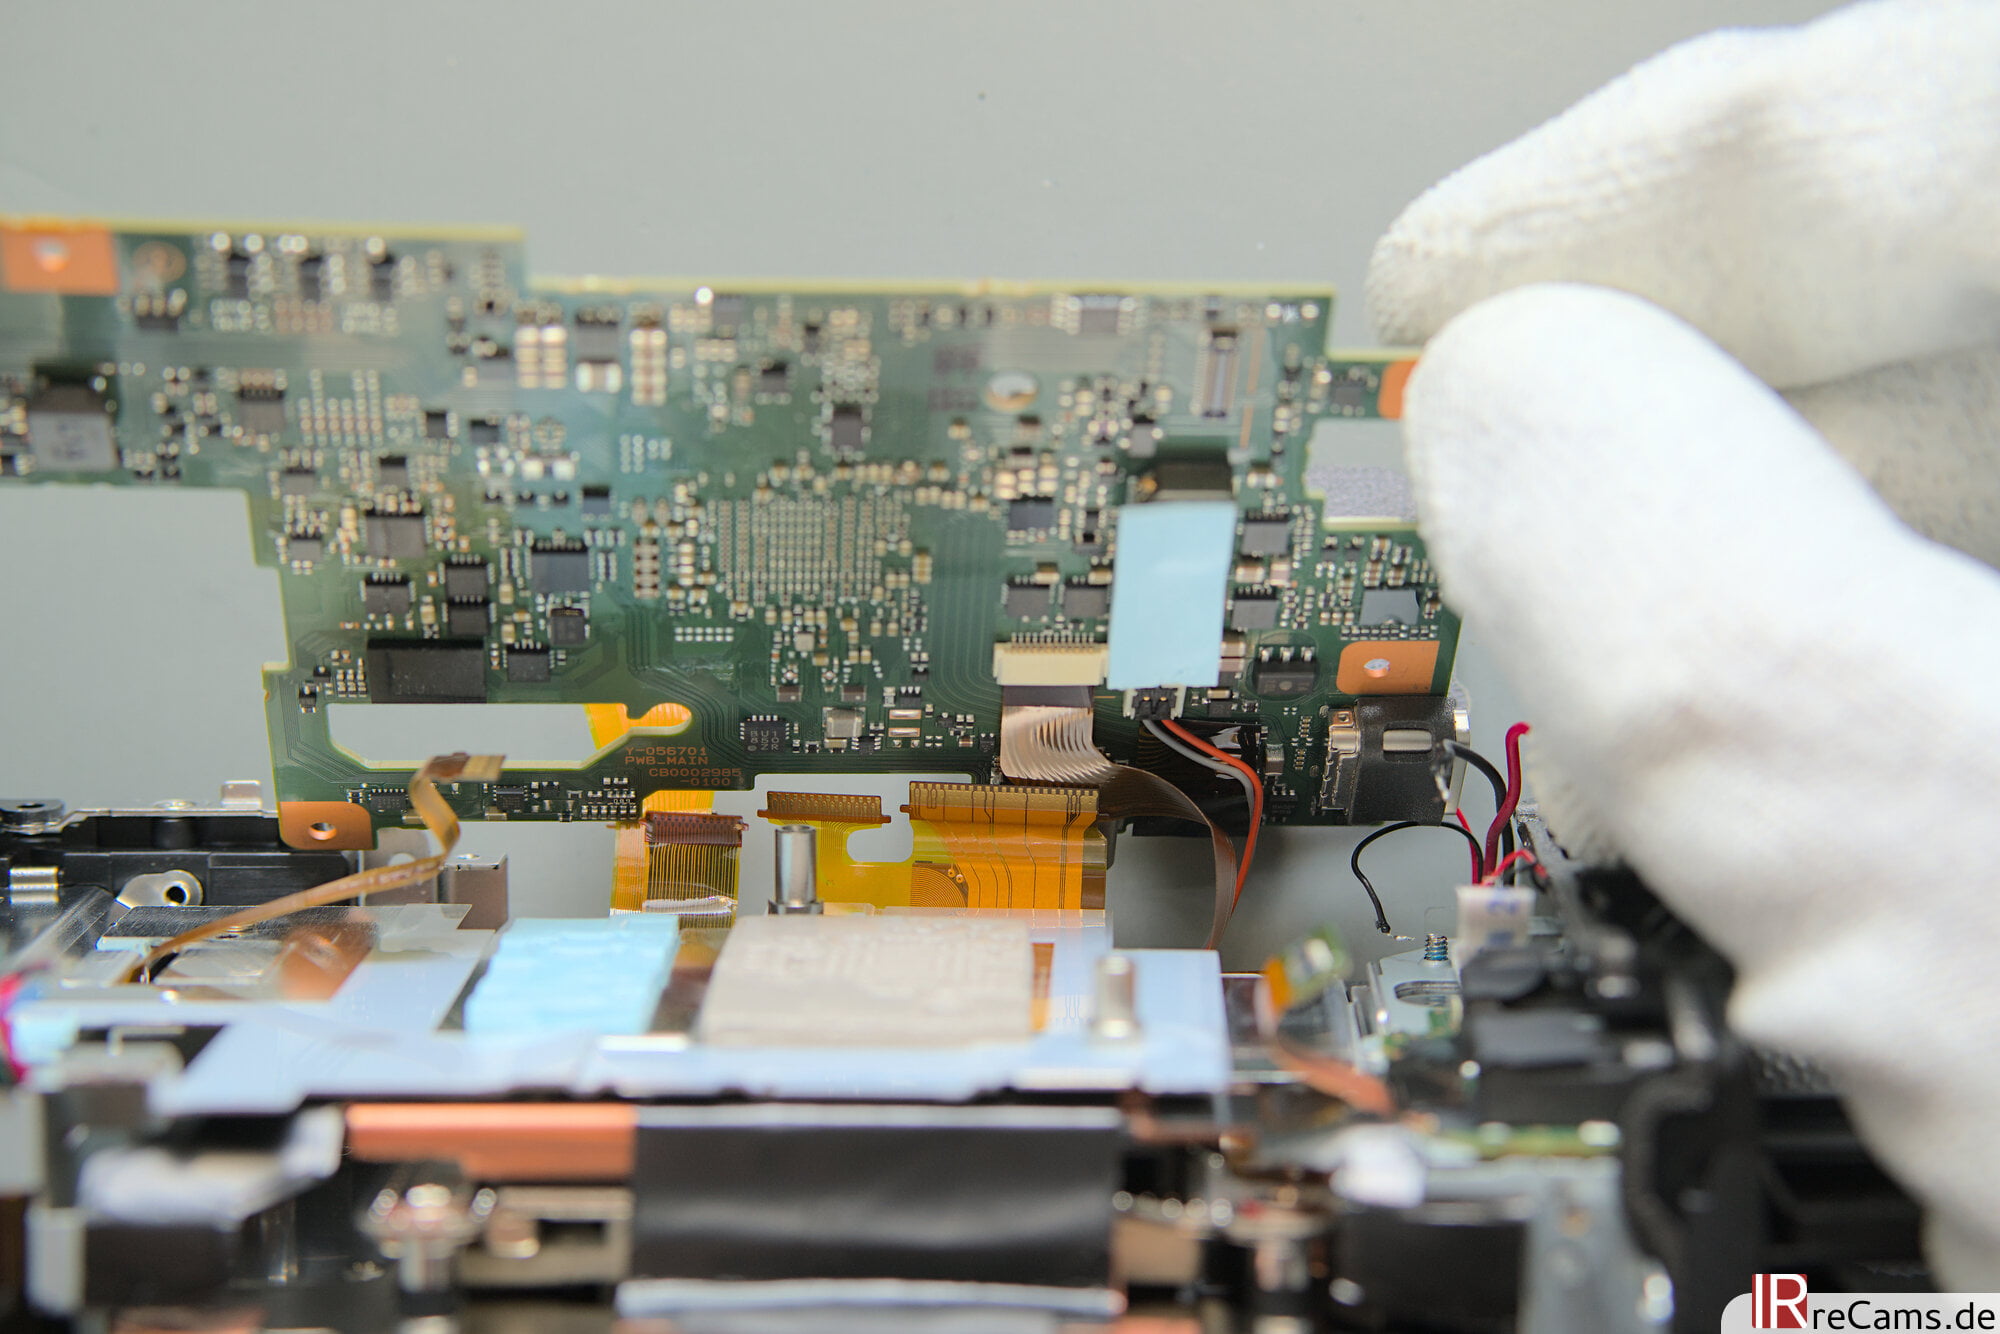
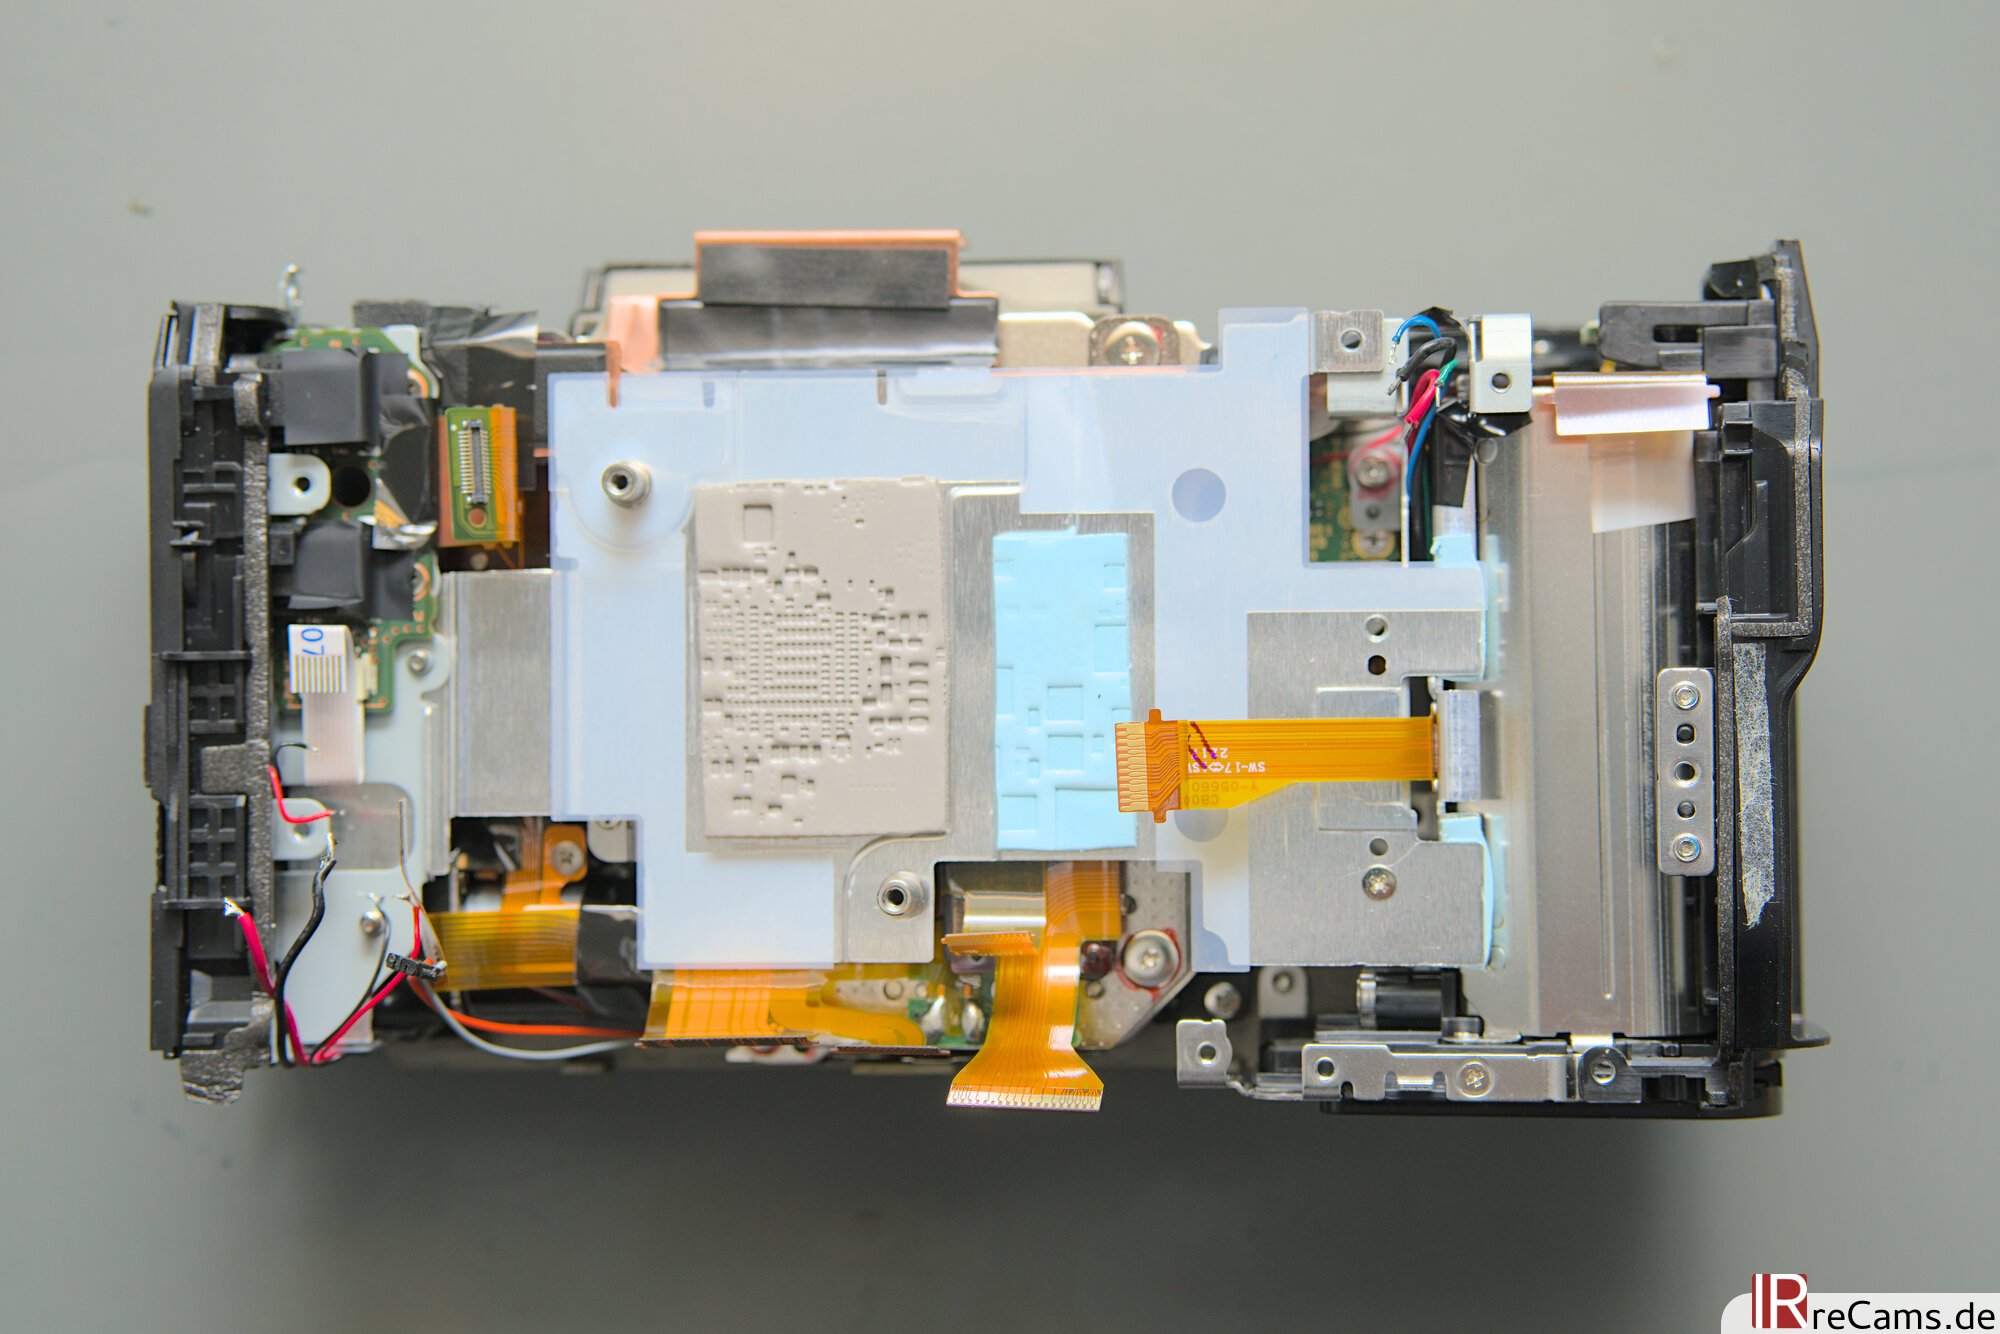
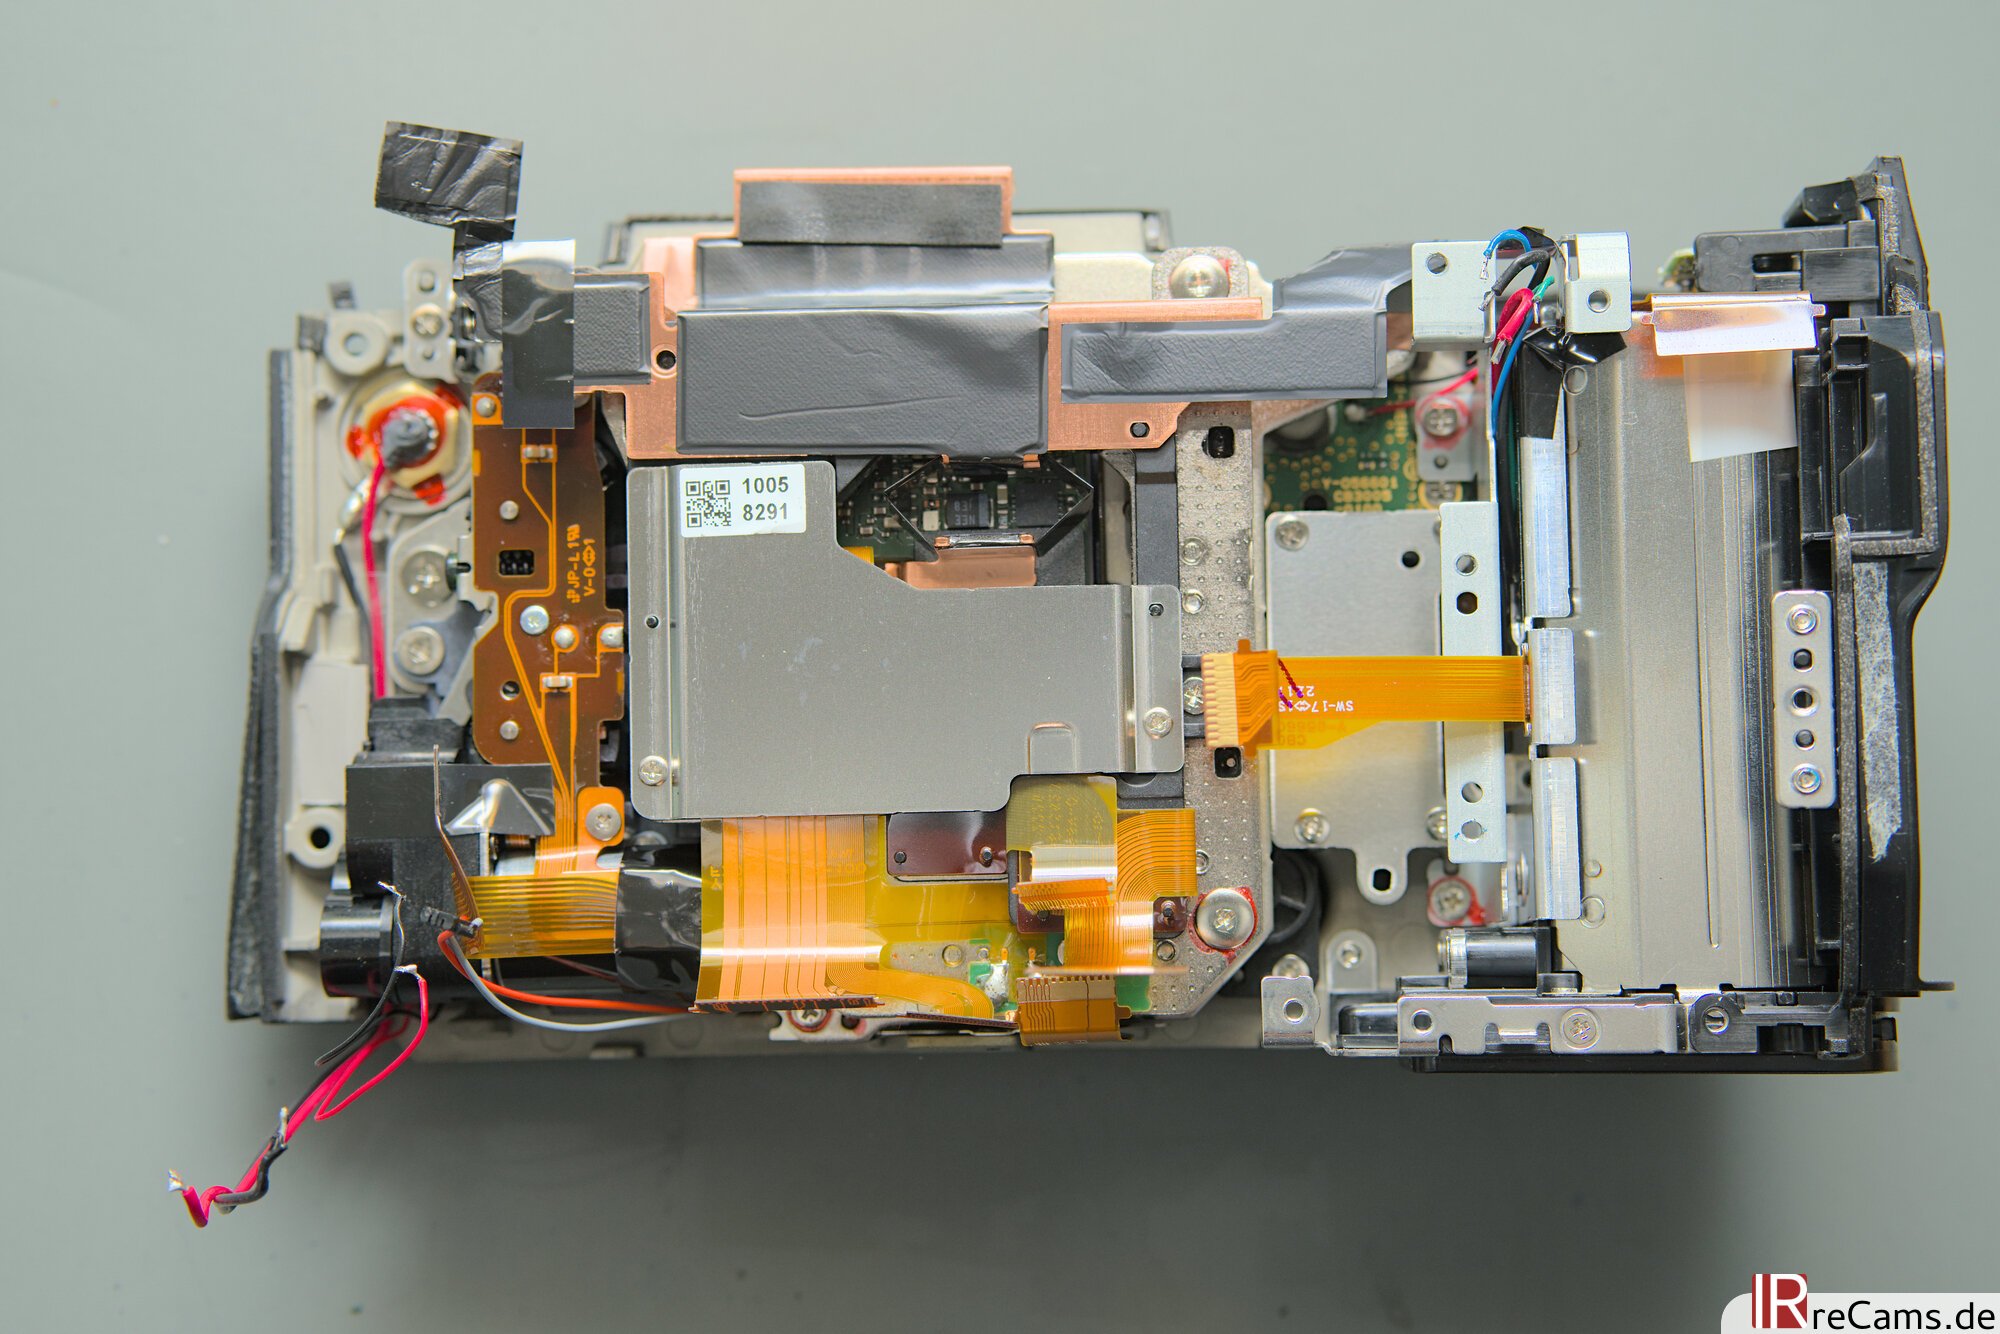
Back to the camera: Directly underneath the removed mainboard is another aluminum plate with large heat conduction pads. This middle frame is probably not only responsible for the mechanical stability of the camera, but also absorbs the excess heat of the SMD components on the underside of the motherboard and dissipates it. Interestingly, the mini board on the left side should also be mentioned. The microphone and headphone jack are integrated here. Many manufacturers now build these into higher-end cameras on separate small circuit boards instead of integrating them directly onto the motherboard. I can only speculate, but presumably the noise performance is a bit better when these connectors are more clearly separated from the rest of the electronics.
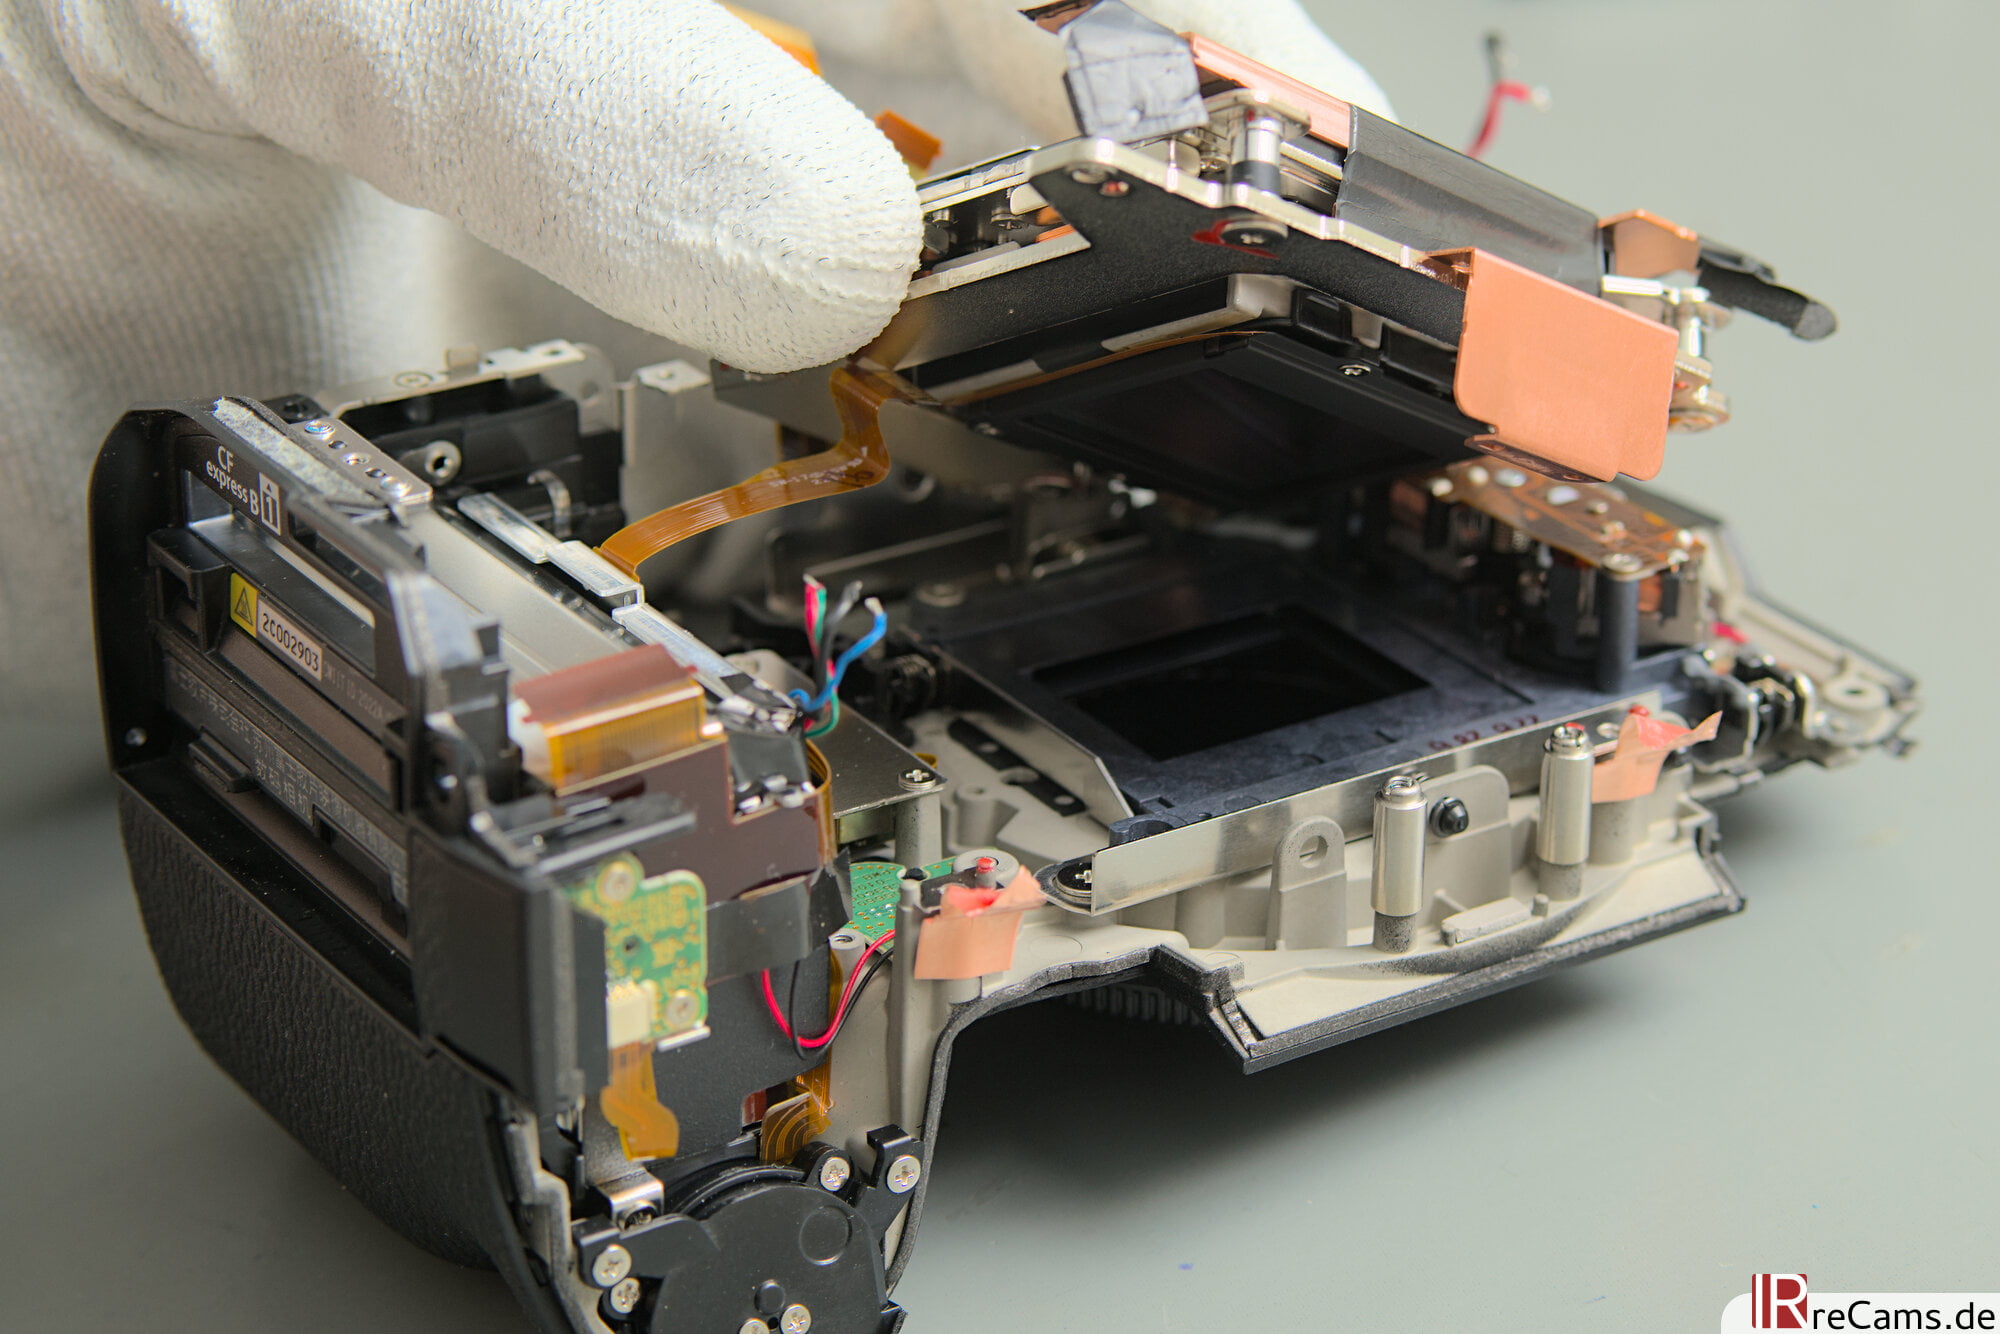
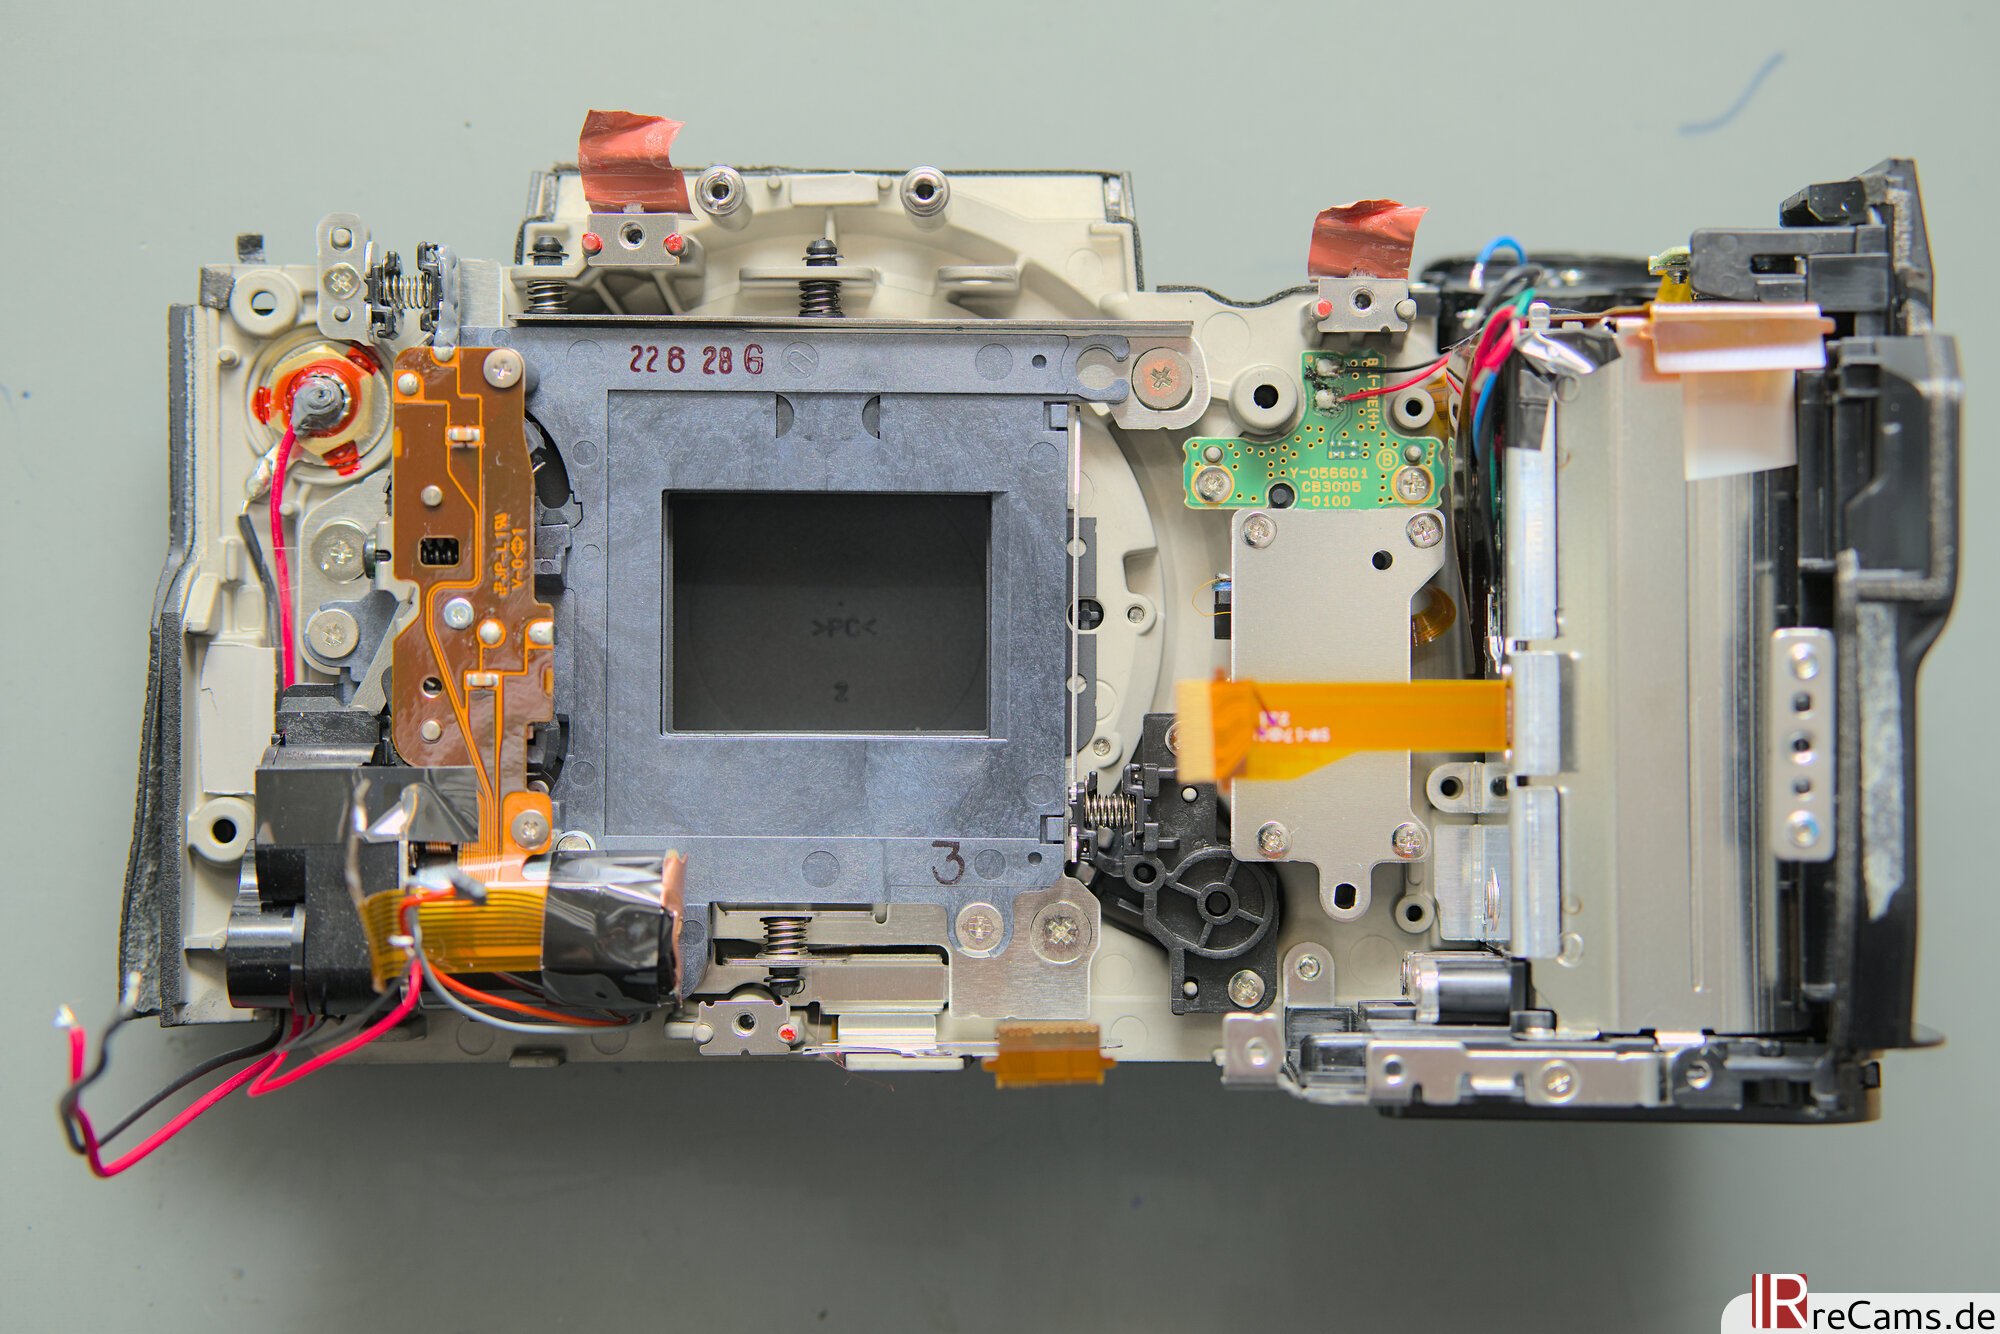
Just below the center frame, the IBIS unit with the new X-Trans 5 HR sensor is visible. Next to the shutter mechanism and the battery compartment, you can clearly see how much space this component takes up in the camera. The module can be removed relatively quickly and easily with 3 screws.
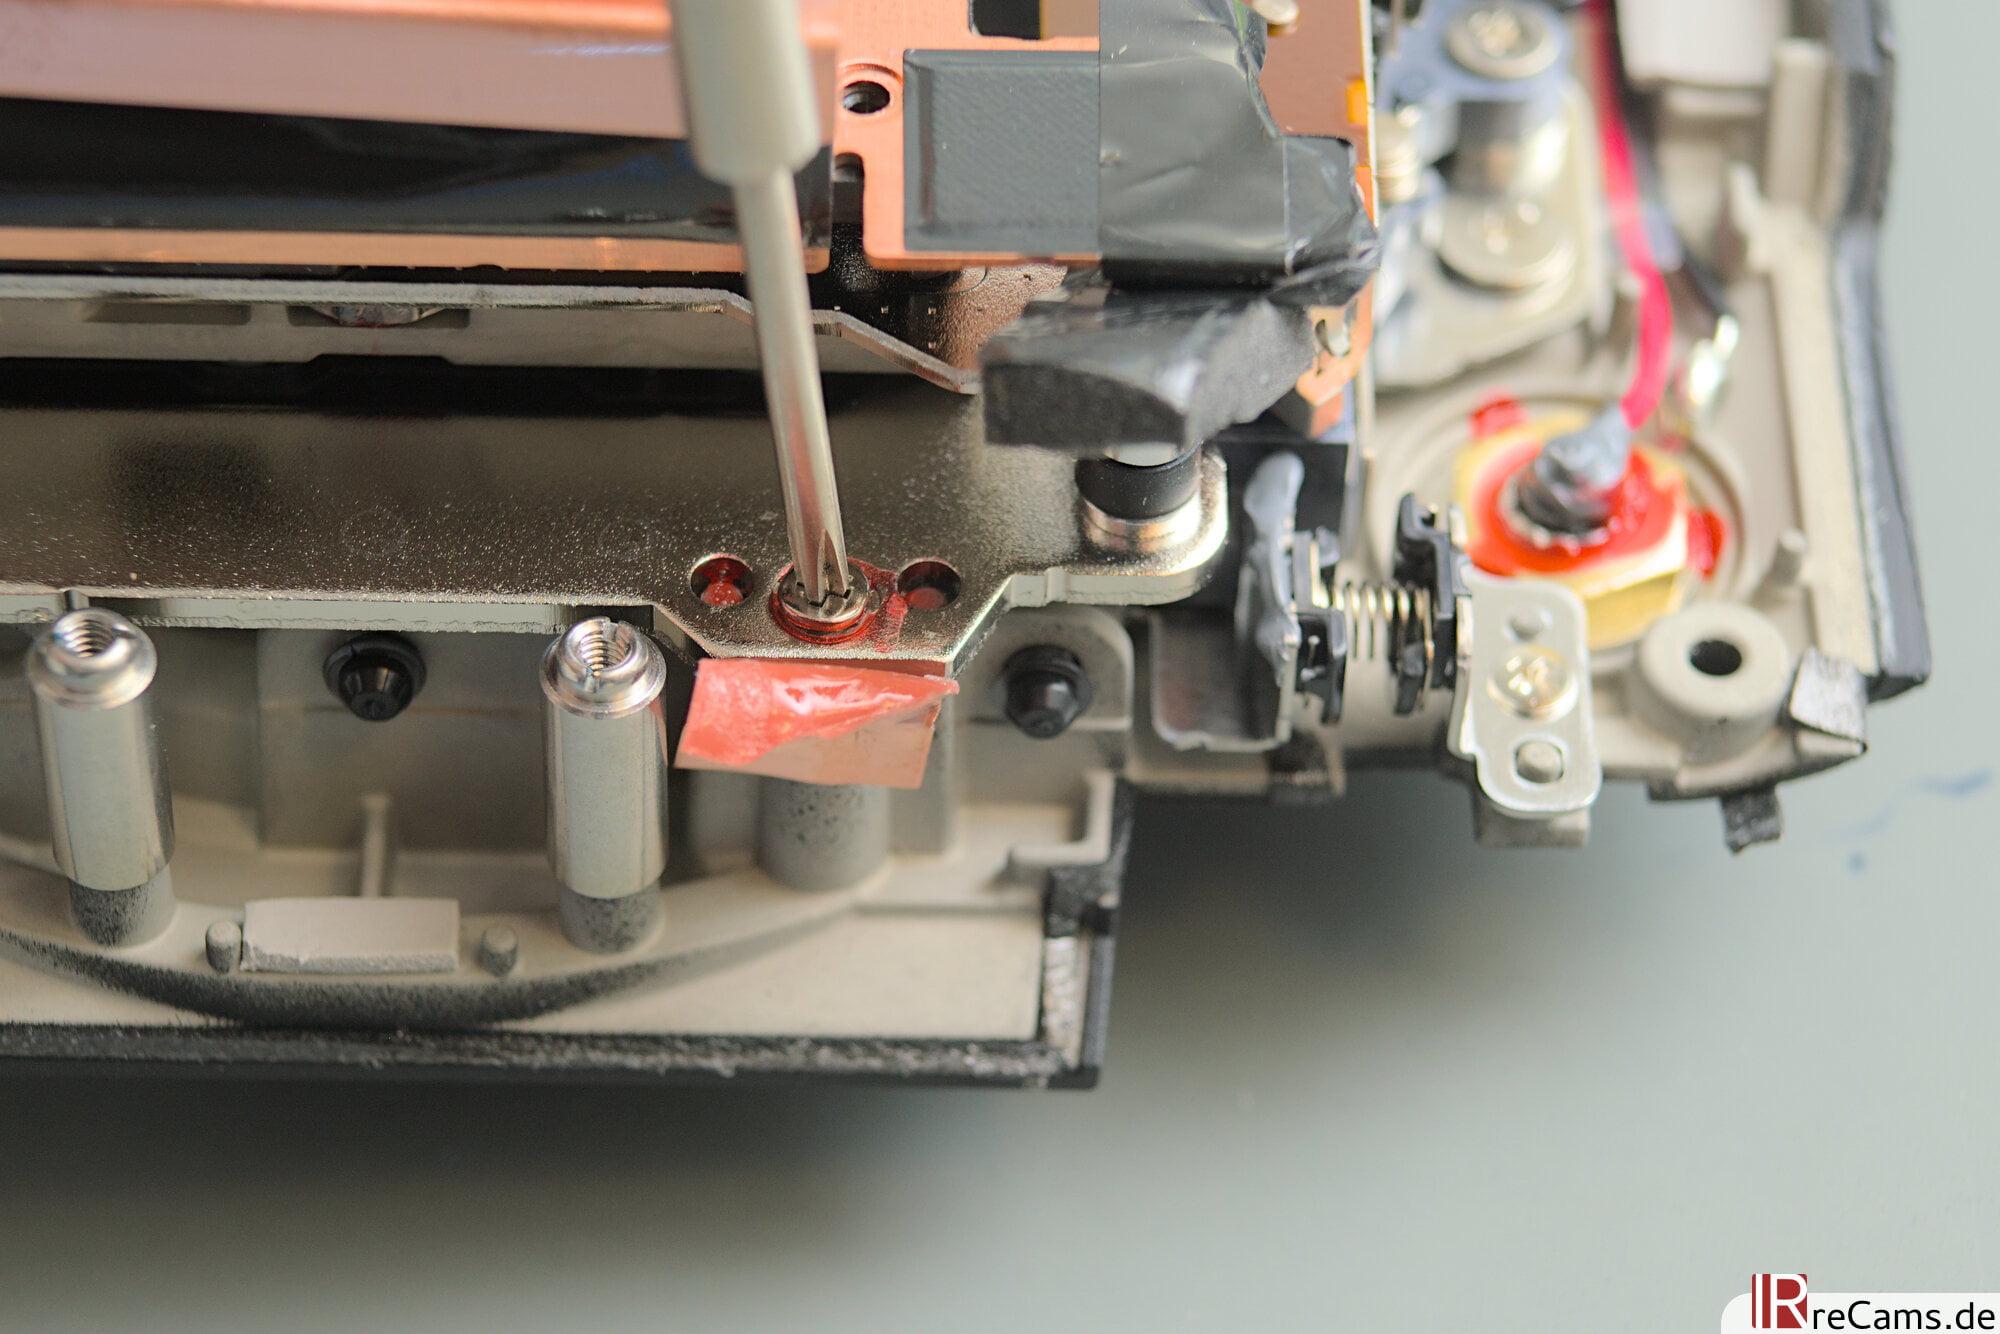
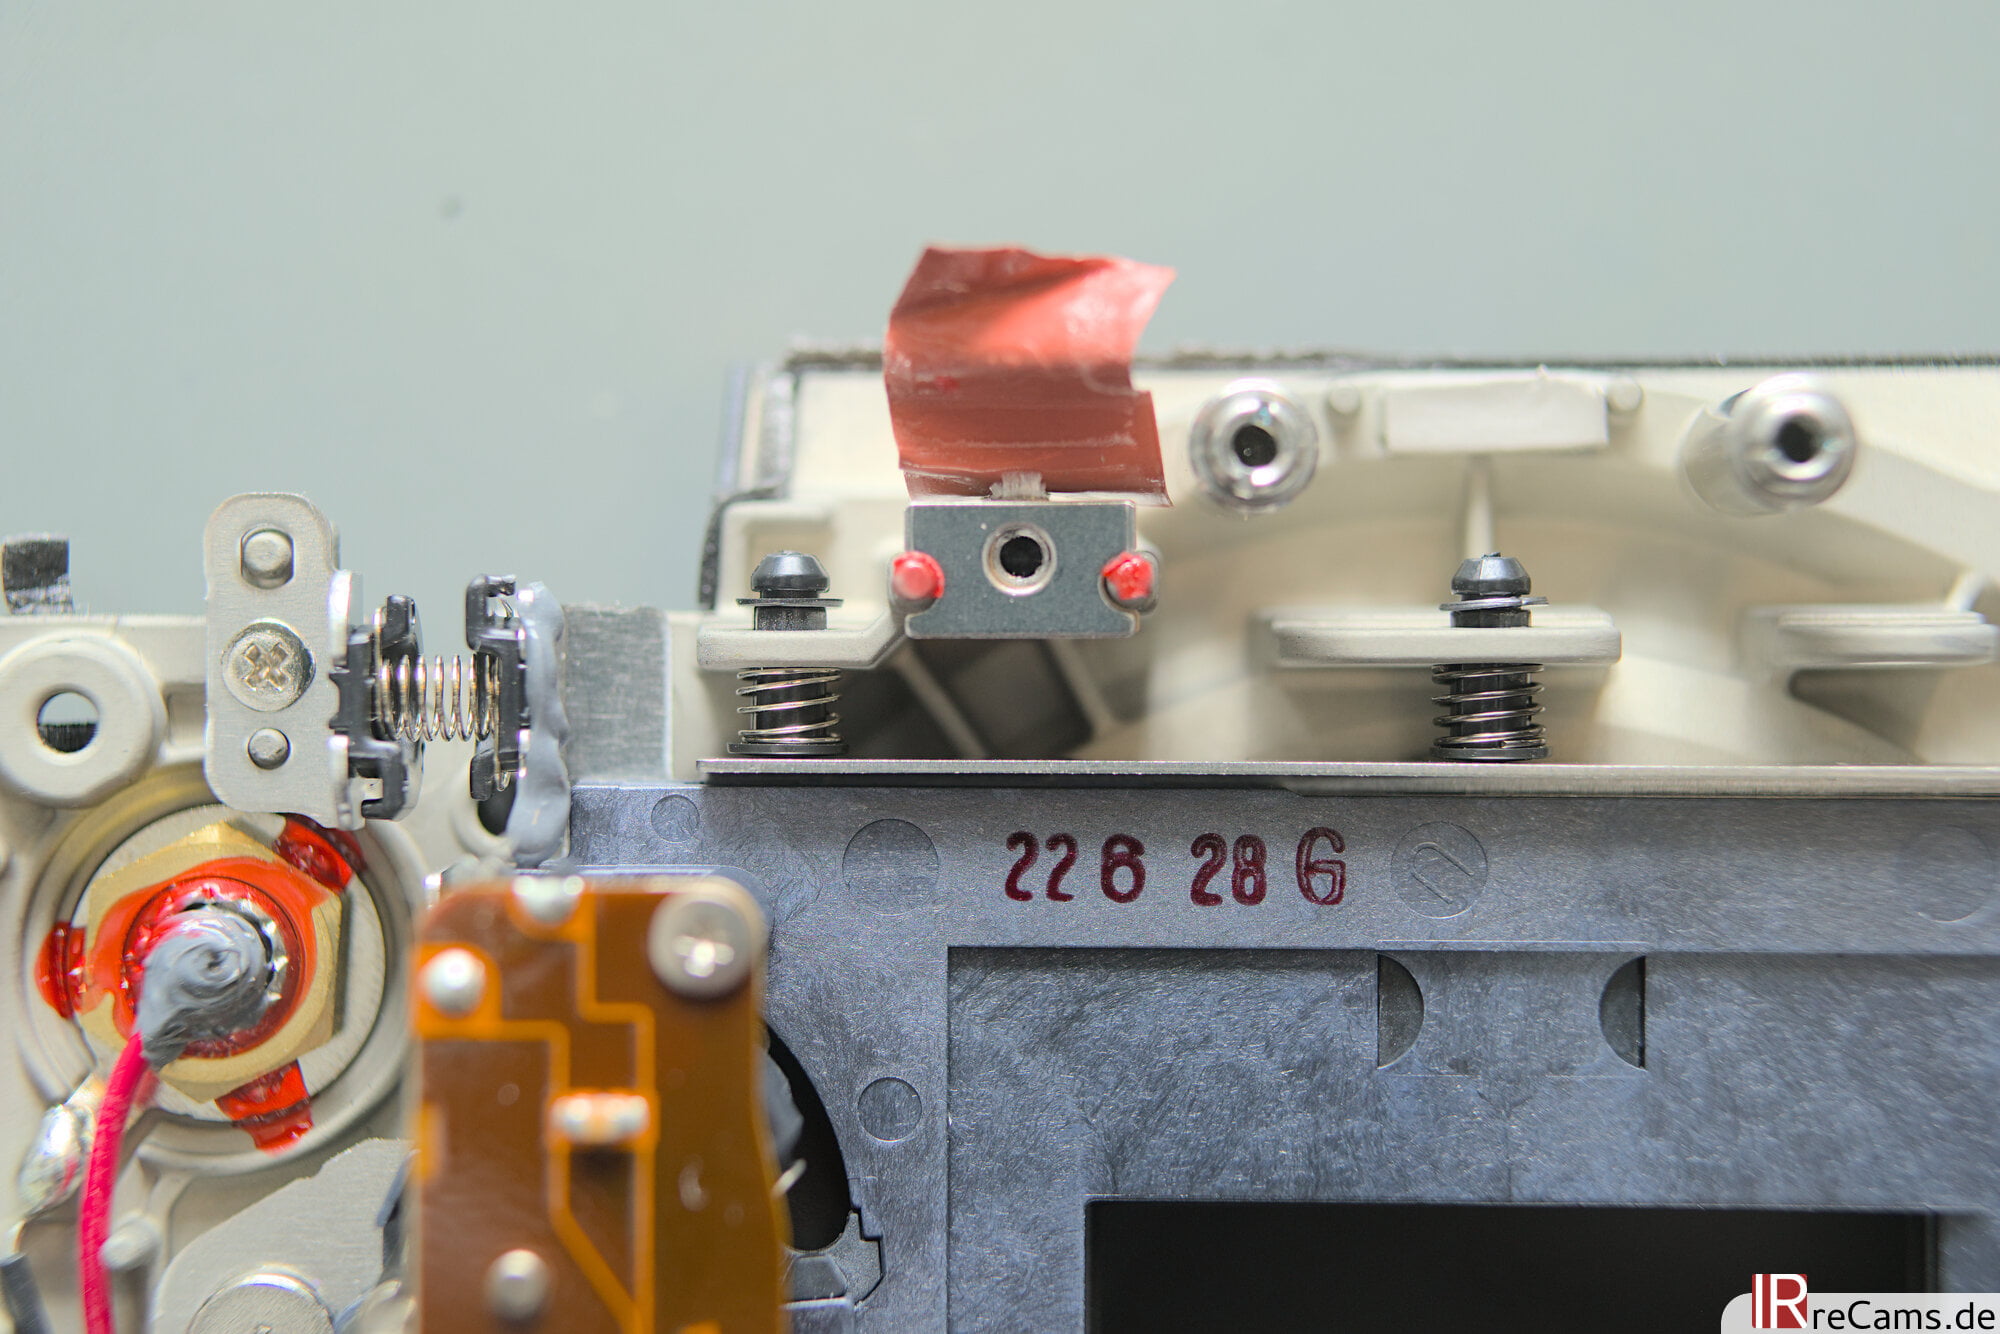
Before we turn to the sensor, a quick look at the shutter underneath. The entire shutter mechanism is supported by small springs all around and has no direct contact with the body. This was already present on the X-H1 and has been adopted on the X-H2. Compared to other cameras like the X-T3 or X-T4, this also explains why the camera's shutter is relatively quiet and has this very special muted sound.
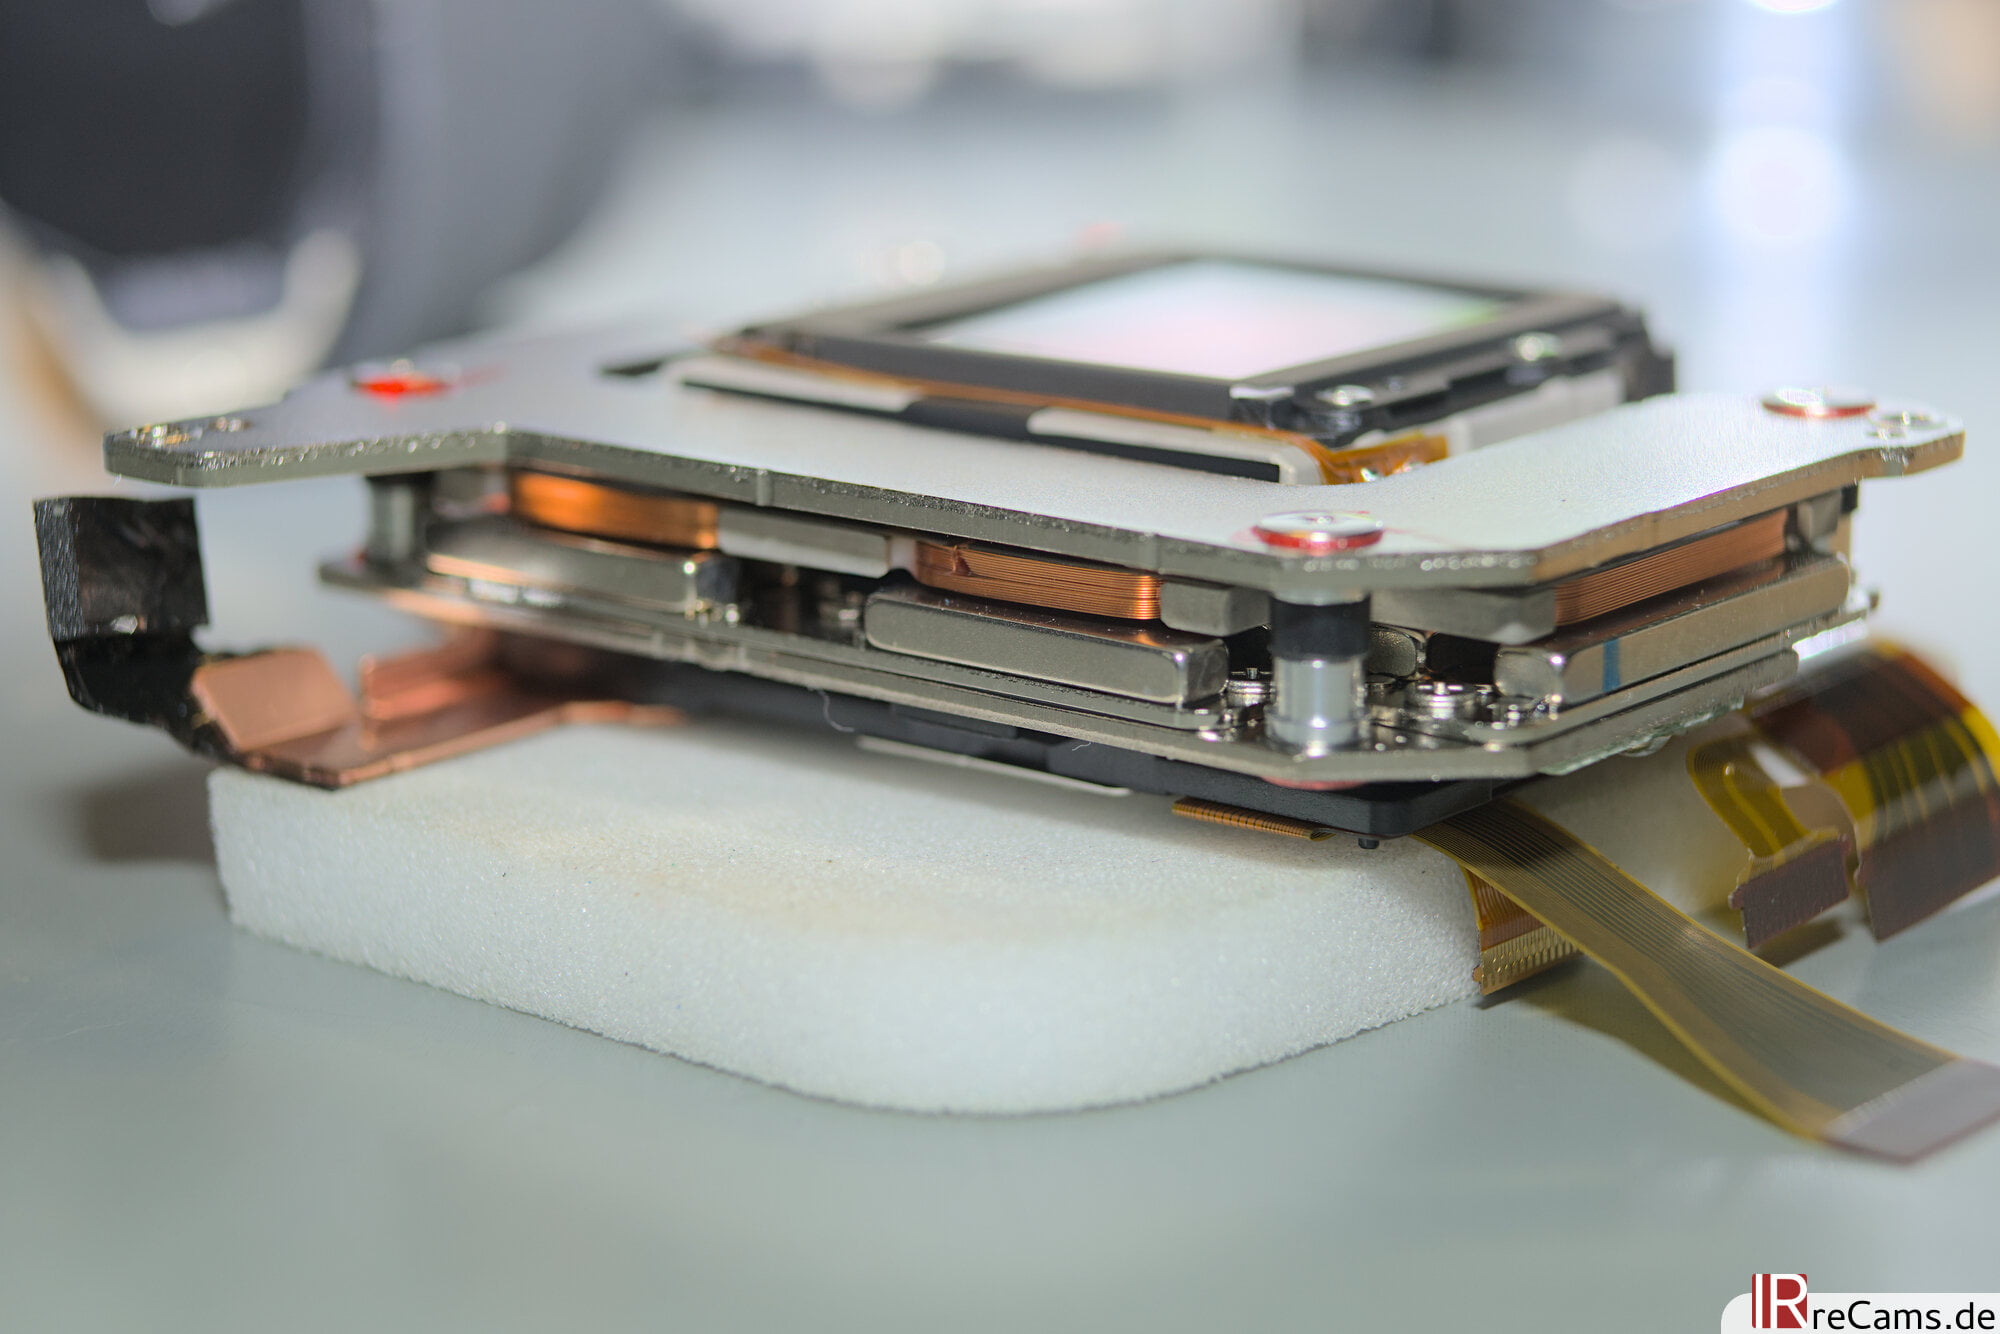
Back to the sensor: The IBIS module consists of a solid stainless steel chassis on which several very strong permanent magnets (presumably neodymium) are mounted. In this construction, the sensor is movably mounted on a metal plate on which various copper coils are located - these are electromagnets. By controlling the electromagnets in a targeted manner, the sensor can be moved and positioned extremely precisely in 5 axes. According to Fujifilm, the sensor stabilization not only compensates for up to 7 f-stops, it can also position the sensor with pixel precision for "Multi Shift Pixel Shooting". By combining 20 individual shots, a resolution of 160 megapixels can be achieved.

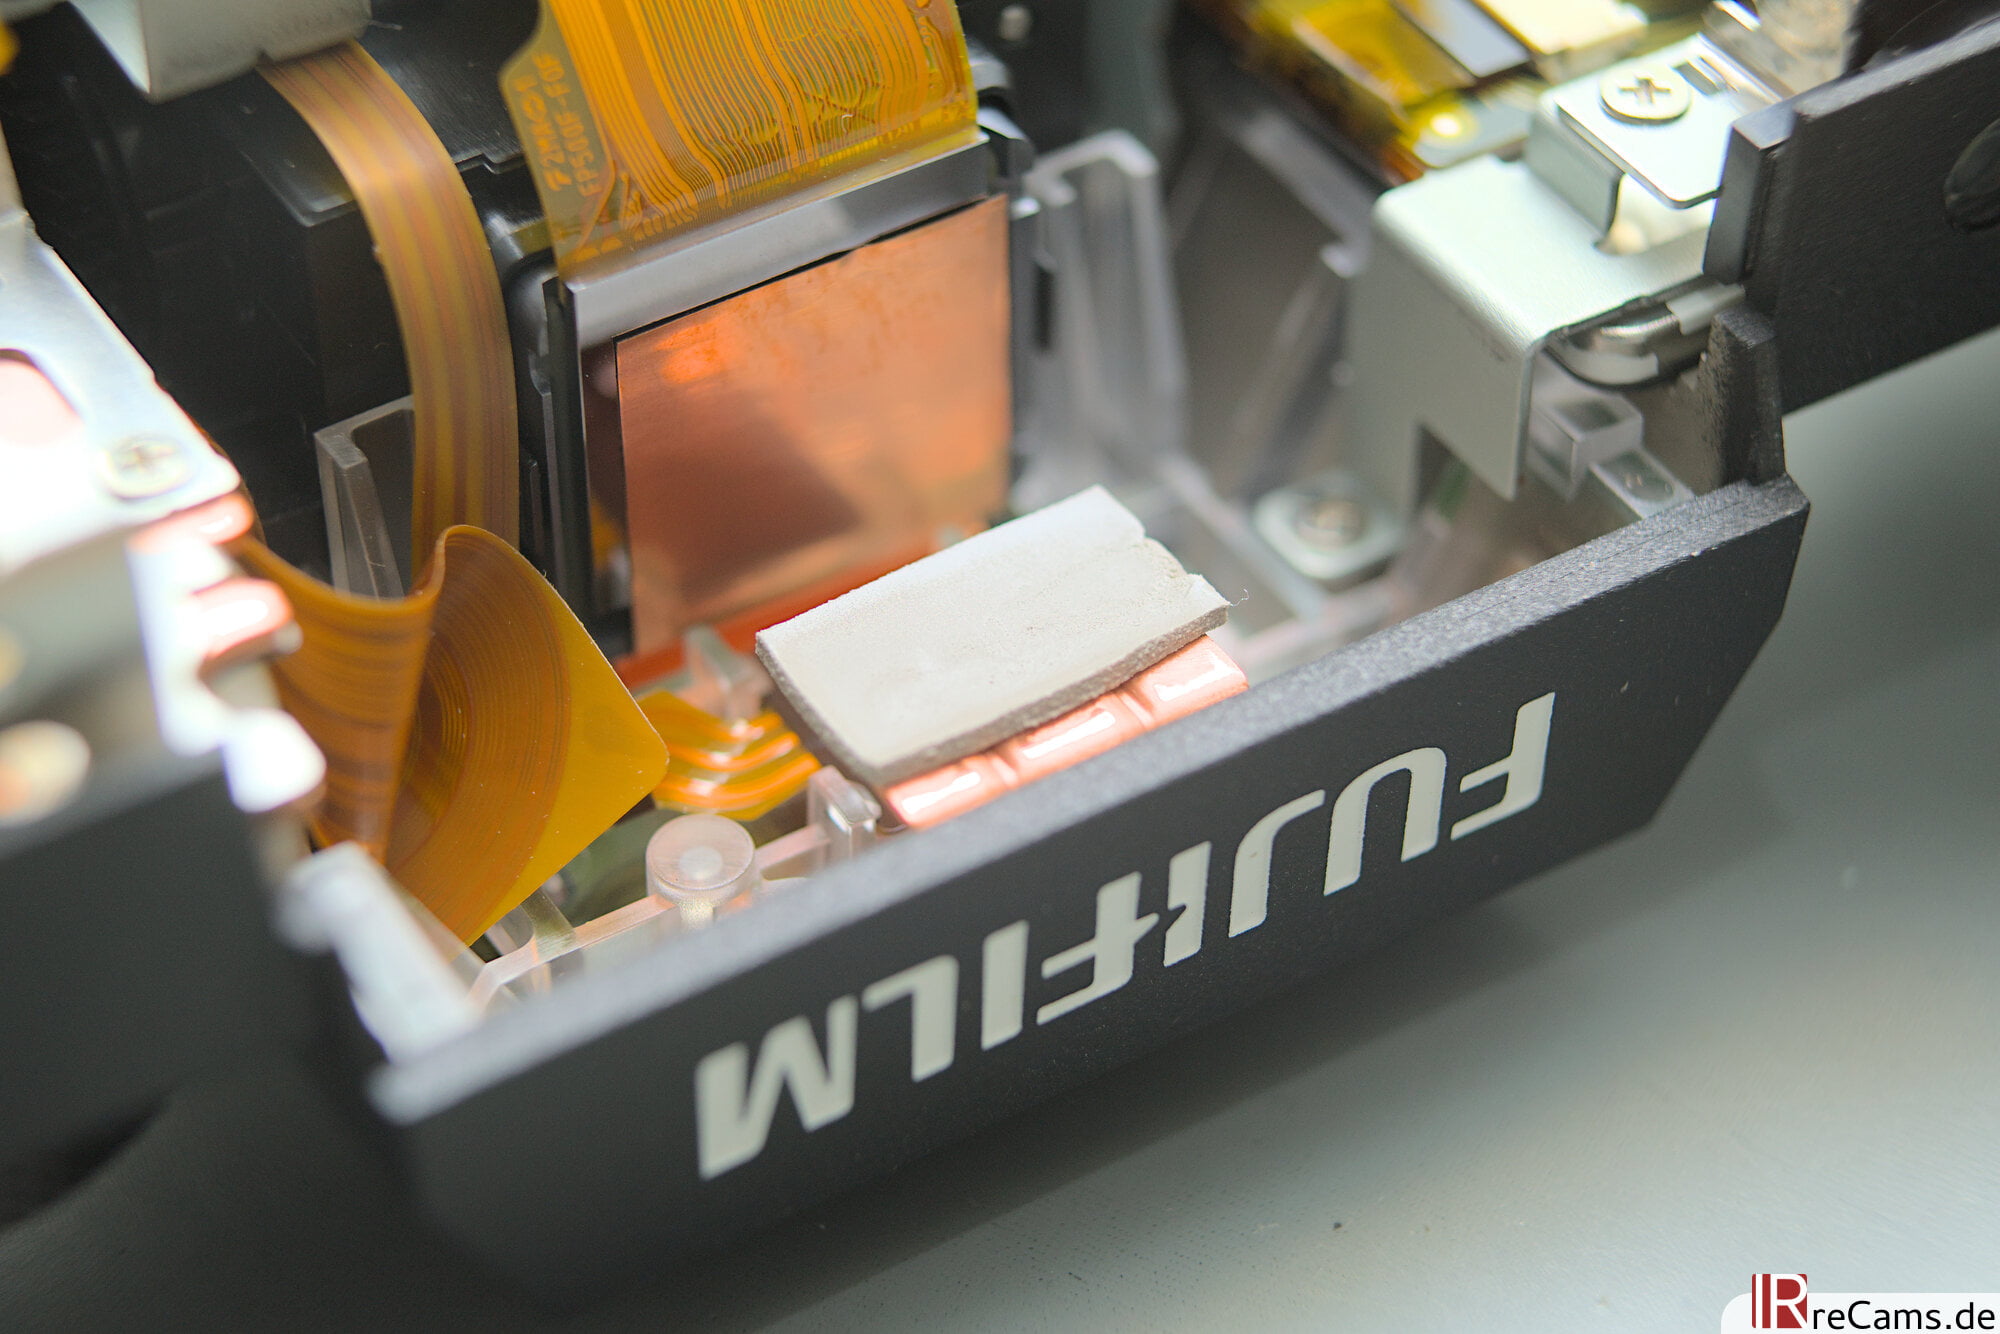
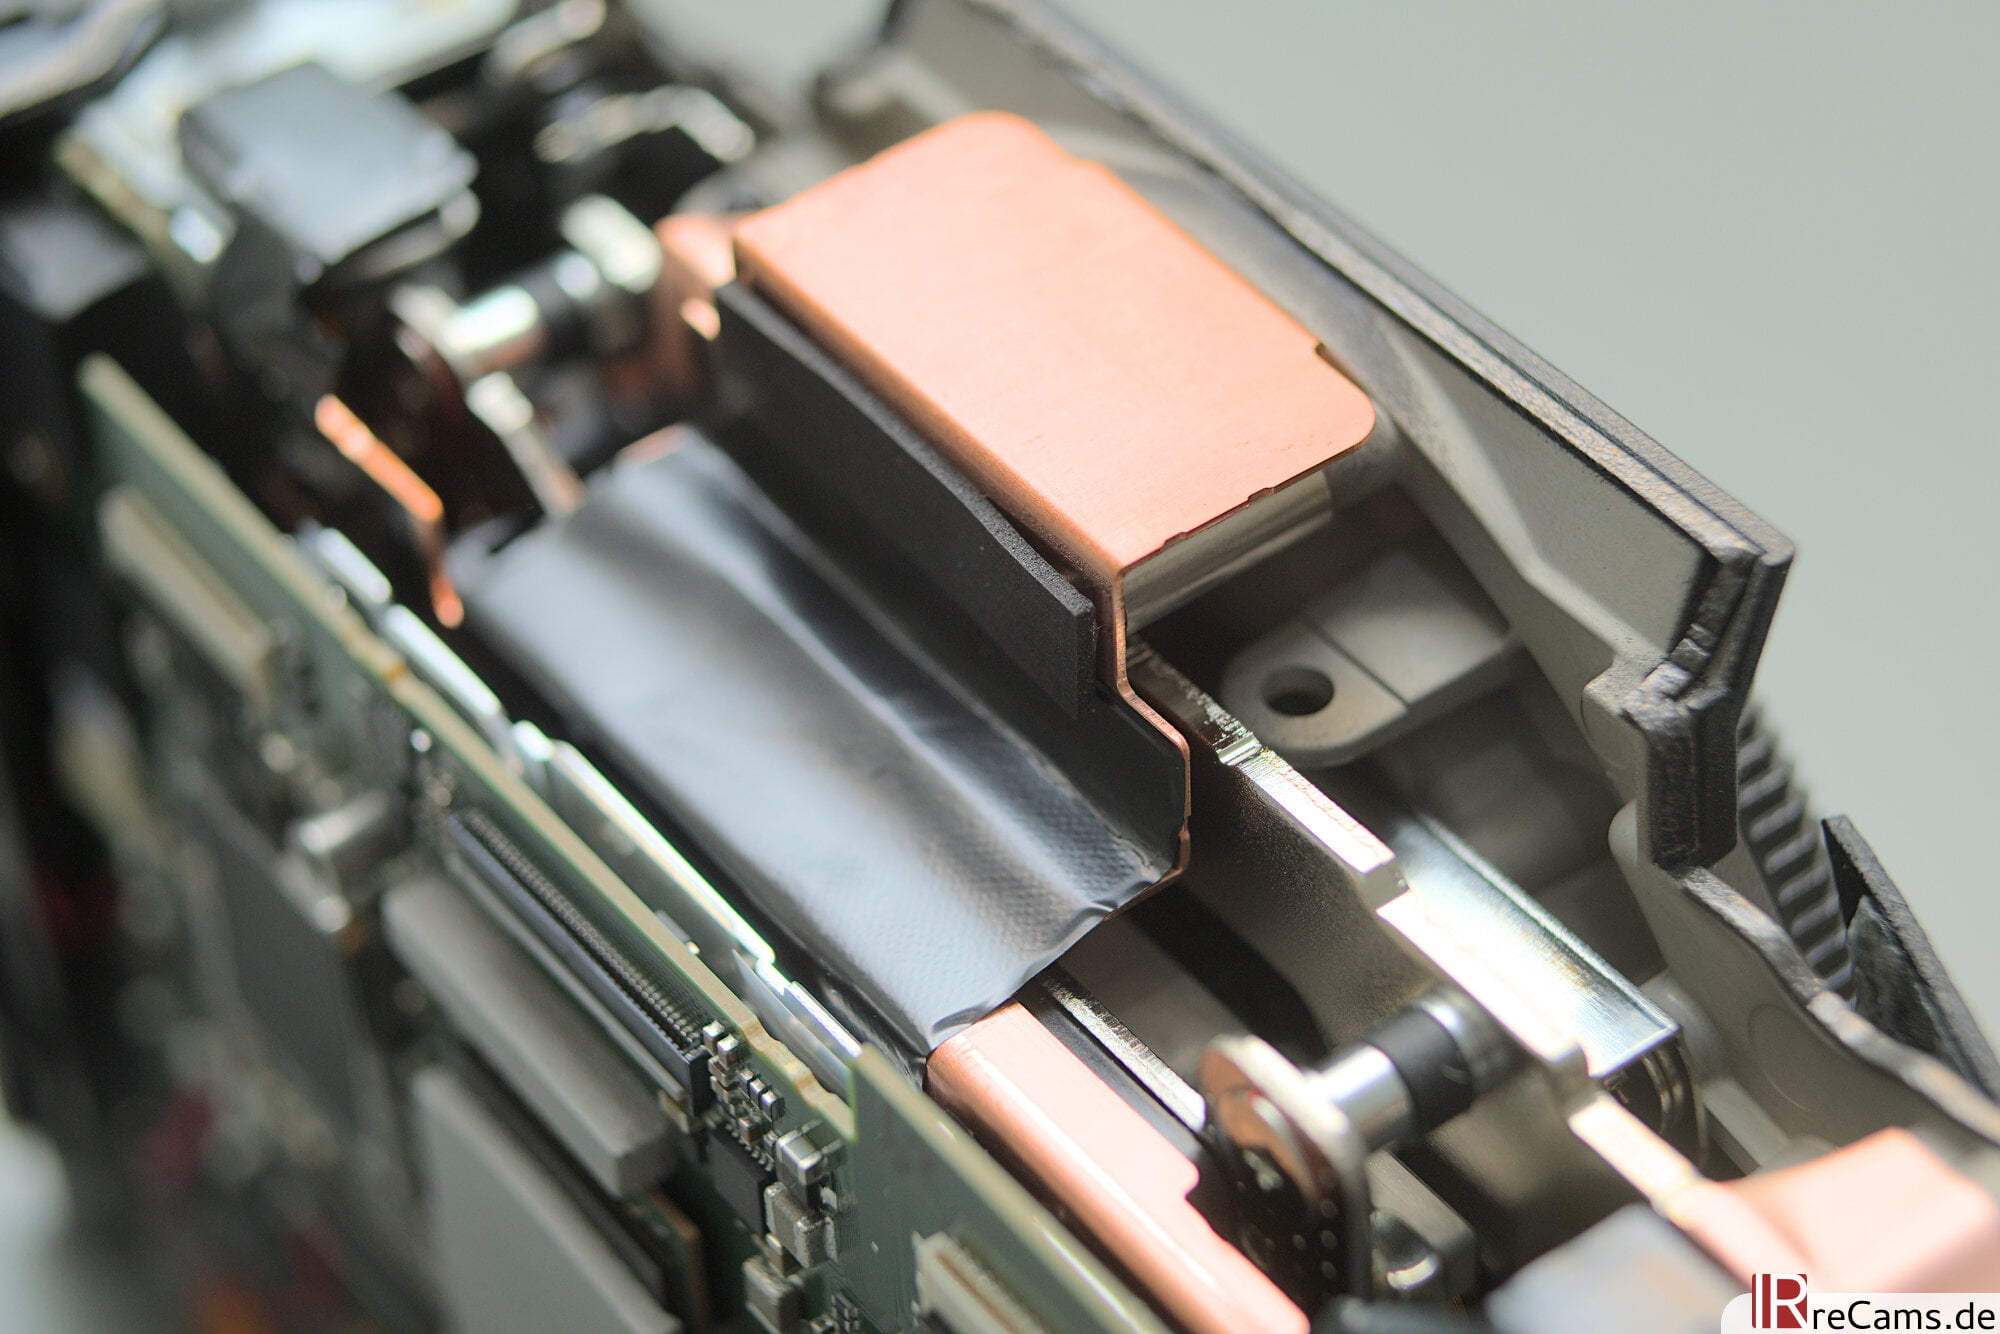
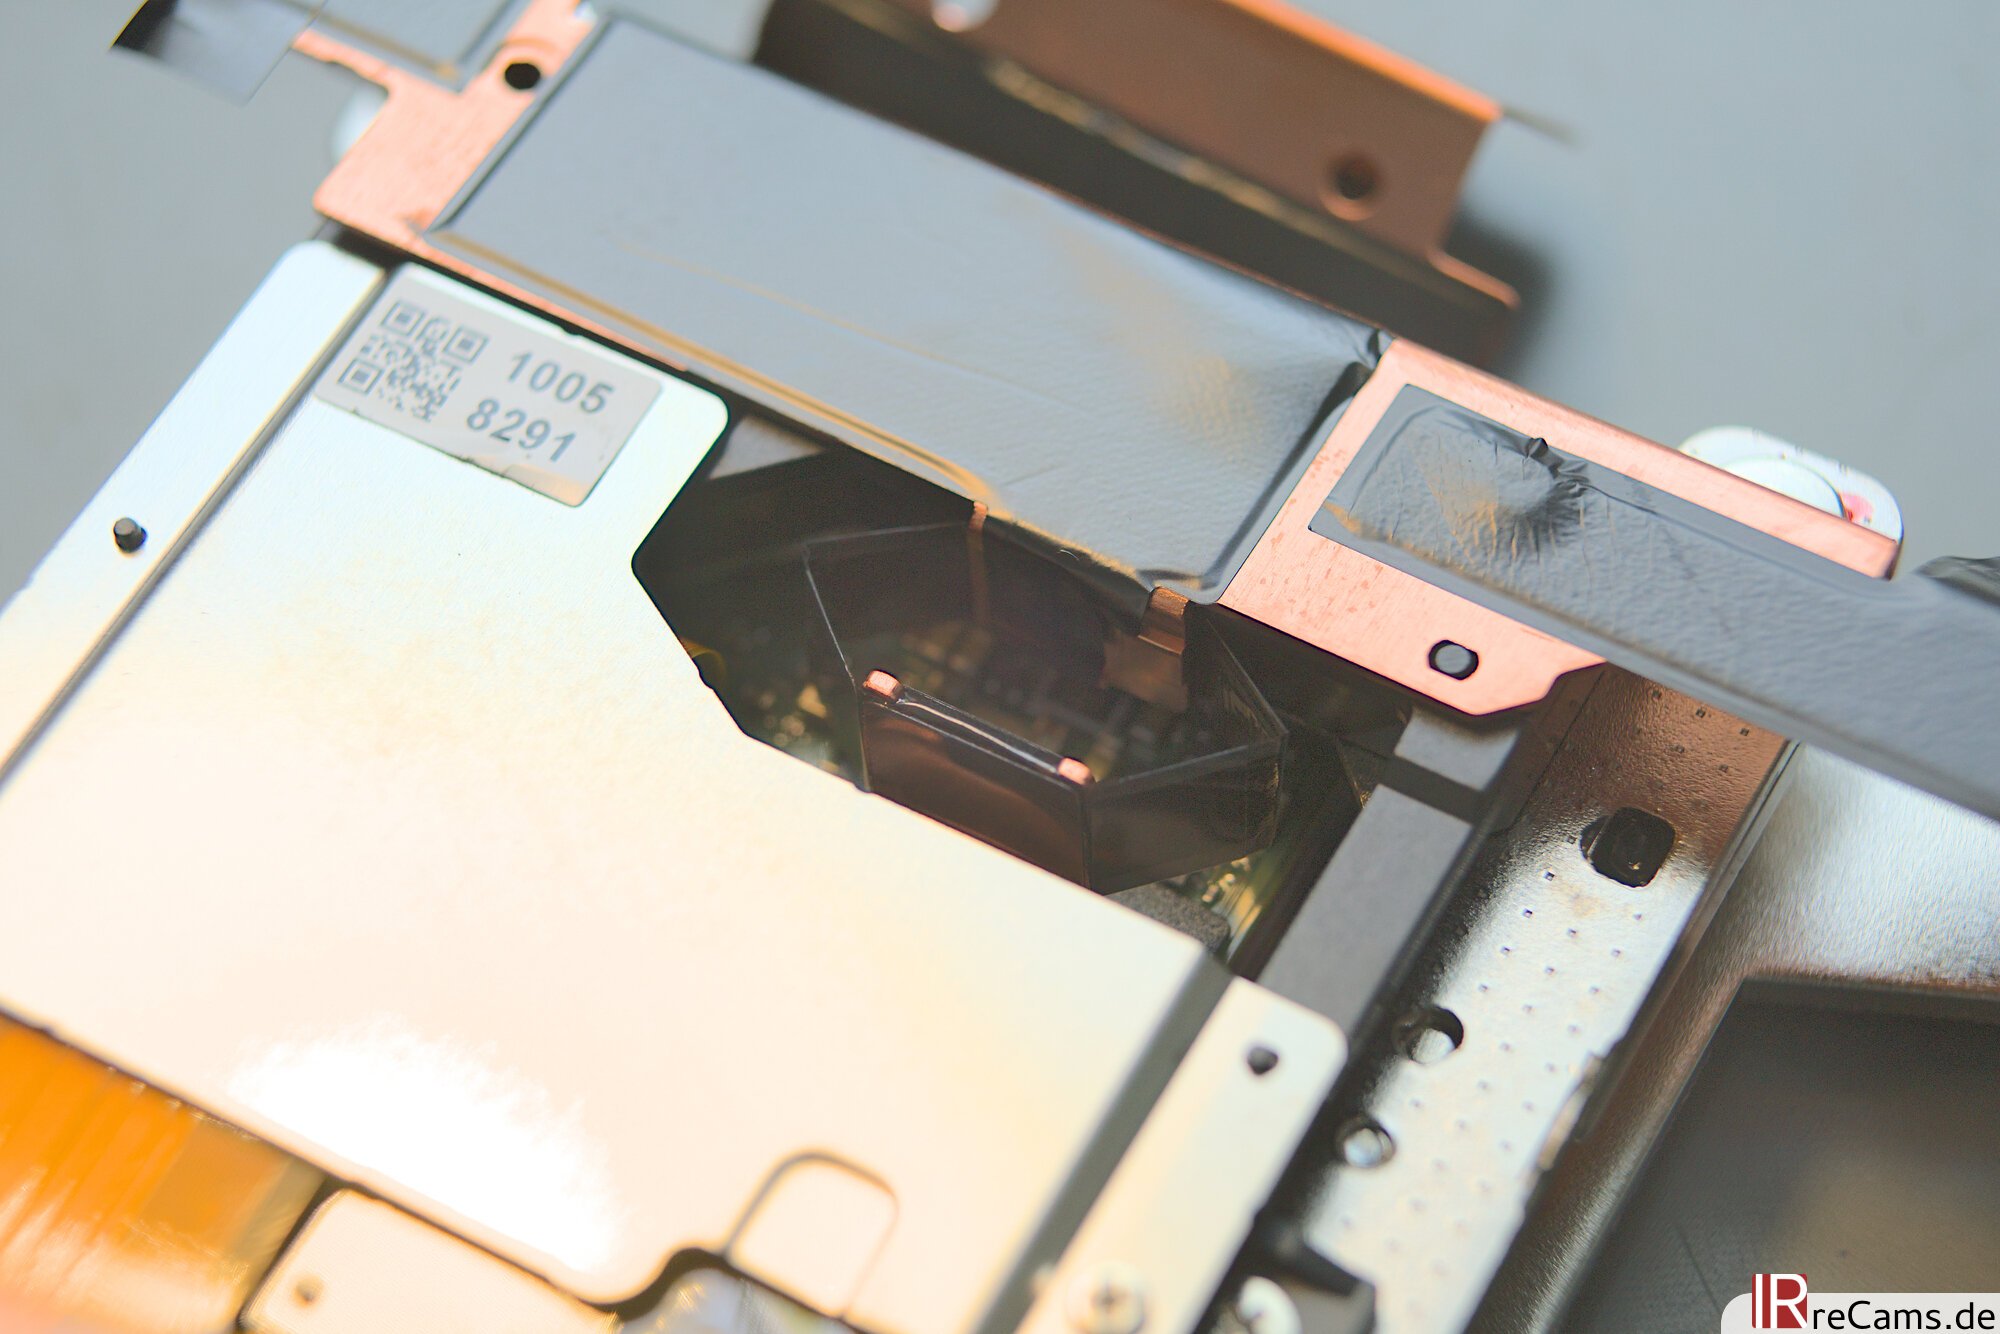
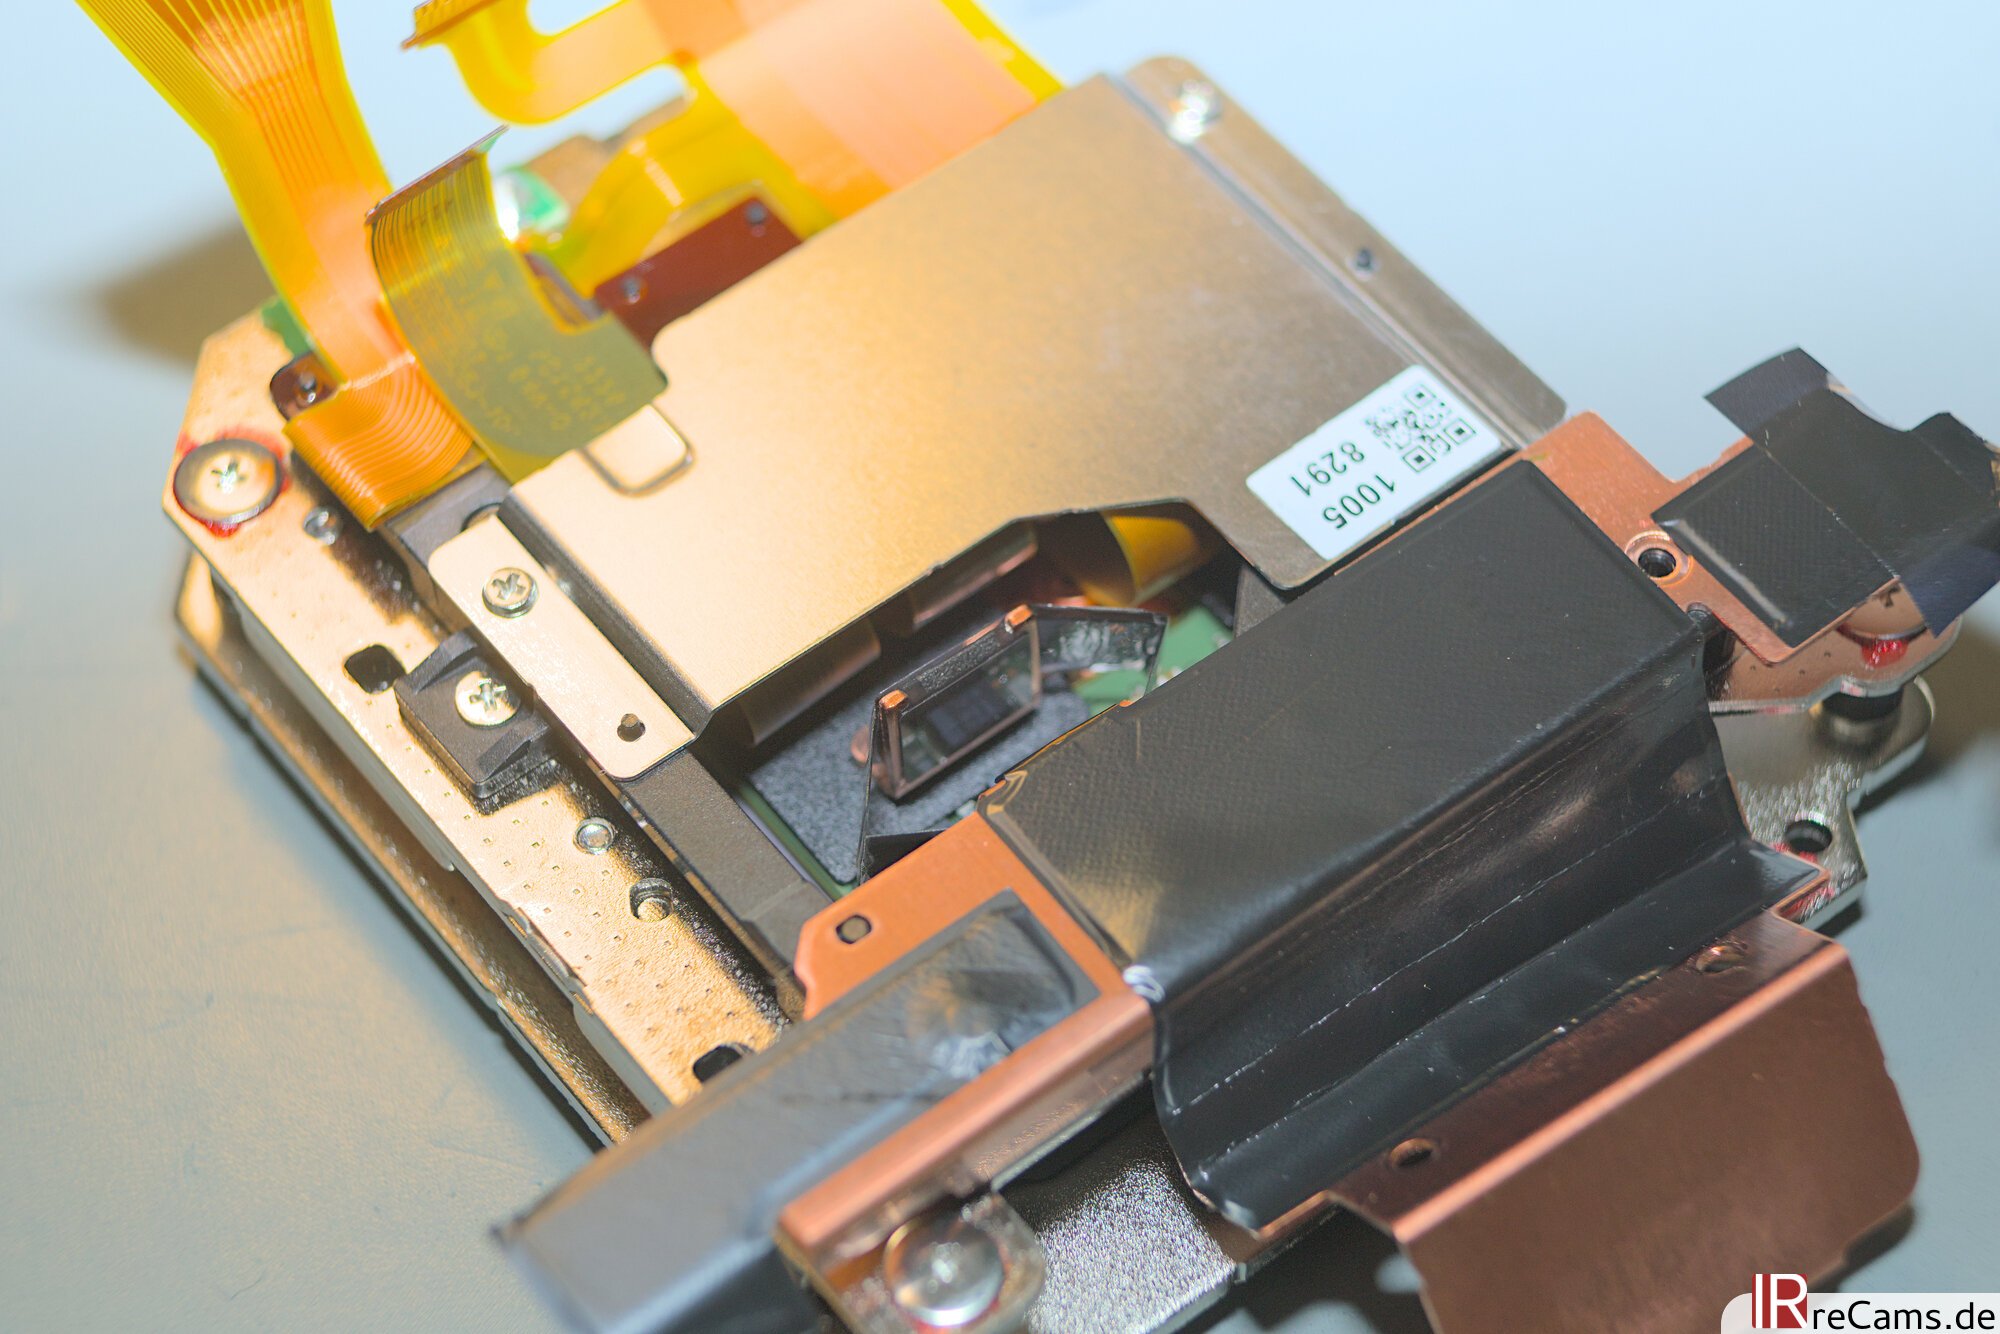
With all those pixels, it's obvious that the sensor must generate quite a bit of heat. This heat is tapped directly on the back of the sensor via a delicate heat sink and conducted to a copper plate on the stainless steel chassis. We had already seen at the beginning that the copper sheet makes contact with the upper part of the housing. A portion of the heat can therefore be conducted to the outside quite efficiently, I haven't seen such a design from any other manufacturer so far.
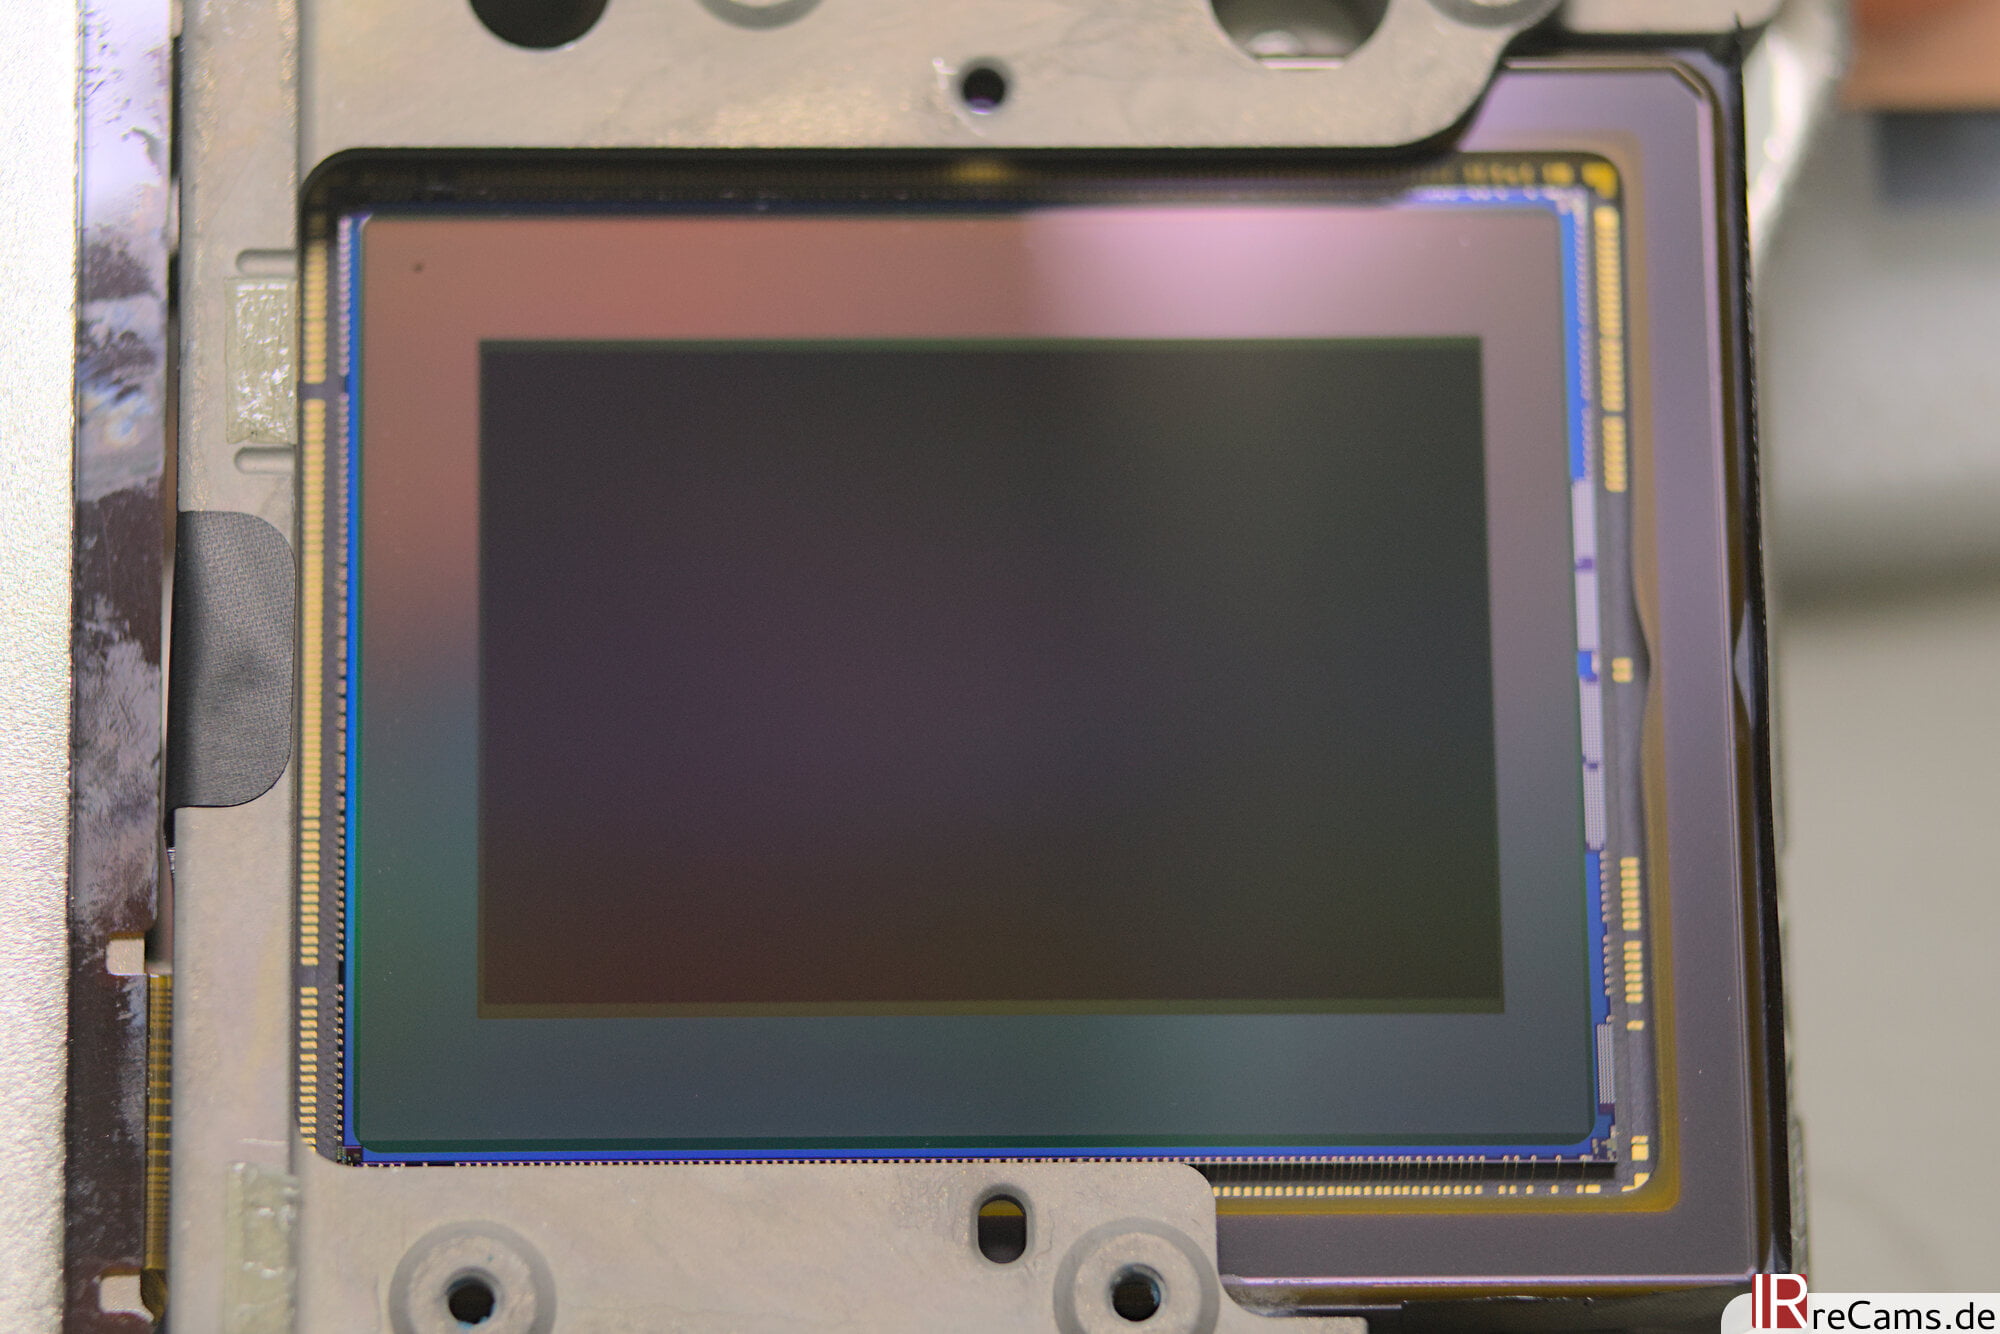
But now back to the actual point of this exercise: The blocking filter in front of the sensor is to be replaced by a 280 nm fullspectrum filter. As with virtually all modern Fuji cameras, the filter stack in front of the sensor consists of 2 glasses. The top glass has a piezoelectric element and is responsible for automatic dust cleaning. The actual UV/IR blocking filter (Hotmirror) is installed directly below it. As with the X-H1, X-T3 and X-T4, this blocking filter is unfortunately so unfavorably glued into the small plastic frame that the complete filter stack has to be replaced. This means that the dust cleaning function of the camera is lost with this model. Before the new filter is inserted, however, we can take a look directly at the new X-Trans 5 sensor. Admittedly, this is quite unspectacular, the pixels are very small after all...

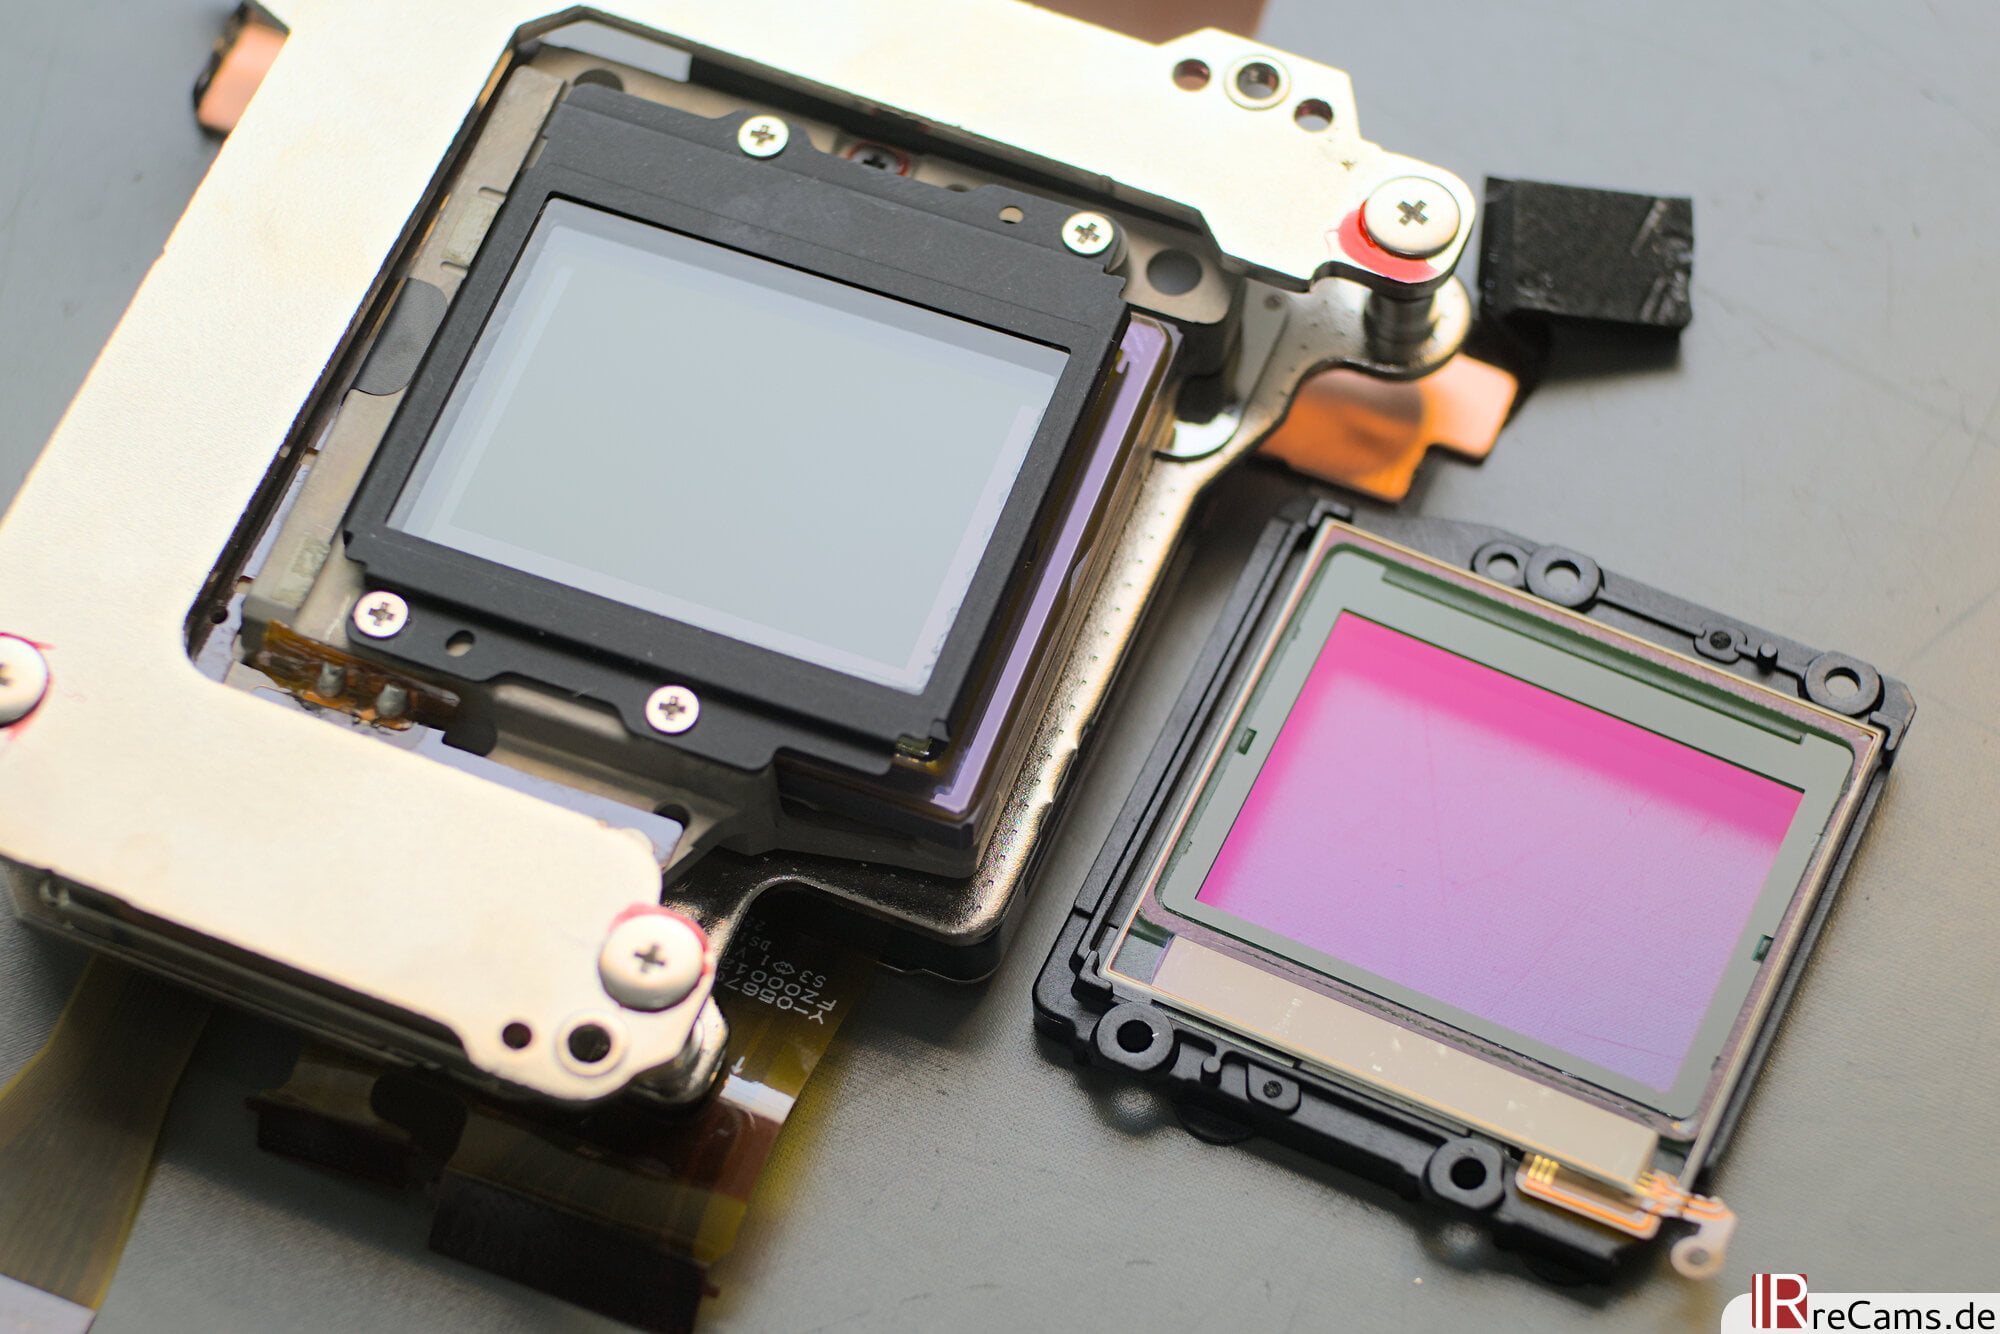
And this is what the finished sensor looks like after the new full spectrum filter glass plus sealing are installed in the camera. For comparison, the original filter stack that was removed is shown next to it. The sensor is now sensitive to the complete spectral range from UV over the visible range up to the infrared range ( estimated carefully 340 nm to 1,200 nm). By selectively choosing cut-off filters on the lens, it is now possible to take pictures in any part of the spectrum.
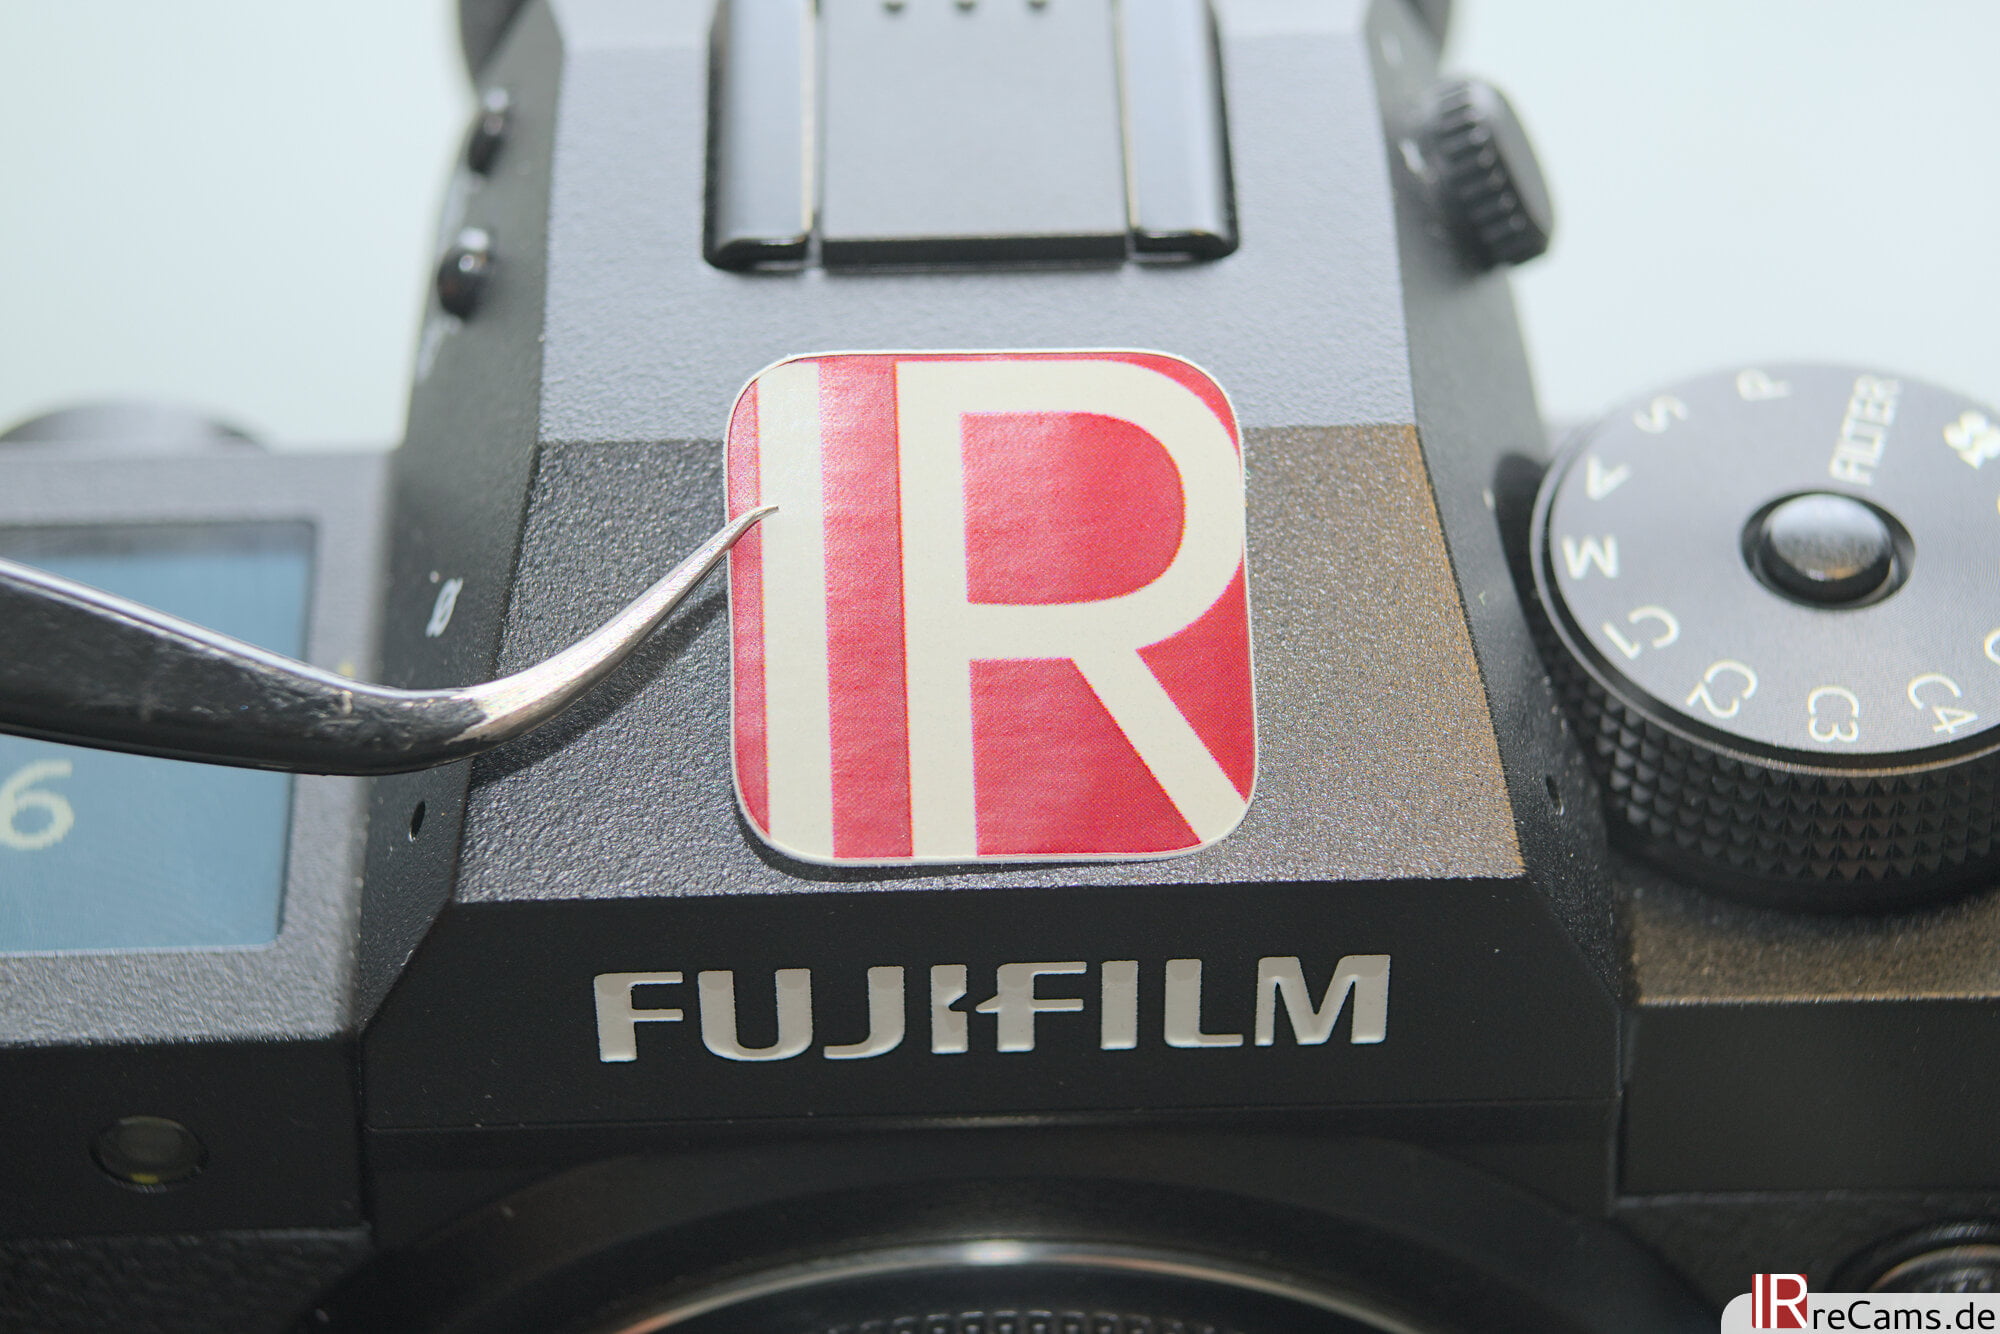
Of course, everything must now be reassembled. Since it's roughly the same process as disassembling, I'll spare you that here. Instead, we'll jump right to the infrared test shots. Last but not least, the camera has earned its knightly accolade after the reassembly: A fresh IR logo sticker now proudly covers the front of the housing.
Internal Infrared LED
The first and perhaps most important test concerns the low-light and astro suitability of the camera. Some modern cameras have an internal infrared LED. Stray light from this LED can become visible on infrared images in low light conditions. Fortunately, a test shot of the converted X-H2 shows that the camera does not have an internal LED. The image is completely black after 30 s at ISO 51,200 (apart from the expected noise). This qualifies the X-H2 not only for an infrared camera conversion but also for an Astromodification in order to become sensitive for H-Alpha light.

Sensor Lines
Some modern sensors can show fine, mostly horizontal lines in the images. PDAF pixels ("AF pixels") on the sensor are probably to blame here. These occur more frequently with strong IR filters and with very high-contrast processing. How does the X-H2 perform with an 830 nm infrared filter? No lines or other artifacts are visible in the 100 % view with exaggerated high-contrast processing (apart from noise, of course, induced by the high-contrast processing). The new sensor is a clear recommendation and can be used without restriction.


Infrared Whitebalance
Unfortunately, the X-H2 shares the same handicap as all X-Trans cameras. The manual white balance is always set without any problems, but the available range is not quite sufficient. The example image was taken with a 630 nm filter, the white balance was set beforehand to a WhiteCard . Unfortunately, a warm magenta color cast remains in the camera and has to be corrected on the PC. Fujifilm can actually do that, with their Bayer sensor cameras (X-A series and X-Txxx) it works without any problems. The X-H2 seems to work a bit better than the X-T3, but you can't get rid of the color cast completely.
In the unlikely event that a Fujifilm firmware designer reads this: Please expand the limits in both color axes in which manual white balance can be set. A little bit wider and the cameras internal white balance will work for infrared as well. Such a change can be distributed in a future firmware update in my eyes and should neither harm anyone nor cause too much work in programming.


Infrared Resolution
Admittedly, the jump from 26 MP of the X-T4 to 40 MP sounds extremely high at first (and the company's marketing makes us believe it). However, the number of pixels actually increases in proportion to the resolution, so the new sensor "only" has a 24 % higher resolution compared to the X-Trans 4 sensor of the last generation. In other words, for every 4 pixels of the X-T4, a 5th pixel has now been added. Against this background, the X-H2 is not a pixel monster from another planet, but a welcome further development of a proven sensor.
The increased resolution also benefits us in Infrared Photography. At least as long as the lens produces a good image and the sharpness is adequate. In general, the lenses in IR draw a little softer and you lose some detail with many lenses. This depends on the lens and it is difficult to generalize. But what can be said as a rule: You should avoid stopping down a lot, especially with the X-H2. The longer wavelength infrared radiation is more affected by diffraction - and this is of course much more noticeable on a high-resolution sensor.
Here is the comparison 26 MP vs 40 MP under optimal conditions with 100% crop in each case:


Infrared Photography with the X-H2
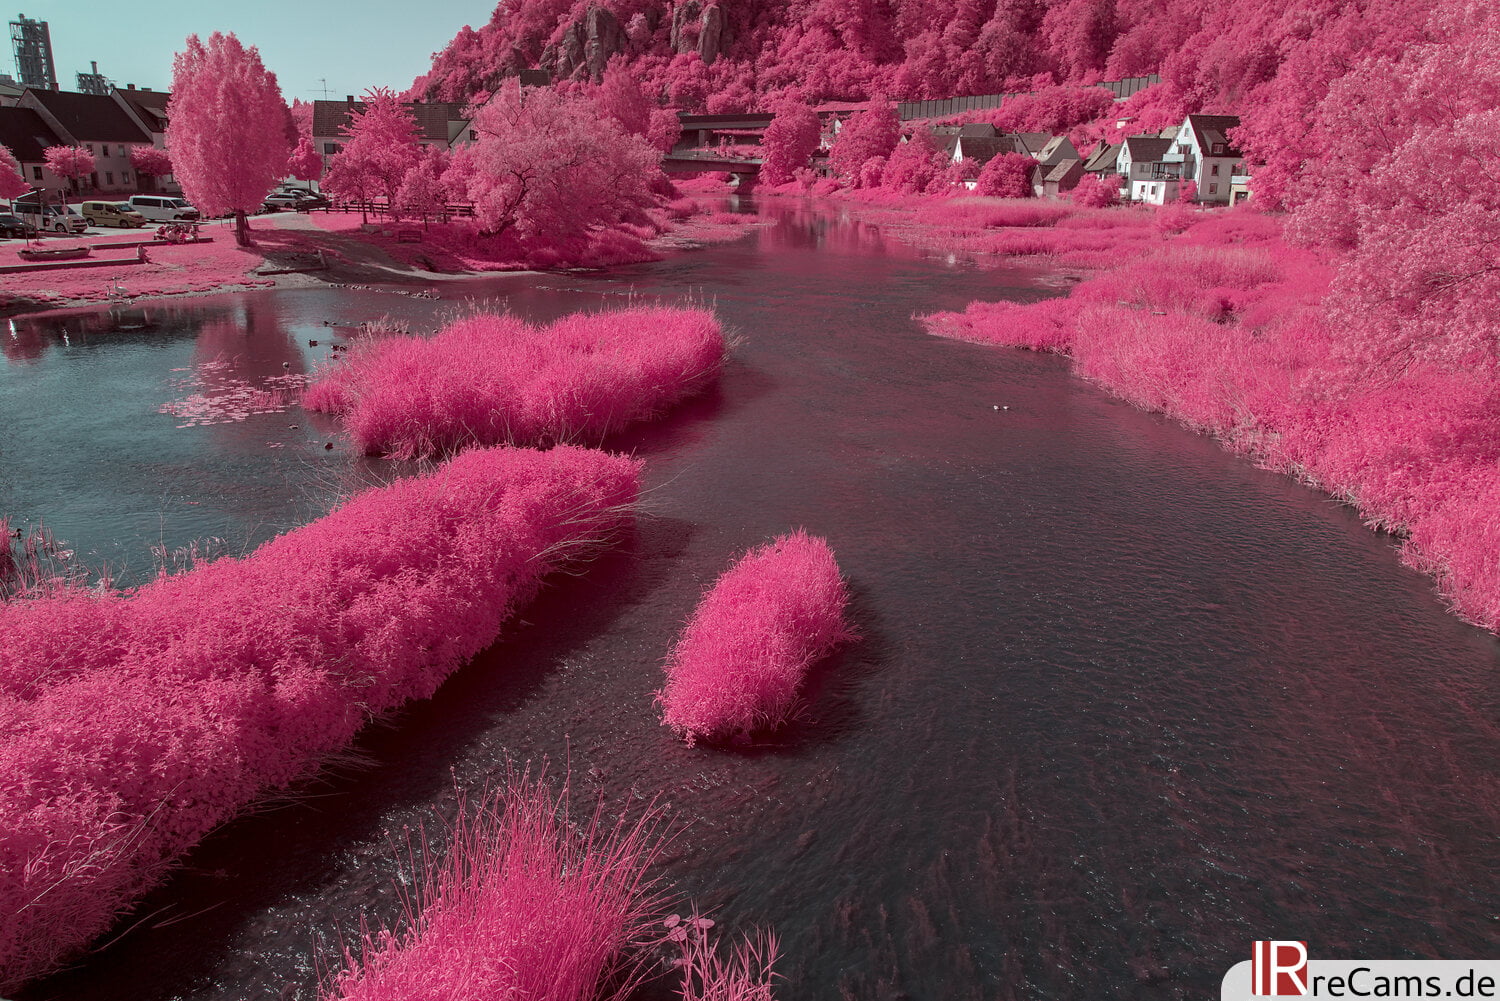
The colors that the camera can produce with various Infrared Filters , are as good as usual, and there are no problems or differences to the well-known X-Trans sensors. Once the white balance is set correctly in the software, the camera is just fun to use.


As expected, the sensor's noise behavior and dynamics are great - the images do not fall apart even with a high contrast Infrared scene. The sensor performance is on par with virtually all modern sensors - it feels like a plateau was reached a few years ago and you could almost get the feeling that CMOS technology has matured.

Summary
The Fujifilm X-H2 is a complex camera that boasts remarkable specs and delivers great image quality. The camera's construction and design are solid, uncompromising, and optimized for dissipating heat. Accordingly, the camera can shoot for a very long time with fast frame rates or create video in 8K. The 40 MP resolution is a welcome update to the existing sensors and also delivers more details in infrared than the predecessors.
The question remains, of course, whether you really need this extra resolution. As in "normal" photography, you have to say: "It depends". Even with the 26 MP sensors you can take great infrared pictures and print them in great quality. A few years ago, I printed a 10 MP infrared image from an old Pentax onto a 1 meter canvas. Despite initial reservations, the result looks absolutely great and you don't miss any details at a normal viewing distance. So it doesn't always have to be the latest and greatest, but of course it's still fun to work with. The X-H2 and X-H2s are now available in the store for a Infrared, Fullspectrum or Astro modification selectable. We also offer the X-H2 as Converted new Camera with a 2-year guarantee.