
Author: Lars Wilhelm
After 8 years of Milky Way photography with various unmodified cameras, I decided to have my Nikon Z6 converted with an astro filter at IRreCams.
Why astromodification at all?
Normal cameras have an infrared blocking filter, which blocks certain wavelengths. This is useful for everyday photography, but prevents the camera from capturing the deep red of the H-alpha line (656 nm). Many gas nebulae and structures in the center of the Milky Way shine in this range. An astromodified camera lets this light pass. As a result, reddish nebulae and the finest structures in particular appear much clearer, whereas unmodified cameras swallow up these details.
First experiences in the Eifel
As is so often the case with new equipment, I wasn't lucky with the weather at the start of my tour to Madeira and Switzerland and the sky was mostly cloudy. However, one would like to try out new equipment as soon as possible.
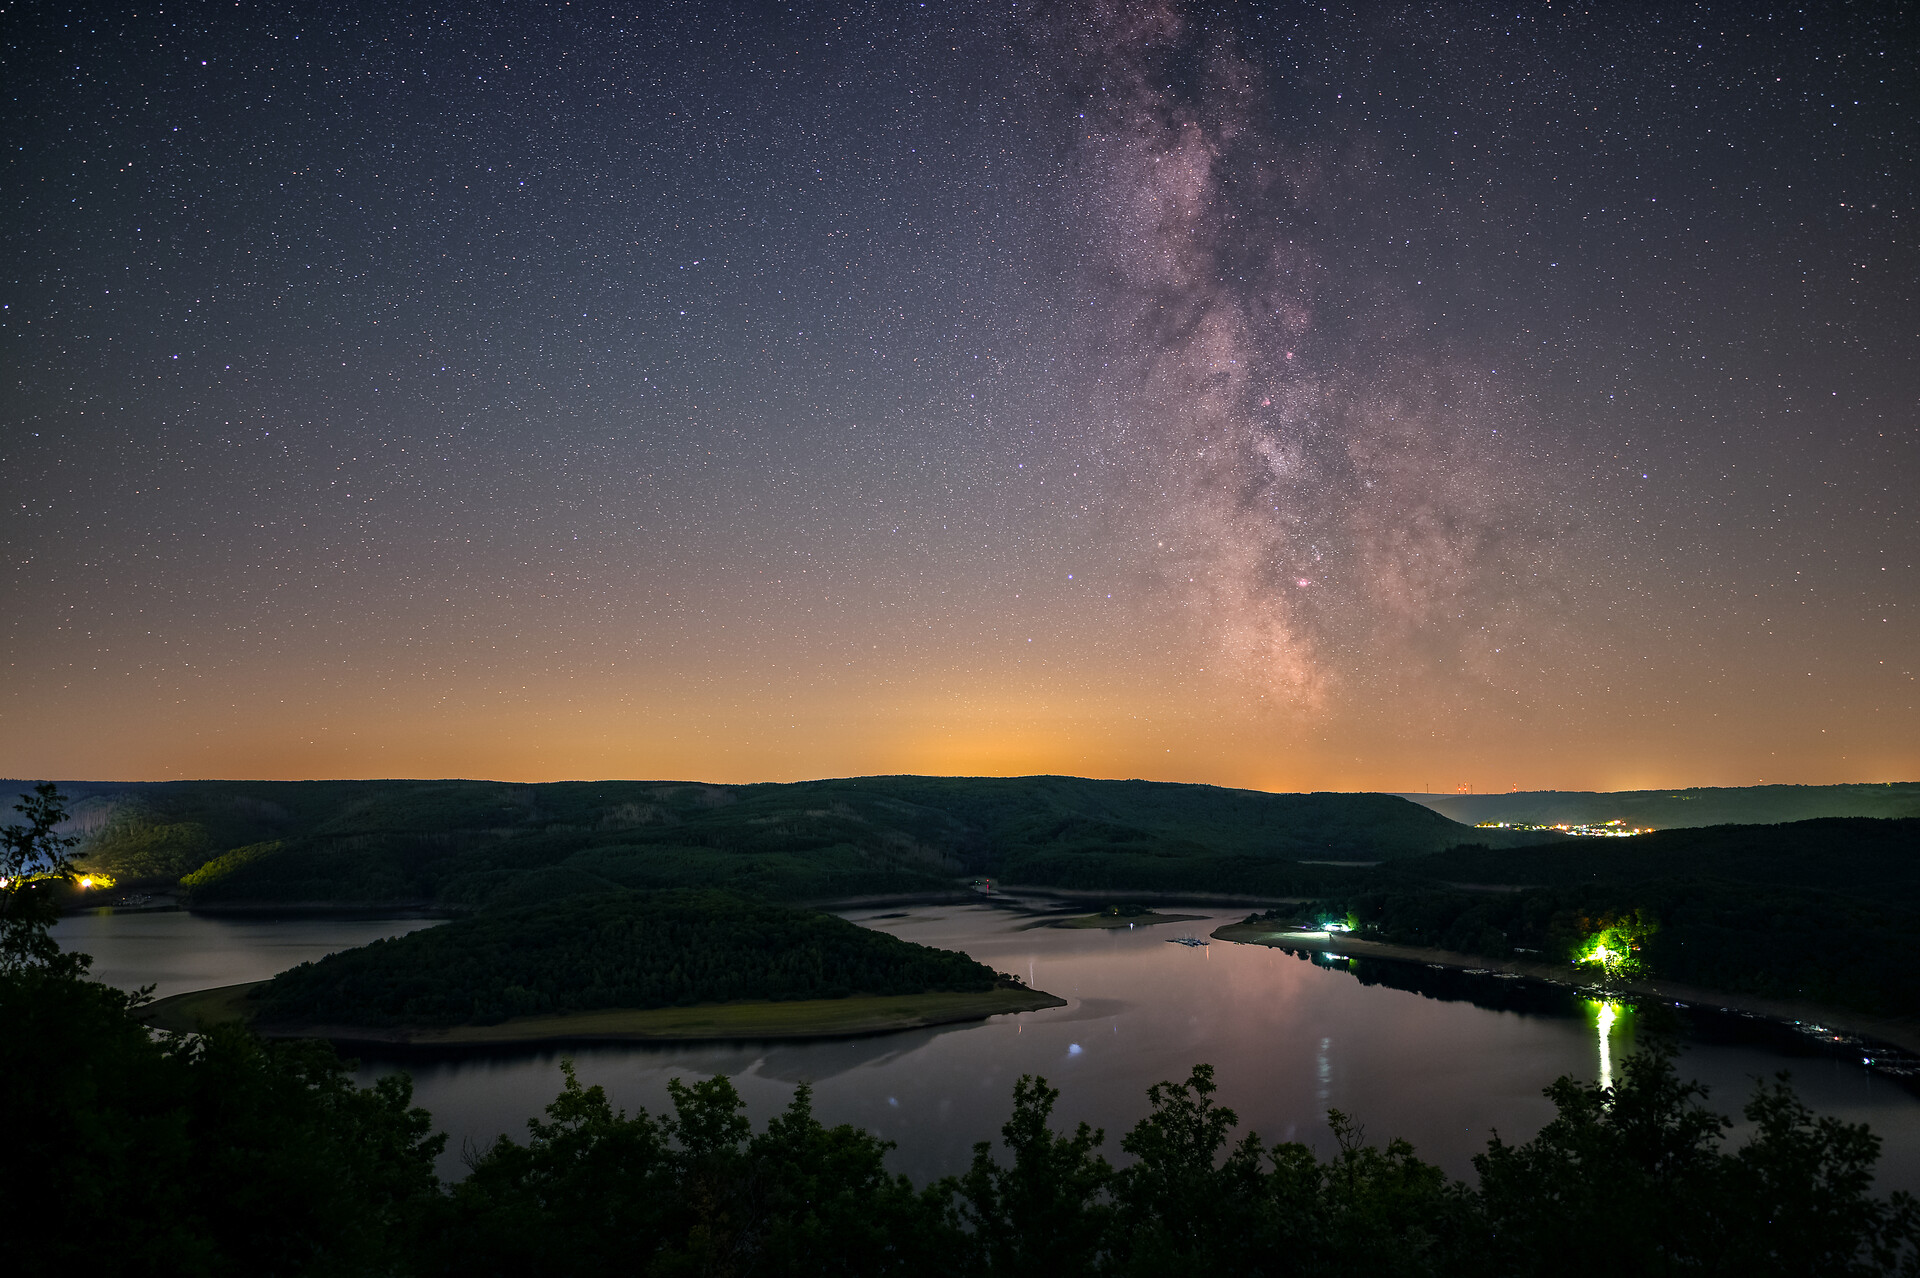
If it wasn't going to work on the road, I watched the weather forecast for the Eifel all the more closely. This is one of the best regions in NRW for Milky Way photography and is also recognized as an International Star Park.
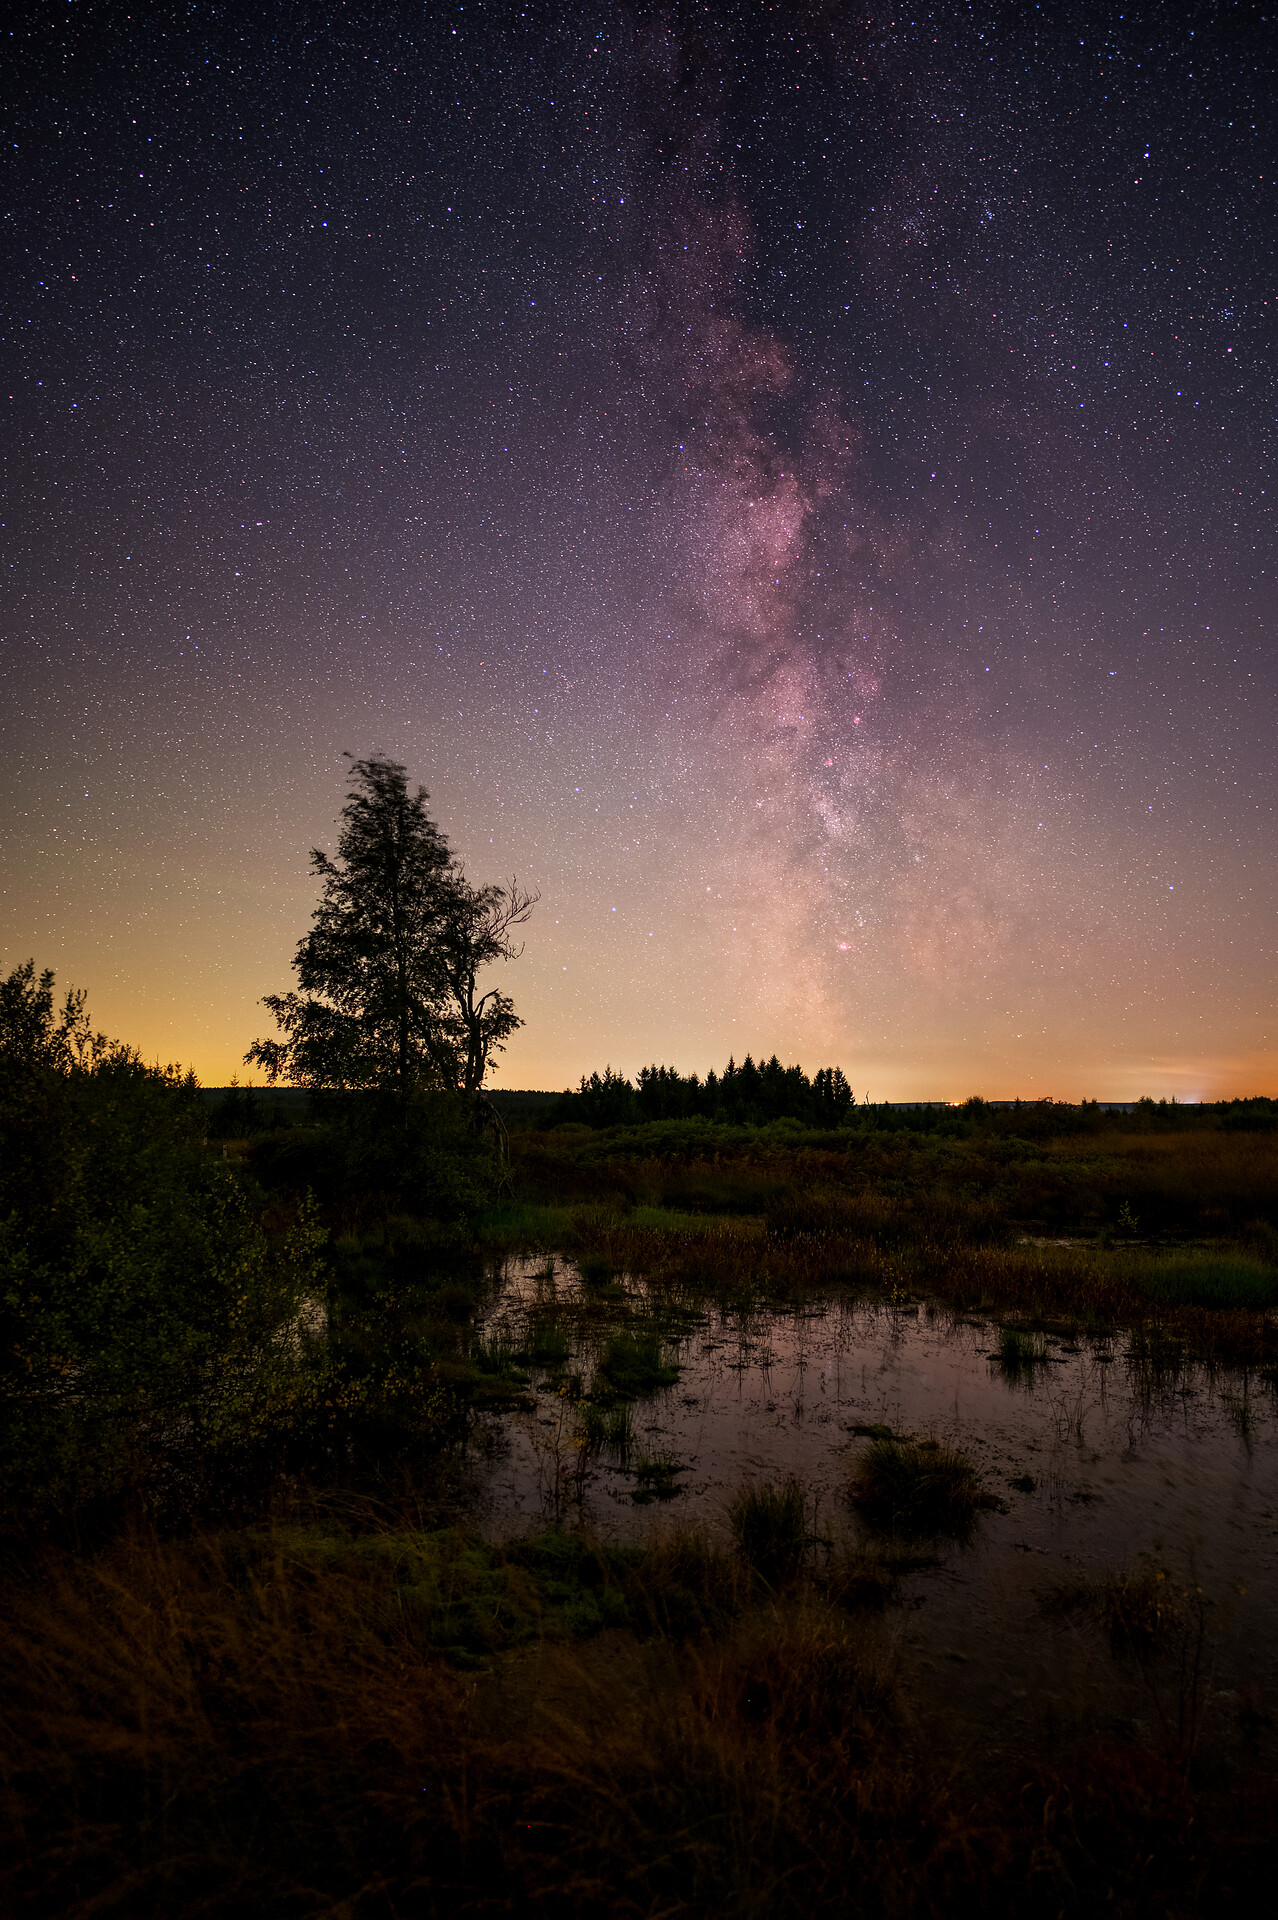
So I was all the more delighted when a clear night was finally forecast for the Eifel. I finally drove to the Hubertushöhe on the Rursee during the week to try out the converted camera for the first time. After setting up the tripod, mounting the modified Nikon Z6 and taking the first test shots of the Milky Way, it showed on the camera display that it captures significantly more colors in the night sky.
For this first shot, I created a stack of nine individual images. I deliberately decided not to use tracking at first, as this would mean considerably more work in post-processing. The result speaks for itself. When I compare it with images from my unmodified camera, the difference is immediately apparent. The red structures in the Milky Way in particular stand out more clearly.
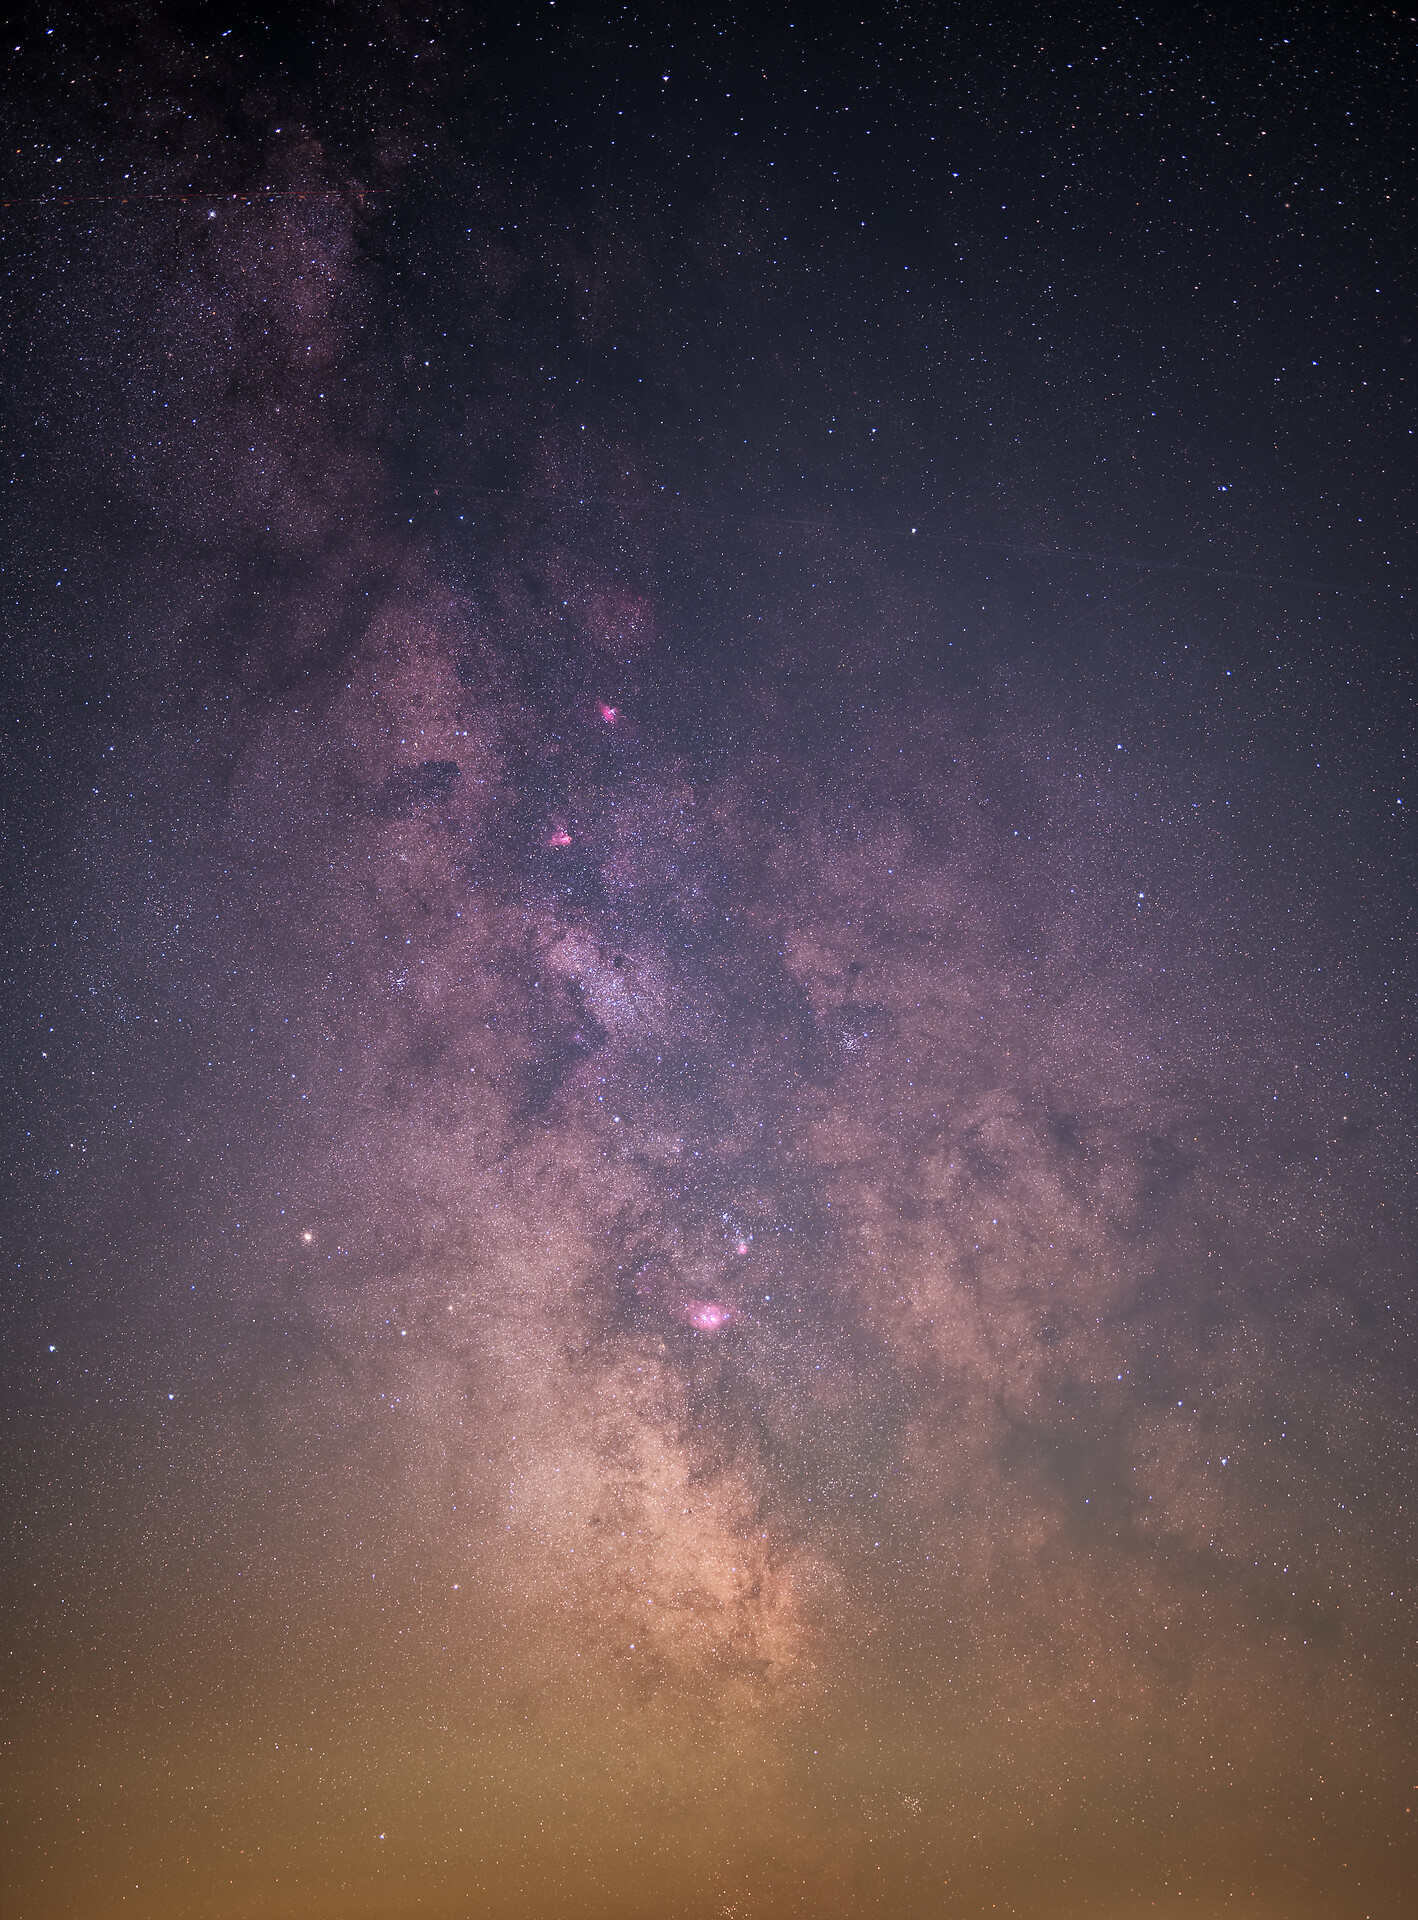
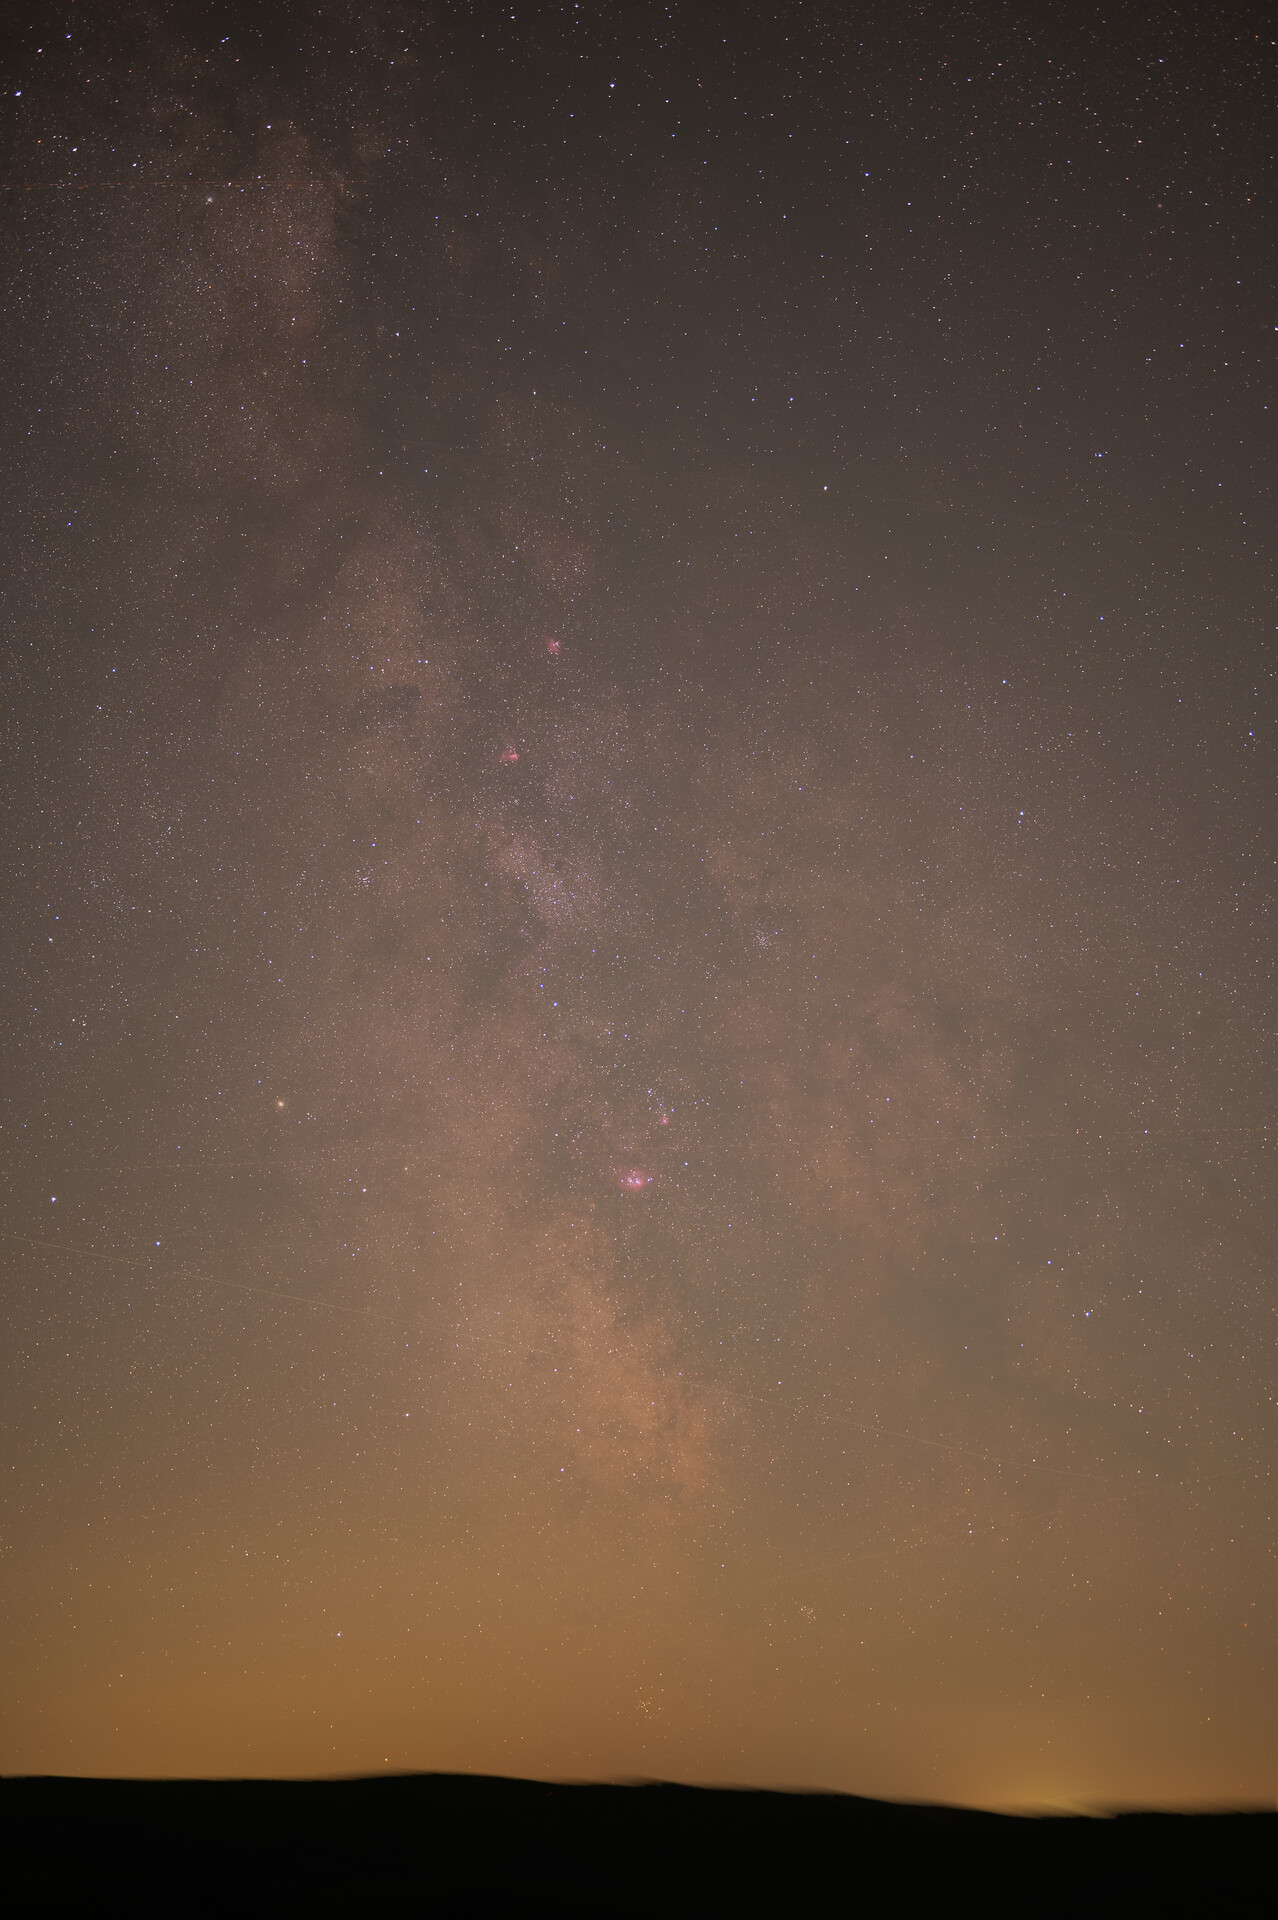
Detailed images of the center of the Milky Way
To make the details of the center even more visible, I later decided to take a detailed image of the center together with my tracking device and a 50 mm lens.
Composition with the foreground
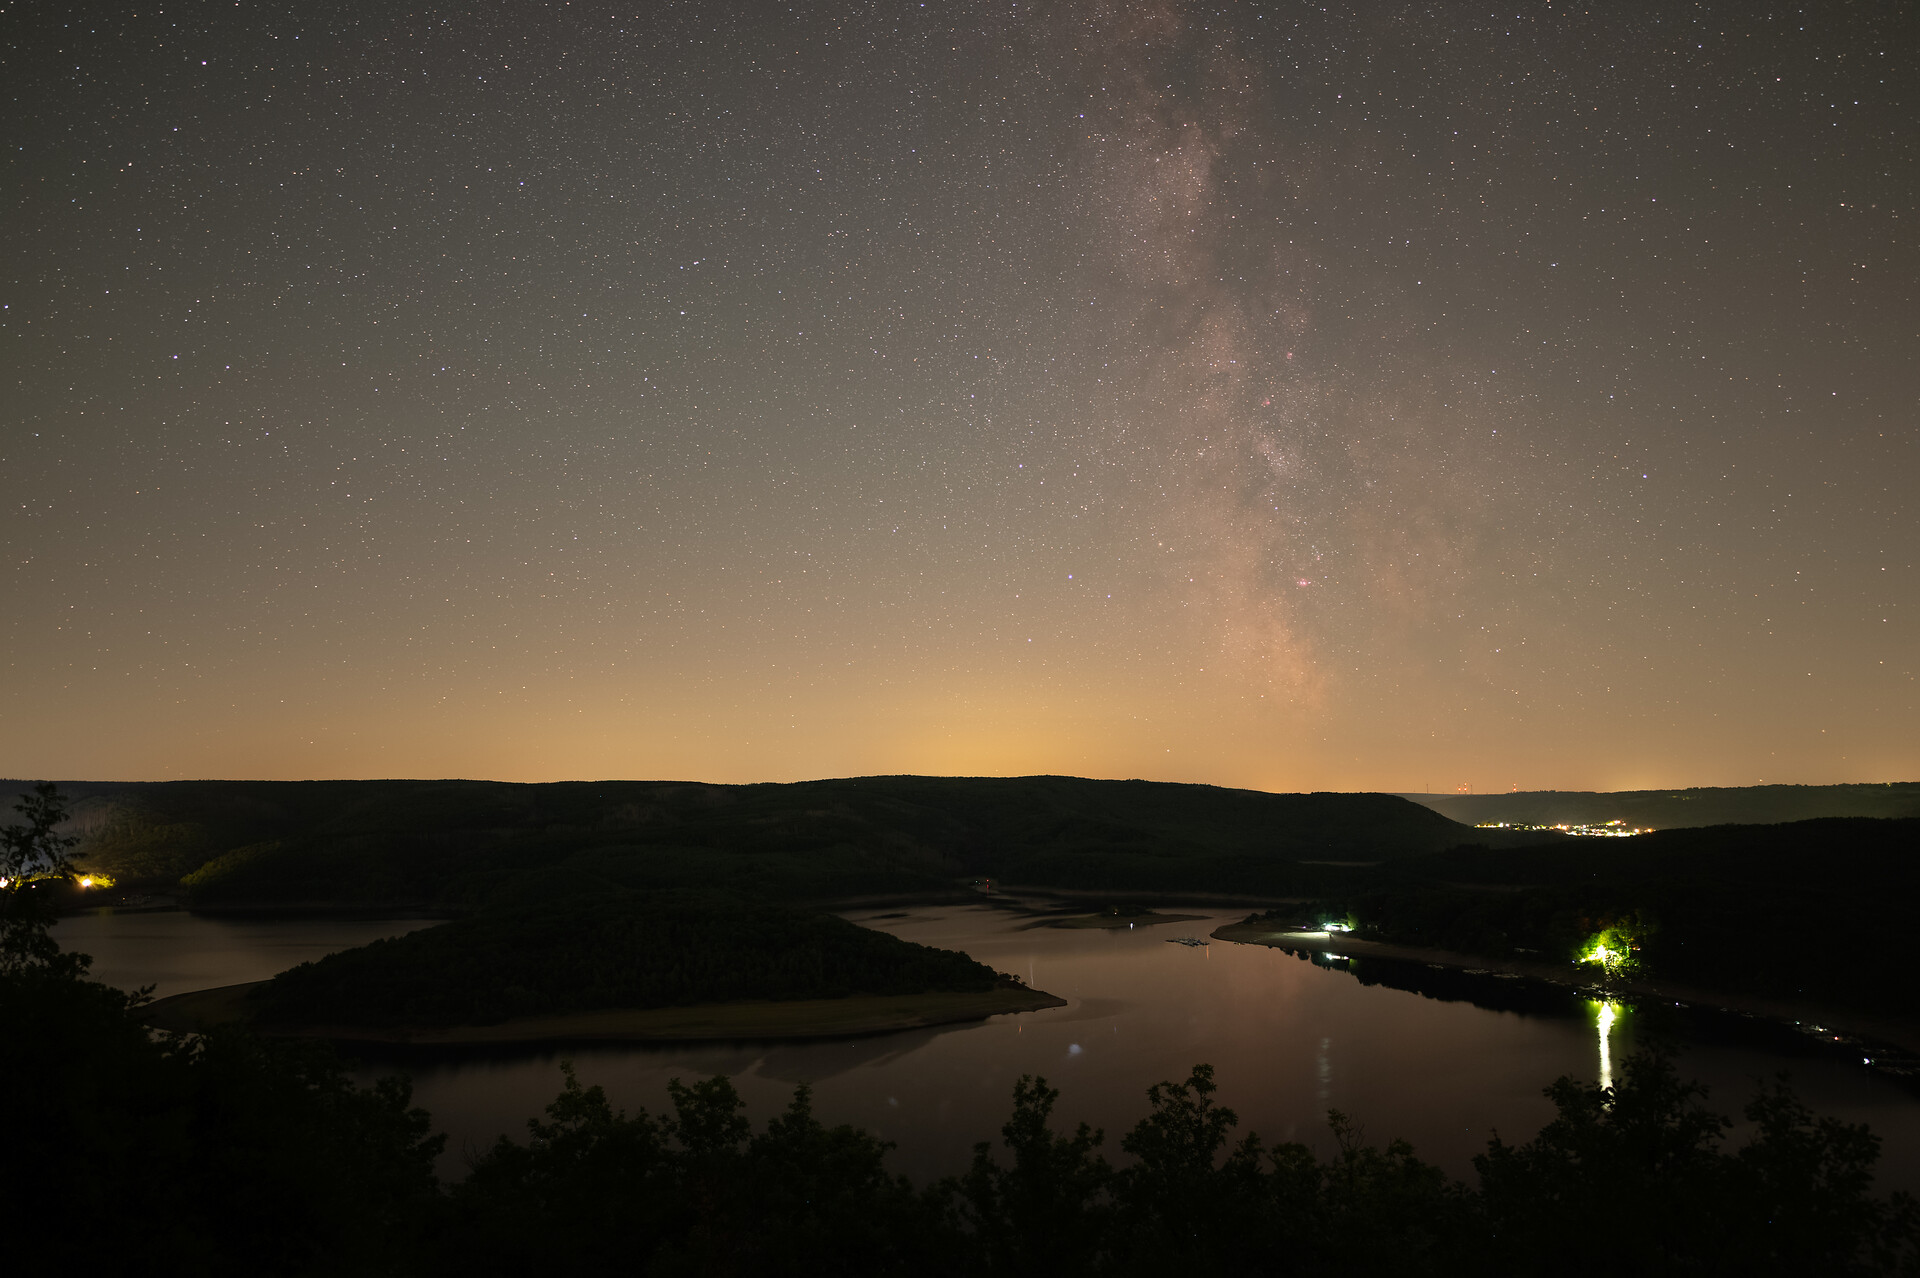
A week later I was drawn to the Eifel again, this time with tracking and a wide-angle lens. I chose the area near Zülpich as the location. There I found prominent stones in the foreground, which were perfect for an exciting composition with the Milky Way.
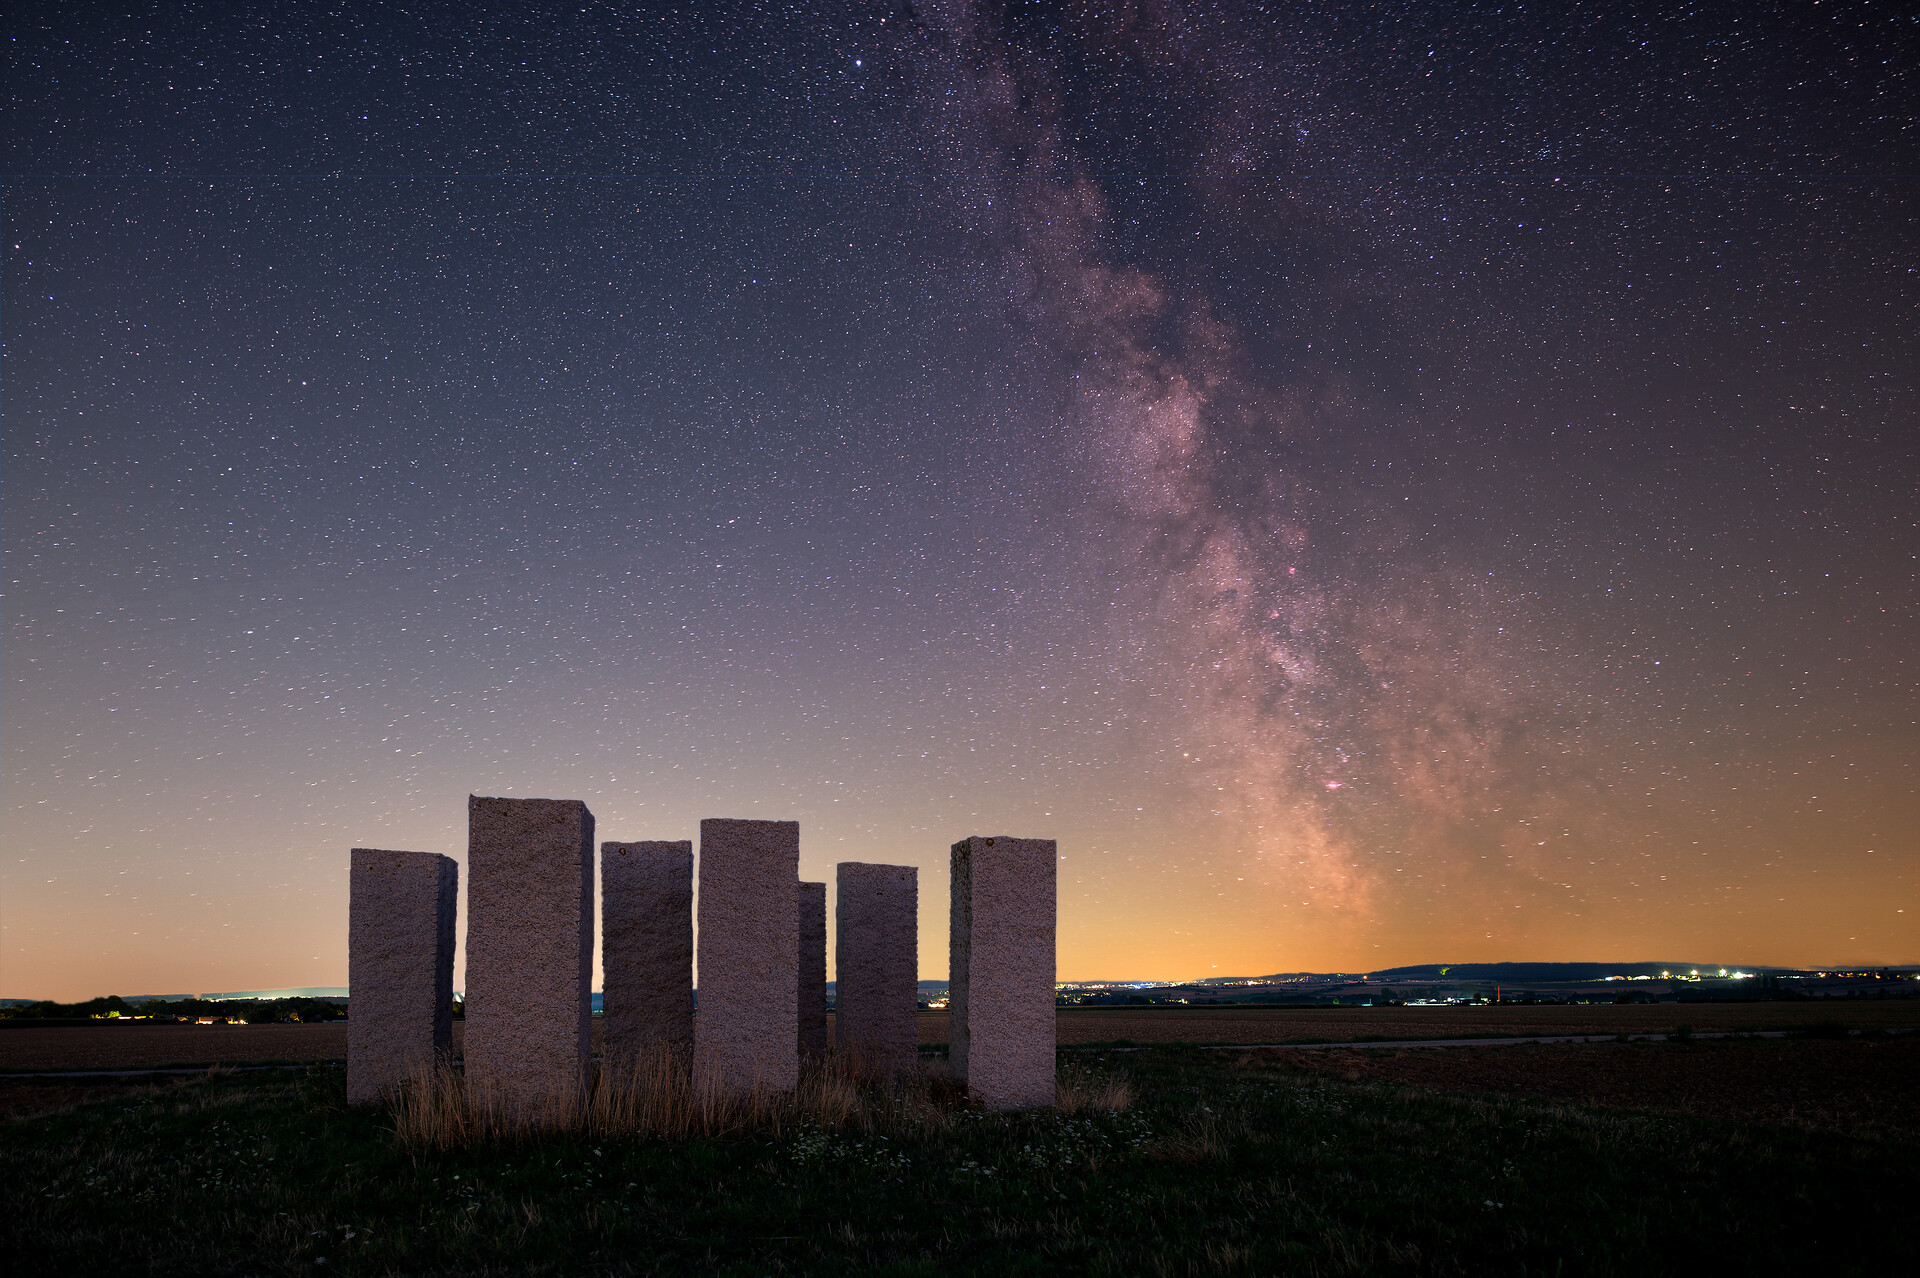
Sky: Stacking 9 x Nikon Z6 | Nikon Z 20mm | 90s | F/3.2 | ISO 800 | tracked
A third time I was finally drawn to the High Fens, which offers its own unique photographic opportunities with its special landscape and characteristic wooden footbridges. The biggest challenge here was to capture the structure of the footbridges in the foreground together with the clear starry sky in one shot. As the enormous depth of field could not be achieved with a single exposure, I opted for a two-layer focus stacking. One layer for the bridge and one for the sky.
This allowed me to keep the details of the footbridges in the foreground razor-sharp with just two layers, while at the same time cleanly depicting the starry sky in the background. The result shows impressively how the foreground and sky combine to form a harmonious composition. This is a technique that I will certainly use more often in future with similar subjects. The layers are simply put together using a manually created mask in post processing.
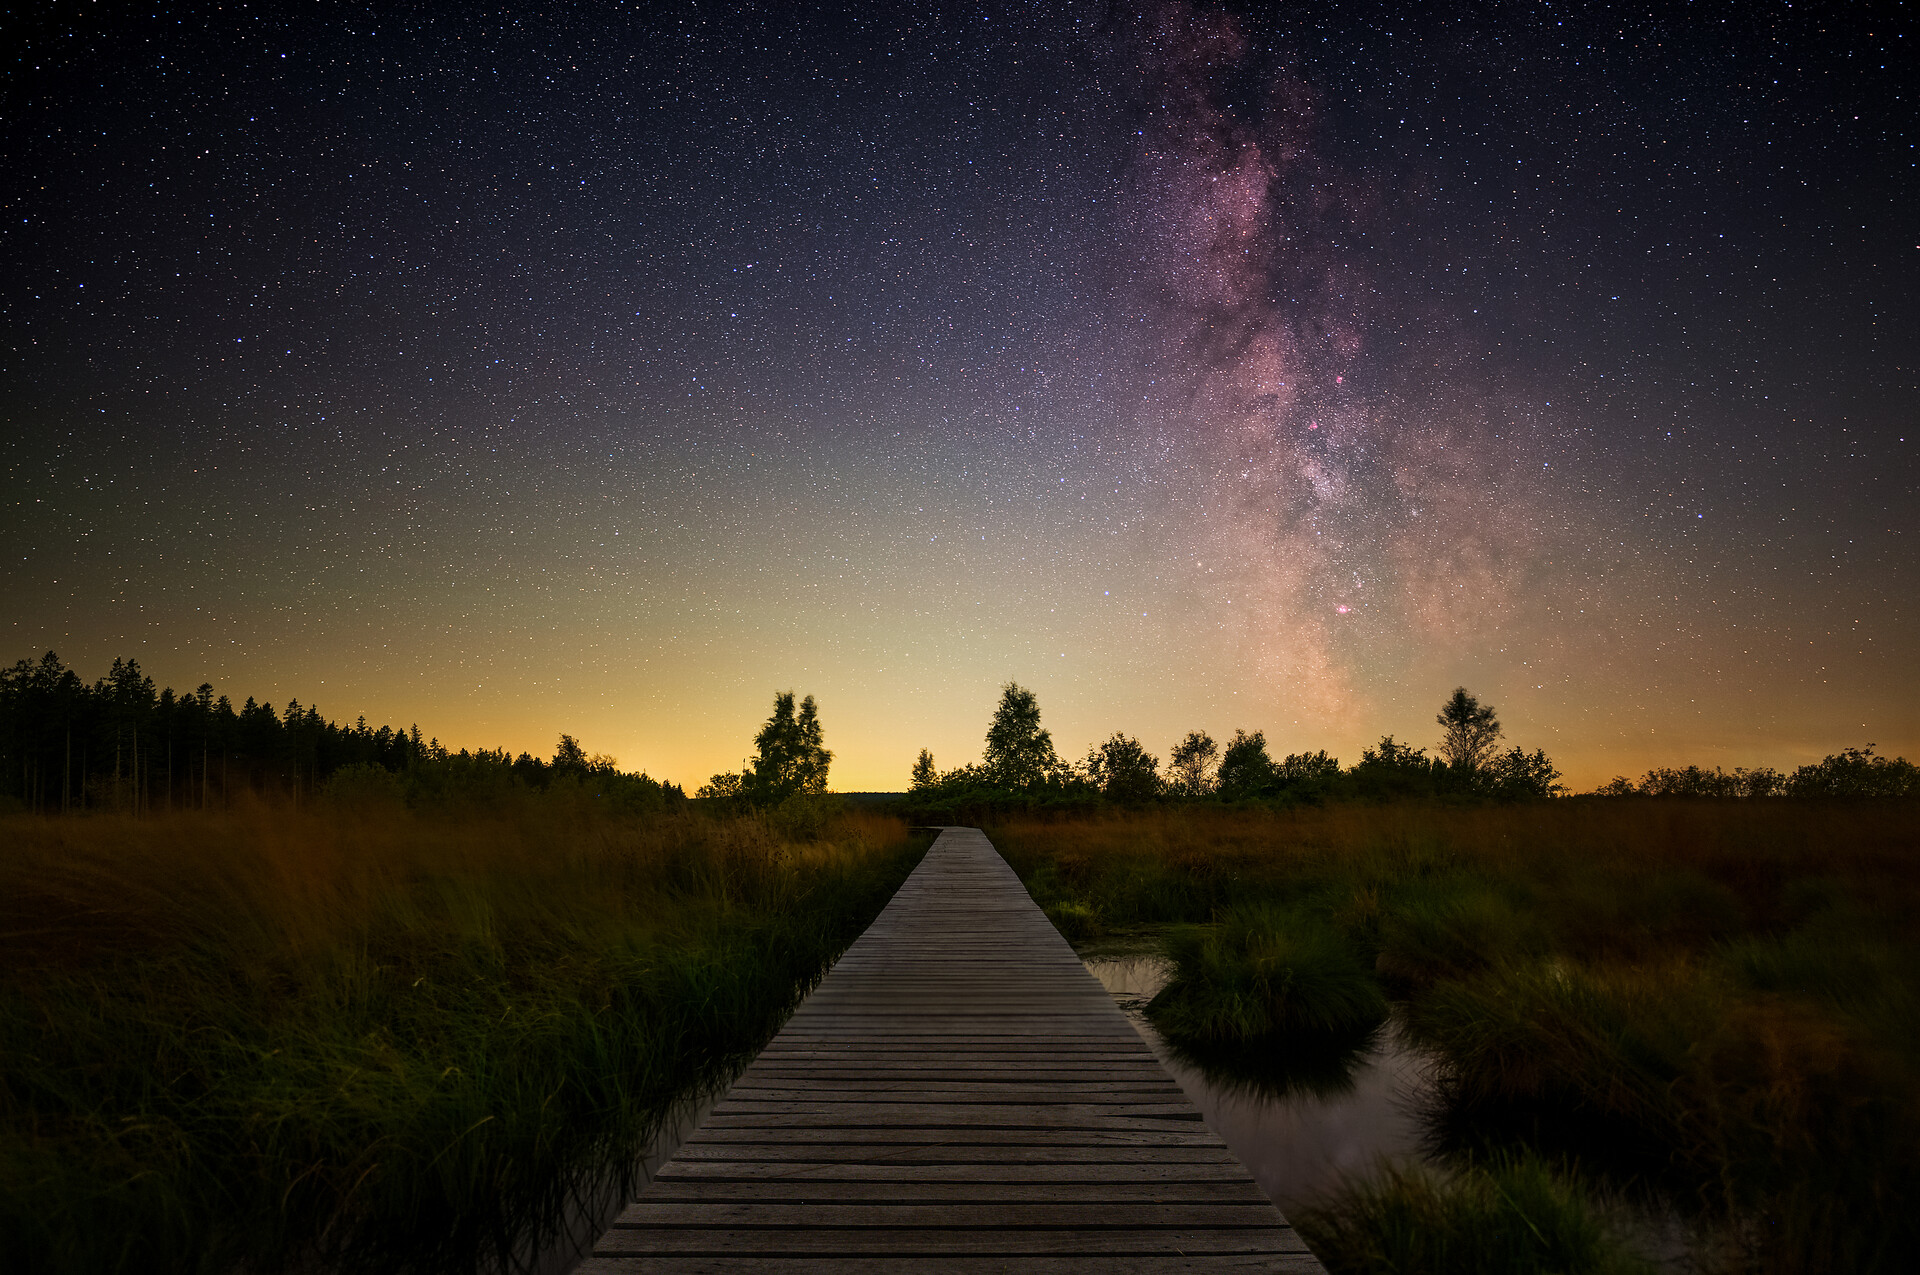
Foreground bridge: Noise stacking 4 x Nikon Z6 | Nikon Z 20mm | 13s | F/1.8 | ISO 3200
What changes during recording?
The modification initially makes the camera image appear more reddish. That's why I always work with manual white balance, usually in the range of 3500 to 4000 K, in order to have a natural camera display. I can flexibly adjust the white balance later in the RAW file. So it's not a problem for astrophotography, it's just important not to leave it to the automatic system.
The tests in the Eifel gave me a good first impression of the potential of the modified camera. With clearer starry skies, more visible colors and more depth in the images, I am now looking forward to using the equipment on future tours.
Processing steps
Post-processing is necessary for the images to develop their full effect. This includes:
- Stacking multiple shots to reduce noise
- Adjusting the white balance in the RAW converter
- Fine-tuning of contrast and colors to highlight the structures
- Often also selective adjustments, for example highlighting the reddish fog regions
Especially in direct comparison to an unmodified camera, it is noticeable that less needs to be teased out. The data is already clearer thanks to the modification. For this article, I have also prepared unprocessed raw versions of some images so that the differences to the final processing stage are clearly recognizable.
More information and pictures of Lars Wilhelm can also be found on his website and social media:
Website: https://lars-wilhelm.com/
Instagram: _lars_w_